Migrate Eggplant DAI to Another Server
You can migrate a working version of Eggplant DAI server from one machine to another.
On your existing DAI server, take a copy of the folders and configuration file that you'll need to set up your new server.
- Stop the Digital Automation Intelligence service.
- Go to
C:\ProgramData\Eggplant\Digital Automation Intelligence. - Take a copy of the following:
dataandminiofolders,config.ymlfile.
On your new server:
- Install the same version of Eggplant DAI.
- Stop the Digital Automation Intelligence service.
- Go to
C:\ProgramData\Eggplant\Digital Automation Intelligence. - Replace the
dataandminiofolders, and theconfig.ymlfile, with the copies that you made earlier. - Delete the
rabbitmqfolder. - Start the Digital Automation Intelligence service.
Update the hostname on your new server:
-
Navigate to the Admin Console. For example:
http://localhost:4652/auth. -
Log in using the System Administrator credentials from the original server.
-
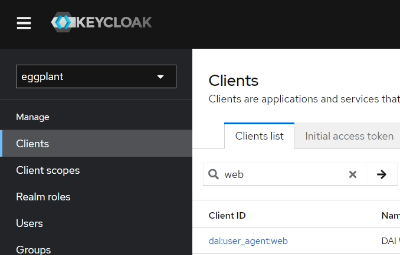
Go to Configure > Clients and search for web.

-
Select dai:user_agent:web.
-
Find the Valid Redirect URIs setting and update it to match the details (scheme, hostname, and port) that you entered for your new server during installation.
-
Click Save.
If required, enter details for your SMTP mail server.
-
In the Admin Console, go to Configure > Realm Settings.
-
Select the Email tab.
-
Enter the following details for your SMTP server:
- Host: Hostname of the SMTP server that sends emails in Eggplant DAI. For example:
smtp.yourserver.com. - Port: Port number that Eggplant DAI can connect to on the SMTP server.
- From: Email address that appears in the SMTP-header for emails sent within Eggplant DAI.
- Enable SSL, Enable StartTLS, Enable Authentication: Select the methods by which you would like to secure the connection to your SMTP server.
If you switch Enable Authentication to ON, you must also supply the Username and Password for your mail server.
- Host: Hostname of the SMTP server that sends emails in Eggplant DAI. For example:
-
Click Save.