Environments
DAI provides two types of Execution Environments: Design Environments and Run Environments. For more information about how execution environments work in DAI, please read About Execution Environments and Agents, and see DAI Components for how environments fit into DAI. To summarize, the two types of environments are as follows:
-
Design Environments are a combination of a DAI Design Agent and Eggplant Functional (EPF) running with its Graphical User Interface (GUI). The Design Agent facilitates the connection between DAI and EPF, which actually runs the test scripts. When you launch a Design Environment, EPF runs in GUI mode enabling you to manage your test assets and write scripts in its Suite window and script editor. EPF remains running as long as the Design Agent is running, or until you close it. Design environments require that you run EPF with a Developer license to enable its GUI.
-
Run Environments are a combination of the DAI Run Agent and Eggplant Fusion Engine, which is EPF running without its GUI (also known as headless) mode. Like the Design Agent, the Run Agent also facilitates the connection between DAI and Fusion Engine. You can run the Run Agent through a command-line interface (CLI) on all supported platforms, and as a service on Windows. The Run Agent remains running until you quit it or stop its service. Unlike a Design environment, however, in a Run environment, Fusion Engine only runs for the duration of a test after receiving instructions to do so from DAI through the Run Agent.
To set up an environment to be a part of your DAI implementation, you need to:
- Add the environment in DAI
- Install Eggplant Functional on the machine where you will run your agent
- Install the DAI Design or Run Agent
- Launch an Agent and Environment (Design or Run)
All environments must be associated with a space in DAI. Spaces are partitions for organizing and controlling access to test assets. DAI provides a common space, called the Shared space, and all environments are automatically available in it. Your environment may also have private spaces available. Private spaces are created by a DAI admin, who also grants permission to them for users. For a Design Agent, you have to specify one space when you log into an environment. Instructions for doing so are included below. For a Run Agent, it receives the space information from DAI at test runtime. For more information about spaces, see About DAI Spaces.
DAI introduced the Spaces feature in version 26.2.0.
Add an Execution Environment in DAI
To start the process of creating an environment in DAI, you must log into DAI with your browser and add an execution environment. When you create an environment, DAI generates a unique agent access key (.ini file) for your environment that you will need to download and then use later when you set up your agent.
You need to repeat this process for all the DAI agents you plan to install.
To set up an execution environment, follow these steps:
-
Log into Eggplant DAI with your browser. The Spaces page opens, with the Environments option available in the menu on the left. In addition to the Shared space (shown below), you may see other private spaces on this page if they exist in your DAI installation.
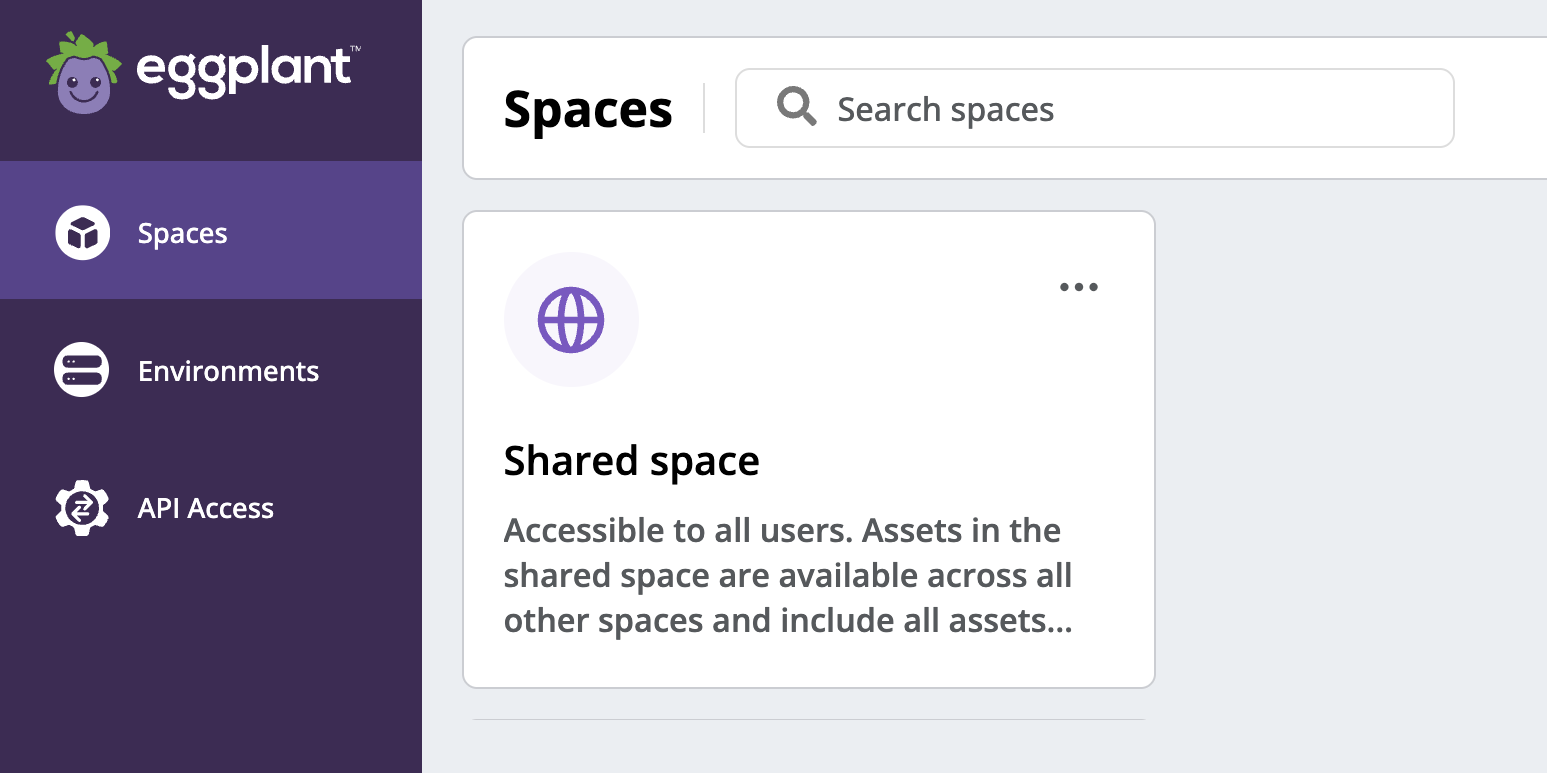
The DAI Spaces page showing the default Shared space and the Environments option in the menu on the left
-
Click Environments. The Execution environments page opens showing a list of existing execution environments. For each environment, you see its connection status, the number of spaces available to it, any tags, and whether it is locked. Note that there are also Space and Connection status filters at the top of the page.

The DAI Execution environments page with the + New environment button on the right
-
Click + New environment. The New environment General tab opens.
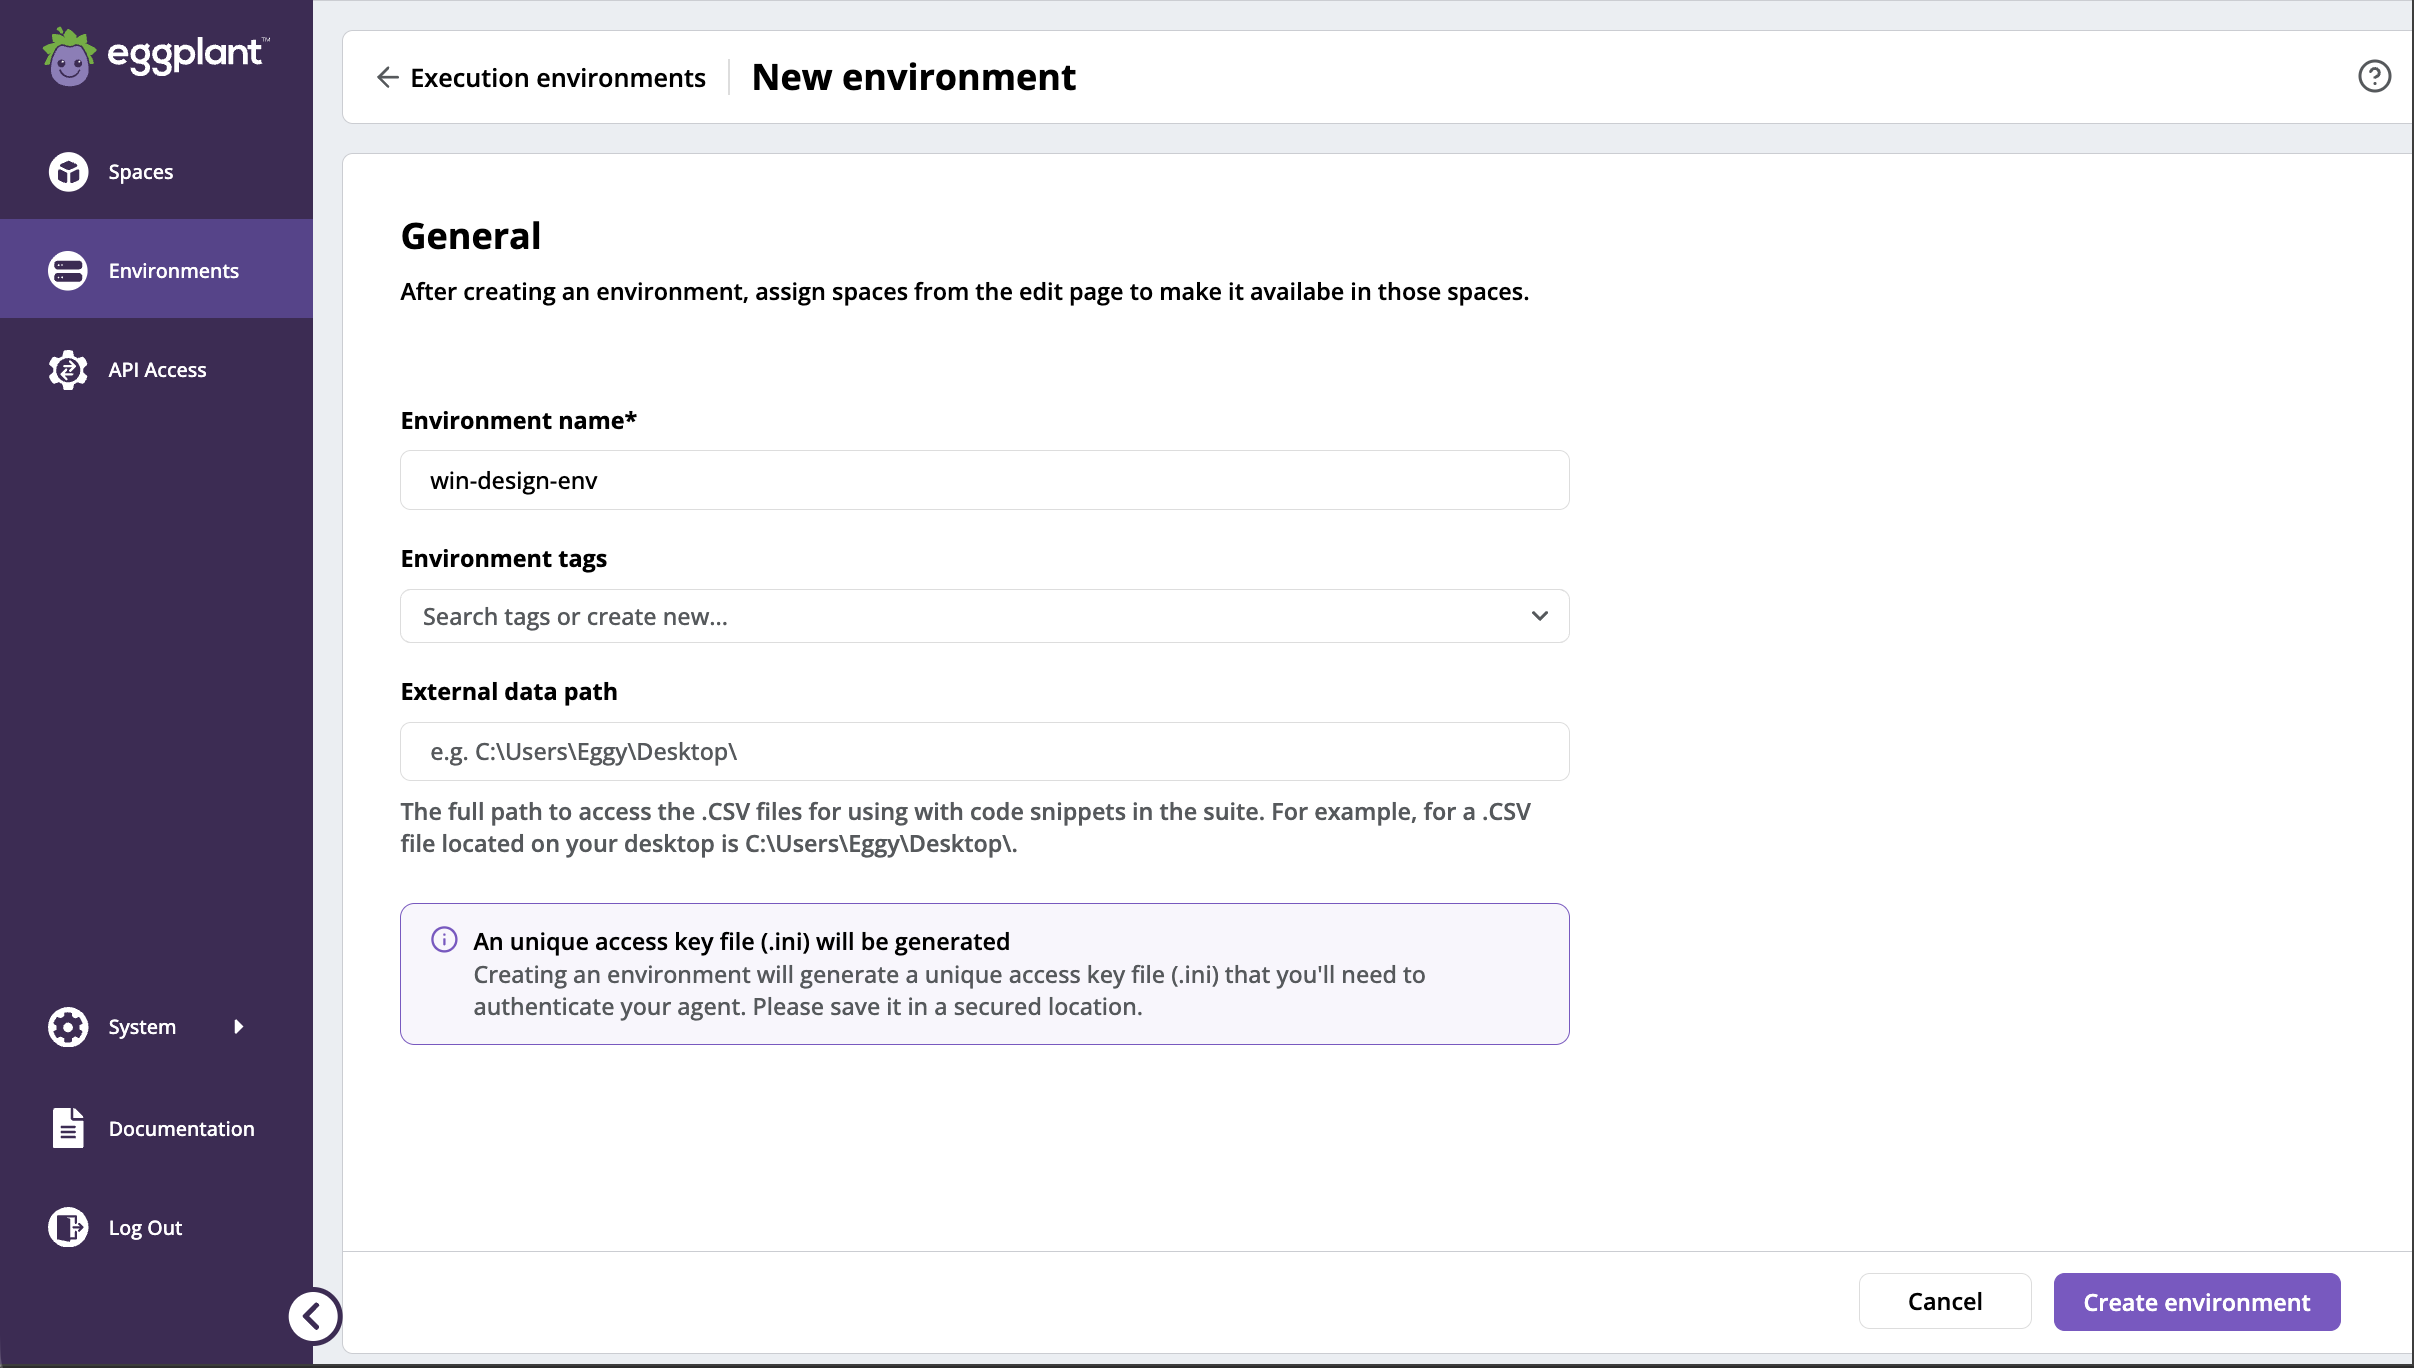
The New environment General tab where you specify information to create a new DAI execution environment
-
In the Environment name* box, enter a unique name for the execution environment with no spaces.
-
(Optional) Add Environment tags by entering a name for the tag and pressing Enter. You can add any number of tags, which can be used for selecting an environment to use in a test.
-
(Optional) Enter the full path to access a .CSV file if you use one with the code snippets in your Eggplant test suite. For example, for a .CSV file located on your desktop, enter
C:\Users\Eggy\Desktop\. -
Click Create environment. The environment access key (
.inifile) automatically downloads to your system and the Environments page displays again. Your new environment will be in the list, although you may need to scroll down to see it if there are numerous environments in your DAI instance.All environments automatically have access to the Shared space. If you want access to any private spaces in your new environment, you will need to ask a DAI Administrator (not just a Space Administrator) to grant that access.
If you are logged in with an Administrator user when you create an environment, after the
.inifile downloads, you will see the Execution environments Spaces tab for your new environment, where you can select from the list of available private spaces. -
Ask a DAI Administrator to grant access to any of the private spaces that you use and want to use with your environment. Note that this must be a DAI Admin, not just a Space Admin. See Shared Space and Private Space Roles for an explanation of the differences.
tipWe recommend saving the list of spaces your environment is granted access to because regenerating an access key (
.inifile) does not preserve access to private spaces. If you regenerate an access key, you will need to ask an Admin to grant the environment access to those private spaces again.
Install Eggplant Functional/Fusion Engine
Eggplant Functional (EPF), either in GUI mode or headless mode known as the Fusion Engine, is the component in the Execution Environment that actually runs your DAI test scripts. The DAI agent makes the connection between DAI and EPF. Therefore, you need to install EPF on the machine where you will install and run your agent. This machine must be network-accessible to the DAI Server. See Install Eggplant Functional for more information.
The type of license your EPF needs depends on your agent:
-
If you are installing a DAI Design Agent, you need to run EPF with its GUI, which requires a Developer license. EPF in GUI mode provides a Suite window where you can manage your test assets and a script editor where you can edit your Eggplant test scripts.
-
If you are installing a DAI Run Agent, you do not need the EPF GUI, and you can run EPF in headless mode (Fusion Engine), which requires an Execution license.
For more information about licensing, see Eggplant DAI Licensing Overview.
Download an Agent
The agents can run on any local or hosted machine that can connect to the Eggplant DAI server over the network. Agents are available as a Windows .exe files, Mac apps, and Linux binaries for Red Hat and Ubuntu. See the Prerequisites page for specific information about supported operating system versions.
For security reasons, we do not recommend installing agents on the machine that is running the DAI Server. See Install the DAI Server on a Separate System on the Securing Your Installation page for more information.
You can download the DAI agents from either of two places:
- The DAI Environments page
- The Eggplant Software Downloads page
The following instructions describe how to download from the Environments page.
- On the Environments page, click Agent Tools in the upper-right corner of the page.
Separate installers are available for the DAI Design Agent and Run Agent. For each installer that you require carry out the following steps 2 to 4: - From the Design/Run Agent Installer list, select the operating system for the system where you want to install your agent.
- Select Download to save the installation file to your Downloads folder.
Install an Agent
Click the appropriate tab below for instructions to install the Design Agent on a specific operating system.
- Install an Agent on Windows
- On Mac
- On Linux
- Open the Downloads folder.
- Double-click
eggplantDAIDesignAgent.exeoreggplantDAIRunAgent.exean installer panel opens where you can follow the prompts to complete the installation. - Click Close to dismiss it when the installation is complete.
- Open the Downloads folder.
- Double-click
eggplantDAIDesignAgent.dmgoreggplantDAIRunAgent.dmg. - Drag
eggplantDAIDesignAgent.apporeggplantDAIRunAgent.appinto your Applications folder.
The steps for extracting and running the agent are the same across different Linux platforms. See the Prerequisites page for specific information about supported operating system versions.
-
Open the folder to which you downloaded the agent.
-
Manually extract
eggplantDAIDesignAgent-Linux.tar.gzoreggplantDAIRunAgent-Linux.tar.gzto your preferred directory, or use the following script:cd $HOMEmkdir eggplanttar -xzf eggplantDAIDesignAgent-Linux-26.2.1-0.tar.gz -C "$HOME/eggplant" -
(Optional) To run
eggplantDAIDesignAgentoreggplantDAIRunAgentdirectly from the command line, addexport PATH="$PATH:$HOME/eggplant"to your.bashrcor.zshrcfile, or use the following commands:cd $HOME/eggplant./eggplantDAIDesignAgent
Launch an Agent and Environment
After you install an agent, you can launch it. Launching an agent is a step in the process of making your environment operational in DAI.
How you launch an agent depends on the type of agent. See the appropriate section for the type of agent you are using:
Launching a Design Agent
Launching the Design Agent involves multiple steps:
1. Running a Design Agent Application
You can launch the DAI Design Agent application from the Start menu on Windows, the Applications folder on a Mac, or from within the directory you extracted the downloaded installer through the command line on Linux.
Click the appropriate tab below for instructions to launch the Design Agent on a specific operating system
- Run a Design Agent on Windows
- On macOS
- On Linux
Open eggplantDAIDesignAgent from the Start menu.
Launch the eggplantDAIDesignAgent from the Applications folder.
Launch your DAI Design Agent from the terminal.
- Open a command prompt.
- Find the directory where you extracted the
.tar.gzfile, e.g.:
cd $HOME/eggplant
- Enter the following command to run the DAI Design Agent:
./eggplantDAIDesignAgent
The DAI Design Agent panel opens.
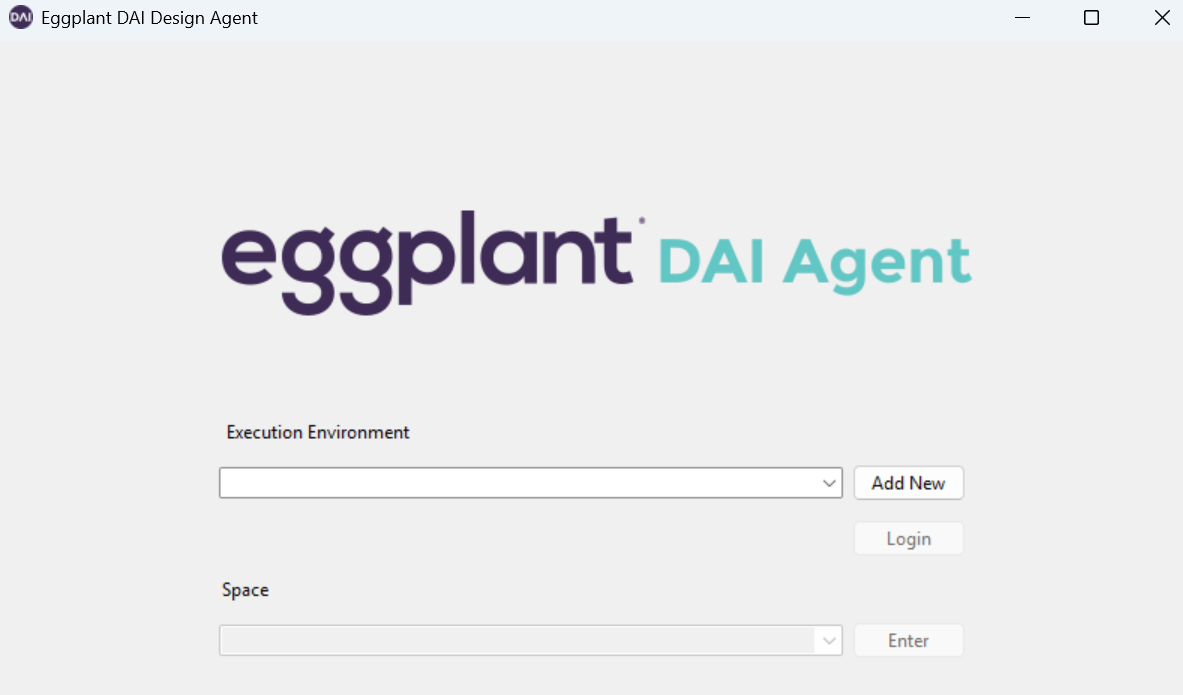
DAI Design Agent panel where you can add or select an environment, login, and select from the list of available spaces
2. Selecting an Environment and Logging into DAI
The DAI Design Agent panel (shown above) is where you add or select an execution environment, log into DAI with it, and then select the space you want to use from the list of spaces available in the selected environment. Note that the Shared space is available in all environments.
On the DAI Design Agent panel:
-
Add a new environment, for example, if this is your first time logging into your agent, by clicking Add New. A file browser opens for you to navigate to and select the environment
.inifile (also called the access key) that you downloaded from DAI when you added the environment. Click Open on the file browser. Your should see your newly added environment selected in the Execution Environment field or available in the selector list.noteIf you regenerate your environment
.inifile (access key), you will need to add it to your Design Agent again, like it is a new environment. See Regenerate Access Key and Add an Execution Environment for more information about the.inifile and these tasks. -
Select an environment from the Execution Environment selector list. The selected environment name shows in the Execution Environment field with its DAI Server URL. The details are automatically added to an environment settings file on your computer.
-
Click Login to authenticate with your Eggplant DAI environment. This may take a few seconds, and you will see status message while the agent logs in and loads the list of spaces available in the selected environment. The Shared space will always be available, and you will also see any private spaces that the environment can access.
-
Select the space you want from the Space selector and click Enter. The second DAI Design Agent panel opens for you to configure your Design Agent and start your Design Environment.
-
For security reasons, delete the environment
.inifile (access key) from your computer now that you've added it to your agent.
3. Configuring a DAI Design Agent
When you see the second Eggplant DAI Design Agent panel (shown below) with information from the environment you selected on the previous panel, you can configure your Design Agent. This information is saved, so you don't need to re-enter it every time you launch the agent. However, you have the option to change it any time you launch the agent.
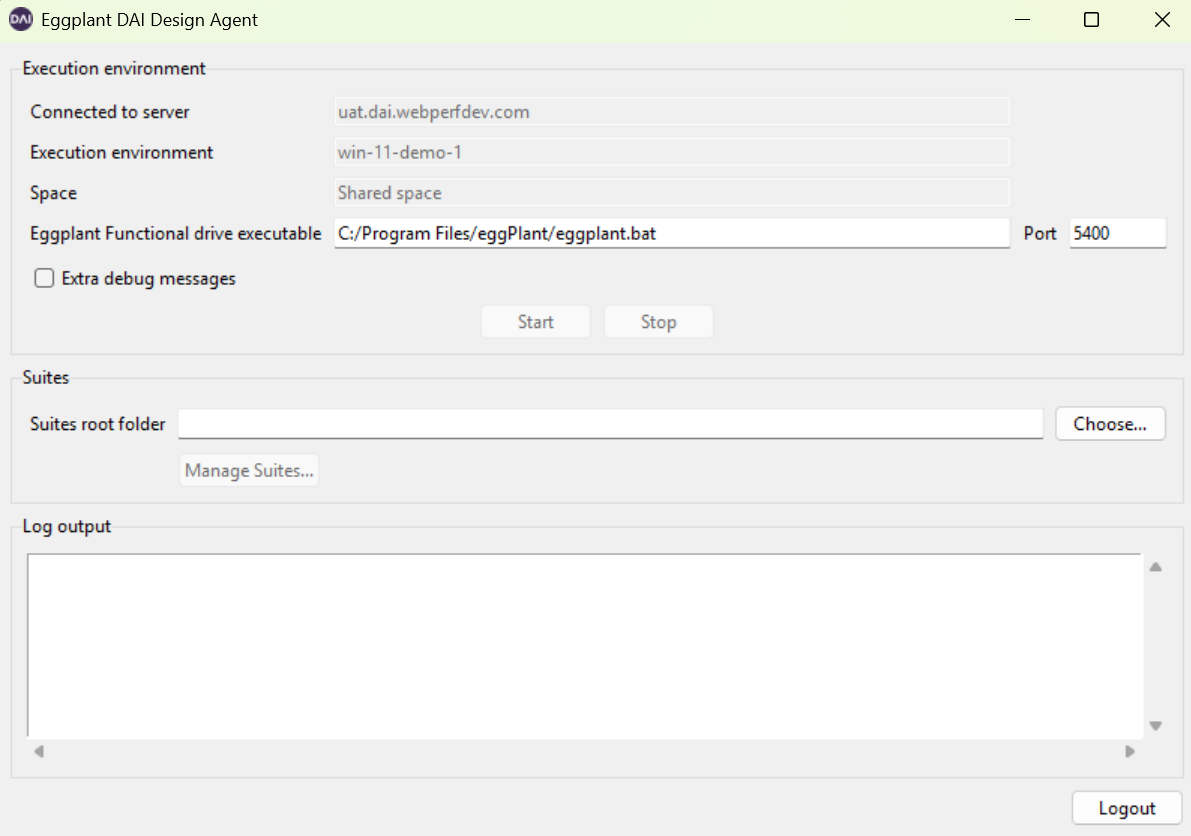
The DAI Design Agent configuration panel where you configure the associated EPF instance and the location of your tests
Configure the DAI Design Agent as follows:
- Review the information about the environment you are logged into at the top of the screen. If it is not the environment you wanted, click Logout at the bottom of the panel to return to the previous panel and select a different execution environment.
- If your EPF application is not installed in the location you see in the Eggplant Functional drive executable box, change the location.
- Similarly, change the port if you want EPF to use a different port in the Port box.
- Select the Extra debug messages checkbox if you want to display more detailed messages in the Log output pane.
- To the right of the Suites root folder field, click Choose to browse to and select the folder on your system that contains your Eggplant Functional suites (and SenseTalk code snippets).
- Click Manage Suites... and see Manage Suites to learn how to upload and download subfolders in this directory.
- When you finish providing all the configuration information the Design Agent needs, the Start button is enabled on the panel.
Launching a DAI Design Environment
The DAI Design Agent and Eggplant Functional (EPF) in GUI mode running together comprise a Design Environment as described in the DAI Component Overview.
To complete the process of launching the DAI Design Agent and launching the Design Environment:
- Complete the steps in Launching a Design Agent above.
- Click Start on the second DAI Design Agent panel (shown above). This starts EPF and makes the Design Environment operational for DAI. You will see output from the launch and subsequent operations in the Log output window on the panel. This DAI Design Agent panel and the EPF GUI remain open until you explicitly stop the agent (and environment) and close them.
- Display the Environments page in DAI and locate your new environment. Note that you may have to scroll to see it or search for it by name.
- Verify that the environment's status is Connected, which case it is ready to use with your DAI instance. If the status is not Connected, it may need a little more time to connect. Or, check the Log output window on the Design Agent panel that is open for any error messages and troubleshoot accordingly.
Stopping a DAI Design Agent and Environment
On the open DAI Design Agent panel (shown in 2. Configuring a DAI Design Agent above), click Stop to close the DAI Design Agent or Logout to go back to the DAI Design Agent Login screen to connect to a different environment. These actions also stop the EPF instance, effectively stopping your DAI design environment.
Launch a DAI Run Agent and Environment
The DAI Run Agent and Eggplant Functional running without its GUI (known as Fusion Engine) together comprise a Run Environment as described in the DAI Component Overview.
The DAI Run Agent is a lightweight command-line application (no user interface) used solely to run tests without needing the other features that the DAI Design Agent offers such as managing suites.
The DAI Run Agent does not provide any configuration panels. Its configuration is set via its command-line arguments.
- Launch the Run Agent either from a command-line interface on all supported platforms, or run it as a service on Windows as described on the DAI Run Agent page.
- Display the Environments page in DAI and locate your new environment. Note that you may have to scroll to see it or search for it by name.
- Verify that the environment's status is Connected, which case it is ready to use with your DAI instance. If the status is not Connected, it may need a little more time to connect. Or, check the agent's log for any error messages and troubleshoot accordingly.
Regenerate an Access Key
If you need to regenerate your DAI environment's access key (.ini file) for security reasons, for example, follow the steps below:
If you upgraded to DAI 26.2.1, you need to regenerate your environment's access key so the URLs it contains are updated with HTTPS. This also requires adding it as a new environment for your agent.
Note that regenerating your access key removes any private spaces previously associated with the environment. Therefore, you will need to ask your DAI Admin grant your environment access to any private spaces that you used with it before. Note that this must be a DAI Admin, not just a Space Admin. See Shared Space and Private Space Roles for an explanation of the differences.
-
Log in to Eggplant DAI.
-
Go to Spaces > View all spaces > Environments. The Environments page shows a list of the existing execution environments and their status.
-
Click the actions menu of the execution environment that you're interested in and select Regenerate access key:
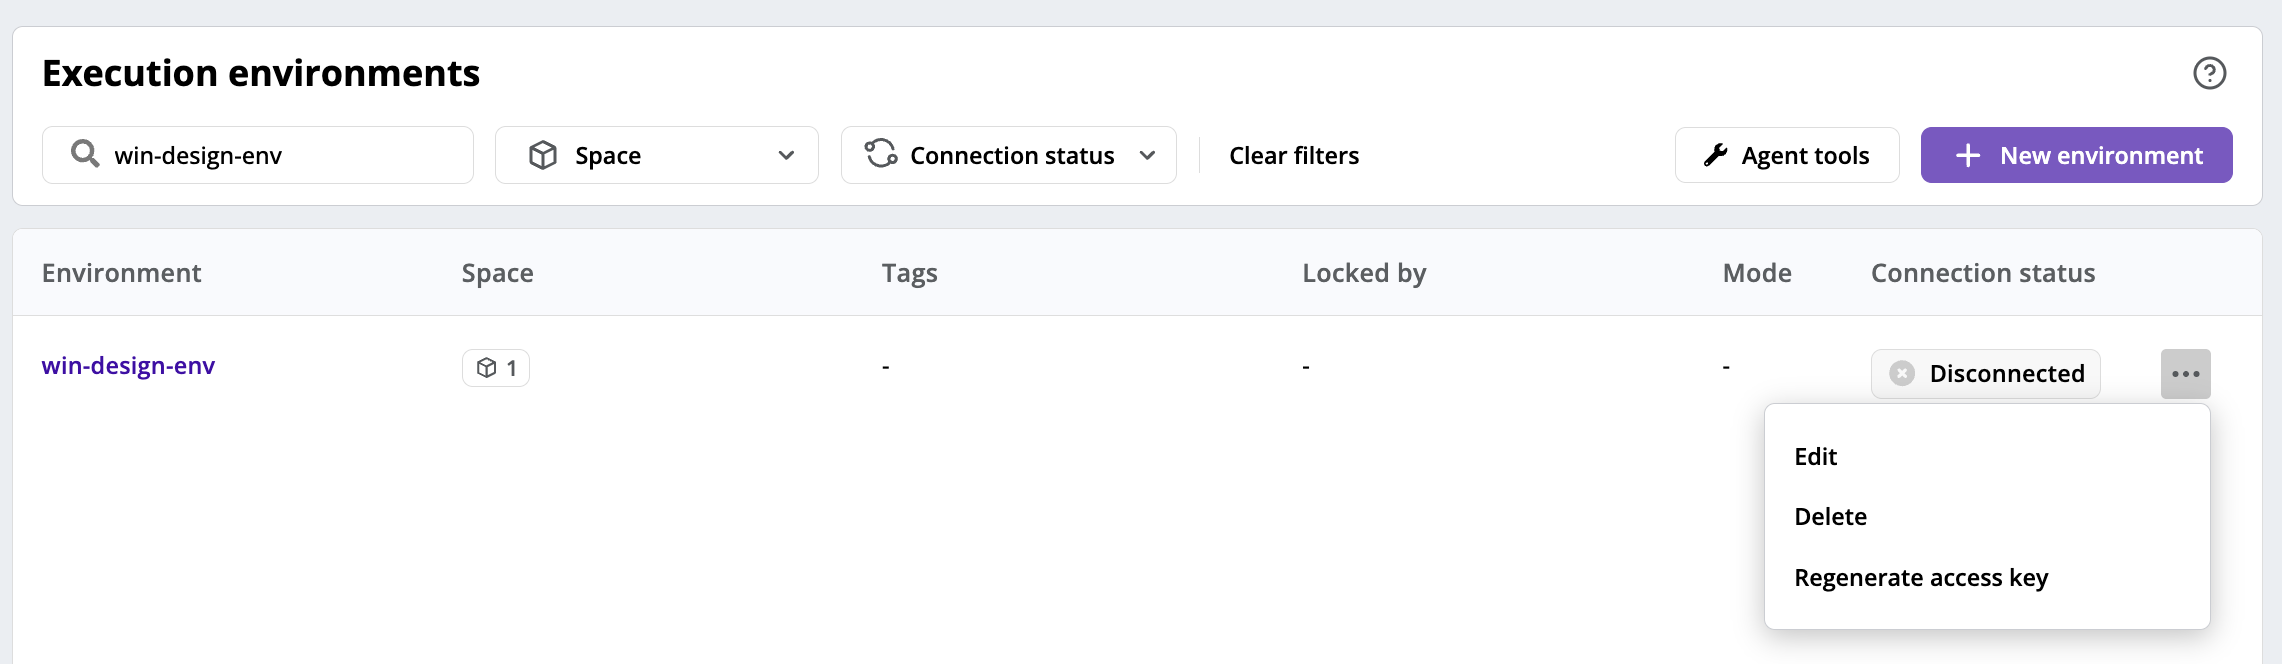
Regenerate access key option on an Environment Action Menu
-
When the dialog box appears, click Regenerate and then Download. Store the
.inifile in a secure location. -
Ask a DAI Administrator to grant access to any of the private spaces that you previously used with your environment. Note that this must be a DAI Admin, not just a Space Admin. See Shared Space and Private Space Roles for an explanation of the differences.
tipWe recommend saving the list of spaces your environment is granted access to because regenerating an access key (.ini file) does not preserve access to private spaces. If you regenerate an access key, you will need to ask an Admin to grant the environment access to those private spaces again.
-
Follow the instructions in 2. Selecting an Environment and Logging into DAI to set up your agent with the new key.