Installing and Upgrading DAI Server on Windows (Versions 26.2.1 and Higher)
This page describes how to install and upgrade DAI Server versions 26.2.1 and higher on Windows systems. These versions require that you use the secure internet connection protocol (HTTPS) to connect client applications such as your browser or the DAI agents to DAI. HTTP connections are no longer supported. If you are upgrading, and especially if your existing installation is configured for HTTP connections, the information you need is included or linked below.
For information about installing and upgrading earlier versions of the DAI Server, see Install or Upgrade DAI 26.2.0 and Older.
This page provides step-by-step instructions to install, upgrade, or license an Eggplant DAI Server as an on-premises ("on-prem") installation on Microsoft Windows systems.
Before you start your install process, please be sure to read Prerequisites for information about supported operating systems and recommended installation configurations, as well as DAI Secure (HTTPS) Connections and Certificates for information about TLS certificate requirements. Additional requirements for these versions are included in Special Requirements below.
Supported Installation Types
You can perform the following types of installations for on-premises Eggplant DAI Servers on Windows:
- Fresh installations: Proceed to Install an Eggplant DAI Server
- Incremental upgrades from the previous supported version. (See Upgrade an Eggplant DAI Server below, the Upgrade Notes page, and Release Notes for more information about upgrading.)
Downgrades are not supported
DAI also supports the following options related to installation:
- Silent Installations: If you want to automate the install, upgrade, or uninstall of your DAI Server on Windows, or you only have command-line access to a machine, you can do so "silently." See Silent Install, Upgrade, or Uninstall for more information.
- Container Deployments: You can also deploy the DAI Server in a container (not a Windows system). See Deploying DAI in Containers for more information.
- Installation of Other DAI Components: For information about installing other DAI components, see Environments, which includes information about installing the DAI agents and Eggplant Functional. See DAI Components for information about the different DAI components and product architecture.
Upgrade an Eggplant DAI Server
If you are upgrading an existing DAI Server, be sure to back up your files and data, and check for important, version specific information, as described on Upgrade Notes before you start your installation. For your convenience, the back up instructions are also provided here. If you have any questions or would like help testing your database before you upgrade, please contact your Technical Success Manager or our Customer Support.
Downgrades are not supported.
If you are upgrading to DAI Server version 26.2.1 or higher, and your existing installation is configured for HTTP connections, the installer will detect your existing configuration. DAI Server 26.2.1 and higher only support secure HTTPS connections. See Upgrade Notes for important information about upgrading to 26.2.1.
Back Up Your Existing DAI Server Data
- Stop the Digital Automation Intelligence Service through the Windows Services manager.
- Open
C:\ProgramData\Eggplant\Digital Automation Intelligenceand copy thedataandminiofolders, and theconfig.ymlandsettings.inifiles outside theProgramDatadirectory to another machine or backup device. - Start the Digital Automation Intelligence Service.
If you experience a problem with an upgrade, and you need to restore the previously working DAI version, see Backing Up or Restoring the DAI Server in the Upgrade Notes for instructions.
Install an Eggplant DAI Server
Below are instructions for an on-premises installation of an Eggplant DAI Server on a Windows system. Special requirements are listed first, followed by a summary of the options you will have during installation, and then step-by-step instructions to walk you through installation.
Special Requirements
The following requirements are specific to installing and upgrading DAI Server versions 26.2.1 and higher on Windows. For additional installation requirements and recommendations, see the Prerequisites. For information about installing DAI versions 26.2.0 and earlier, see Installing or Upgrading DAI (26.2.0 and older).
Install the DAI Server as an Administrator
We recommend running the DAI Setup program with Run as Administrator to ensure you have adequate permissions to install. Additionally, DAI runs under the local system account on Windows. You must make sure this account has permission to write to any directory you select during installation. Otherwise the installation will fail. For any non-default folders you select during installation, you can ensure you have adequate permissions for them by creating the folder during installation. You can do this by clicking Browse on the panel next to the default folder you want to change, and then choosing the option Make New Folder on the Browse to Folder panel.
DAI Server 26.2.1 and Higher Requires HTTPS Connections
Starting with DAI 26.2.1, accessing the DAI Server on Windows requires a secure (HTTPS) connection. While previous versions of the DAI Server on Windows allowed HTTP connections, now all users must use https in the URL they use to access DAI.
For important details about certificate requirements, see DAI Secure (HTTPS) Connections and Certificates.
While it is important to read the detailed certificate requirements referenced in the section above, a high-level summary of the HTTPS requirements is provided below:
-
Configuring DAI to use HTTPS requires a trusted TLS (Transport Layer Security) certificate issued from a certificate authority (CA) for the system where the DAI Server will be installed. You must then make this certificate accessible to the Windows system where you are installing DAI, and then specify the location of the certificate when prompted on the Server Configuration panel during DAI Server installation.
-
As an alternative to providing a trusted CA certificate, the DAI Server installation for versions 26.2.1 and higher also provides the option for you to generate an Eggplant self-signed certificate during installation. While this self-signed certificate will allow you to install the DAI Server, and be automatically trusted by the DAI agents, browsers will not automatically trust it. Therefore, we don't recommend it for production deployments because each user will have to download the certificate when they navigate to DAI from their browser.
-
DAI 26.2.1 requires Eggplant Functional (EPF) version 26.2.1.1 or 26.2.101.1 because of the change to require HTTPS connections. Higher versions of DAI may require higher versions of EPF as well. See the Upgrade Notes, Release Notes, and Prerequisites for important information about upgrading and products that are compatible with the version you want to install.
-
If you are upgrading DAI and your server was previously configured to use HTTP, the 26.2.1 or higher setup program will detect this and prompt you to configure HTTPS. After upgrading to 26.2.1, you will need to download new
.inifiles for your Environments because the DAI URL in the file will have changed to HTTPS. See Upgrade Notes for the 26.2.1 release for more information about these upgrade requirements.
Installation Options
When you run the DAI Server setup program, you have the following options:
- Accept the default installation directory (
C:\Program Files\Digital Automation Intelligence) or specify a different directory. - Accept the default DAI Server HTTPS port (
8000) or specify a different port that is available for HTTPS connections on your network. You may need to consult with your IT department about port availability. You can also change the port after installation as described in Change the Eggplant DAI Port on Windows. - Specify an existing trusted CA certificate (recommended for production use) as described in Special Requirements above, or select the option to use a self-signed certificate (not recommended for production use).
Advanced Installation Options
Additionally, you can further customize your installation on the Advanced Installer Options panel, which will take you to panels where you can specify alternate directories for the following options:
- Accept the default directory where your DAI data (which is PostgreSQL database data) is stored (
C:\Program Files\Digital Automation Intelligence\data) or specify a different directory. - Accept the default directory for where you want to store your Eggplant test suites (
C:\Program Files\Digital Automation Intelligence\minio) or specify a different directory.
Run Setup
Follow the steps below to run the DAI Windows Server Setup program. You can use these instructions for a fresh installation or to upgrade from the previous minor DAI release.
If you're upgrading, be sure you back up your DAI data and understand any version-specific instructions as described Upgrade Notes. The DAI service should be stopped before backing up your data and then re-started before commencing your upgrade installation. If you have any questions or would like help testing your database before you upgrade, please contact your Technical Success Manager or our Customer Support.
- Download the Eggplant DAI installation file to the Windows system where you want to install the DAI Server.
- Right-click the installation file to launch the Setup program using the Run as Administrator option. For a fresh install, the Select Destination Location panel opens, showing the default installation location and a message about required disk space.
If you are upgrading, you might be asked to uninstall your existing DAI Server installation if you haven't done so already.
We recommend running the DAI installer as Administrator if possible, as this ensures DAI is installed with the correct permissions.
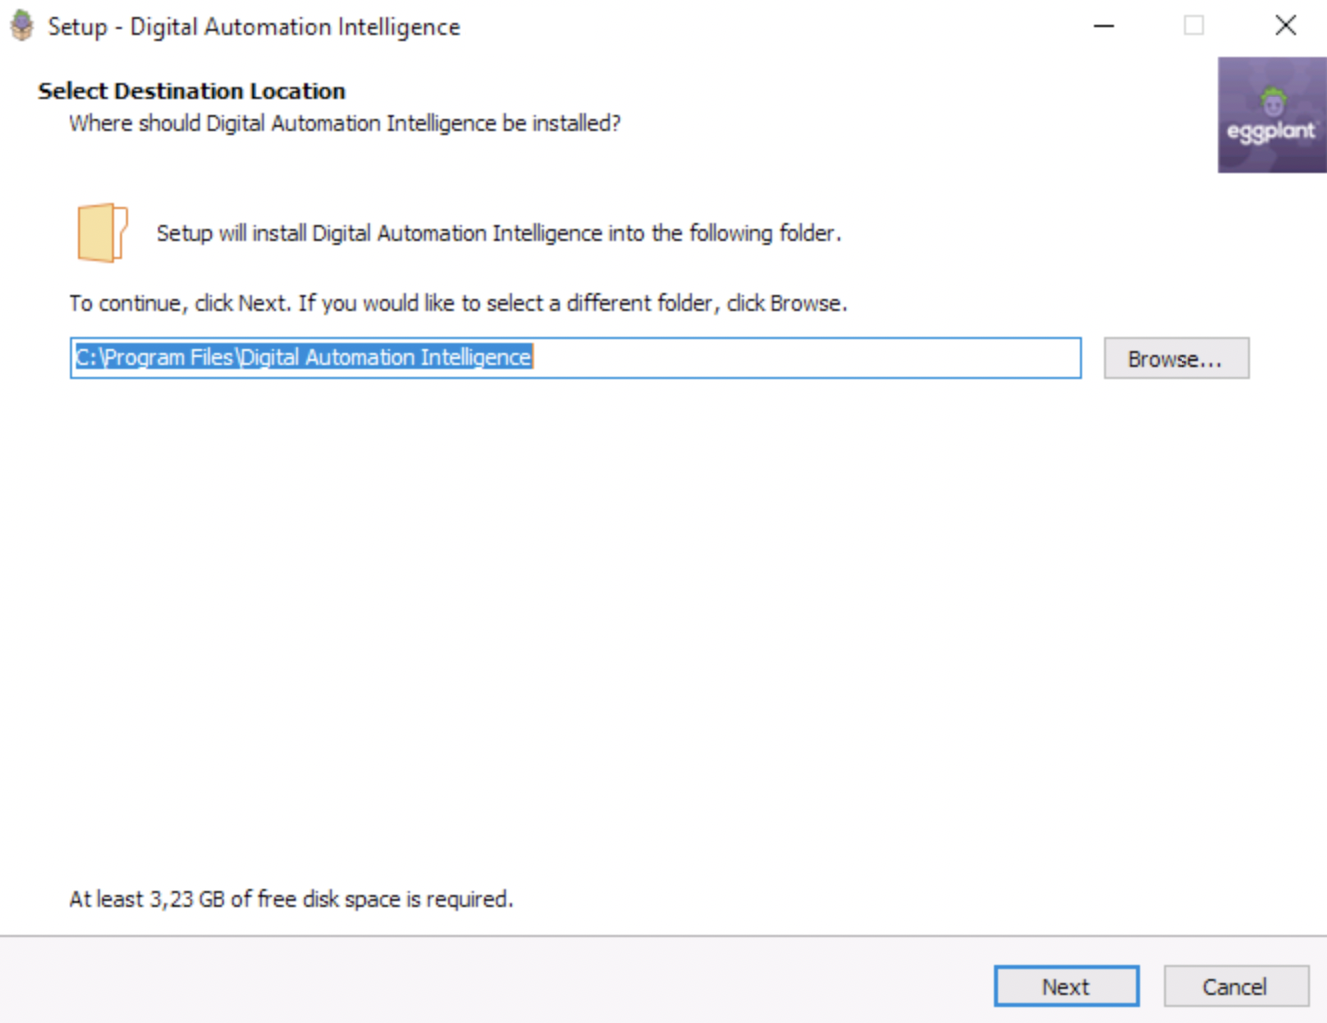
The Select Destination Location panel in DAI Setup where you specify where you want to install your DAI Server
-
Keep the default installation directory:
C:\Program Files\Digital Automation Intelligenceor click Browse... to choose a different location. We also recommend checking the Prerequisites for considerations related to the amount of disk space you will actually need where you install your DAI Server. -
Click Next to proceed to the Server Configuration panel, where you will specify the DAI Server hostname, port, and Certificate Authority (CA) certificate information.
noteStarting with DAI version 26.2.1, all DAI Servers are configured with secure HTTPS connections; HTTP connections are not supported. If you are upgrading a DAI Server that was previously configured for HTTP access, you will need to configure your DAI Server to use HTTPS by choosing a certificate option on the Server Configuration panel below.
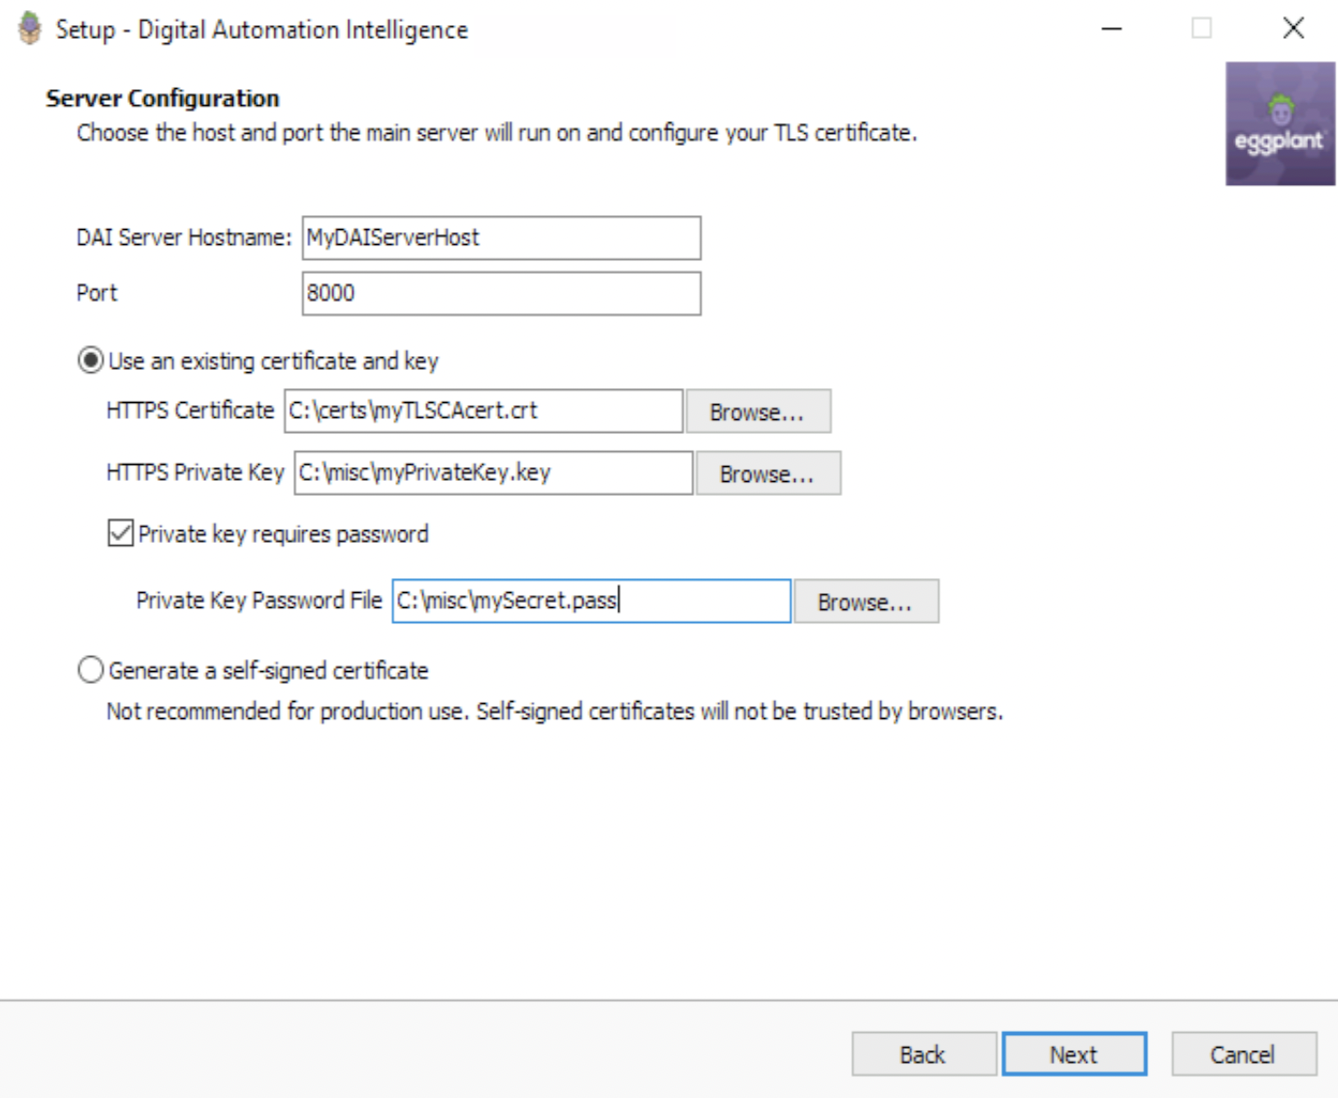
The Server Configuration panel in DAI Setup, where you configure your DAI hostname, HTTPS port, and Certificate Authority (CA) certificate
-
In the DAI Server Hostname field, enter the hostname of the Windows system where you are installing your DAI server. If you will be specifying a trusted CA certificate below, the hostname you enter here must match the hostname the certificate was issued for.
tipTo find the hostname of your server, go to Settings > System > About.
This hostname will appear in the URL of your Eggplant DAI environment. Do not include the
https://prefix in the hostname.- If the server is your local machine, enter
localhost, which means Eggplant DAI can only be accessed from this machine athttps://localhost:8000. - If you need to access the DAI server from other, remote machines, enter a fully qualified domain name, for example,
www.serverhostname.com. This allows you to access Eggplant DAI from a browser at, for example,https://<serverhostname>:8000.
- If the server is your local machine, enter
-
In the Port field, either accept the default port
8000, or specify a different port that is open for HTTPS connections on your network. You may need to consult with your IT department about port availability. You can always update your configuration after your installation if needed.notePort
80is not currently supported. -
Under Use an existing certificate, which is selected by default, you can specify the location of a Certificate Authority (CA) certificate if you have one and made it accessible to this machine. Or, you can choose to have Eggplant generate a certificate for you by choosing Generate a self-signed certificate instead. See Special Requirements above for more information about certificate options.
-
To specify the location of an existing CA certificate, click Browse... next to the HTTPS Certificate field, and navigate to the location of your certificate. This certificate must be issued to the hostname that you enter in the Hostname field above.
-
To have Eggplant generate a certificate for you, choose Generate a self-signed certificate. Choosing this option will allow you to proceed with the installation. However, we do not recommend this option for production use. Self-signed certificates are not trusted by browsers, which means each of your DAI users will have to download a certificate when they point their browsers to the DAI URL.
The setup program won't let you proceed to the next panel, if you do not select a valid certificate, or if the hostname does not match the hostname the certificate was issued for.
noteUsing a trusted CA certificate is recommended for production use.
-
-
Click Next to proceed to the Advanced Installer Options panel, where you have the option to further customize your installation by changing the directories where DAI stores data, or your Eggplant test suites.
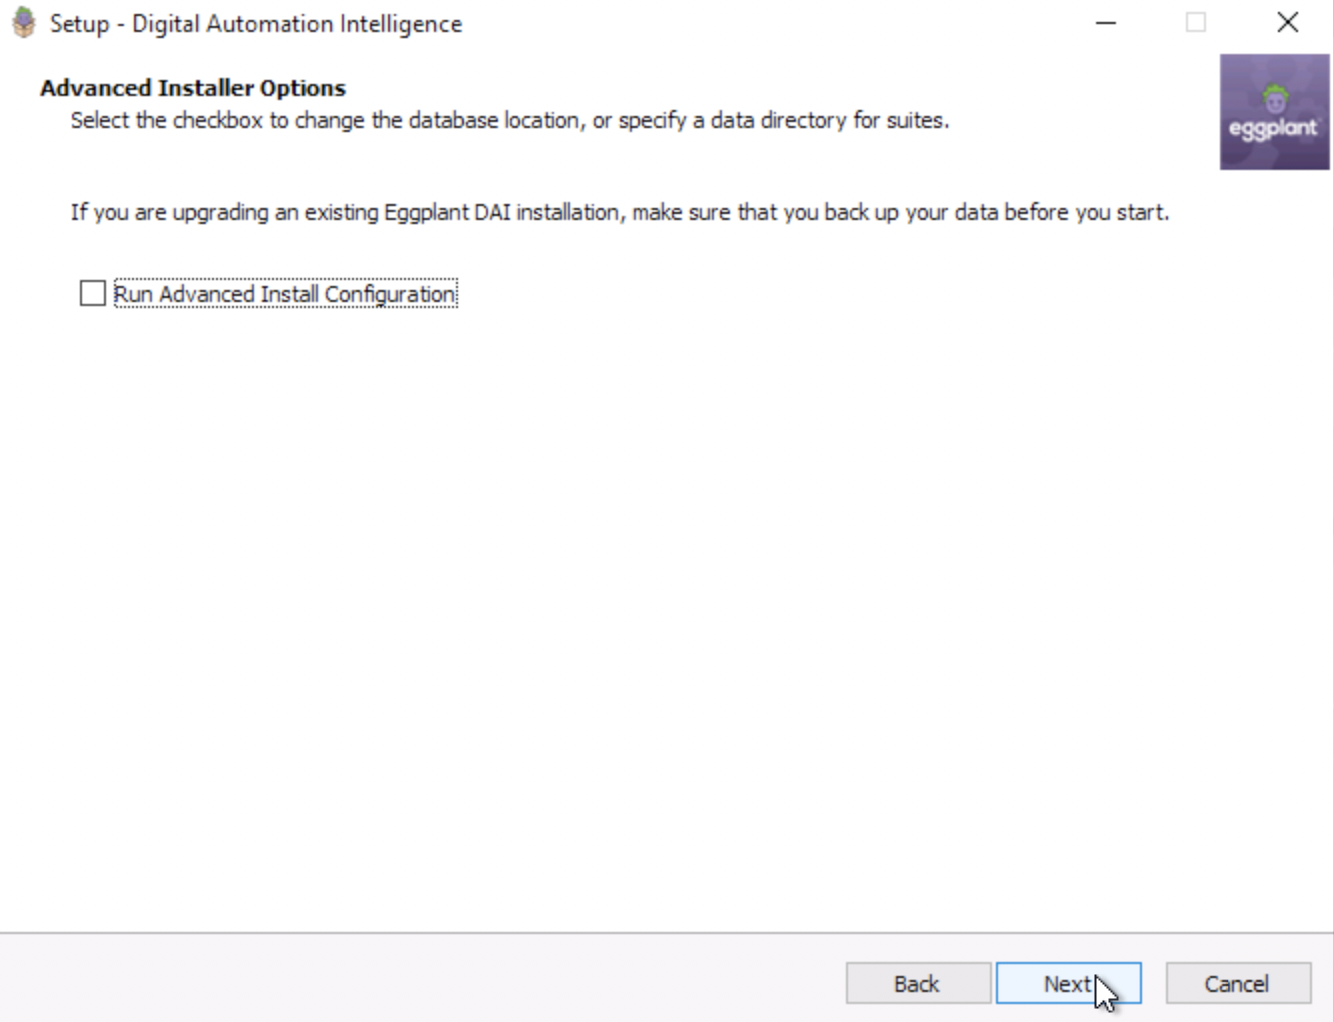
The Advanced Installer Options panel, where you can choose to customize your installation with advanced installation options
-
On the Advanced Installer Options panel, choose if you want the Run Advanced Install Configuration option, which allows you to specify different directories for your DAI Server data and test suites. If you don't want to specify different directories, click Next to proceed to the Administration Settings panel where you can provide information for your DAI System Administrator and DAI Administrator user accounts.
Choose the appropriate tab below for the installation type you want.
- Continue Standard Install
- Advanced Configuration Options
Click Next to proceed to the Administration Settings panel where you can specify information for your DAI System Administrator and DAI Administrator user accounts.
On the Advanced Installer Options panel, select the Run Advanced Install Configuration to specify different directories for your DAI data or test suites.
-
Click Next to proceed to the PostgreSQL Data Directory panel. DAI stores its data in a PostgreSQL database. This panel allows you to change the default location for PostgreSQL database data:
C:\ProgramData\Eggplant\Digital Automation Intelligence\data. This panel also reminds you to be sure you back up your existing DAI data if you are doing an upgrade. Instructions for backing up your data are provided in Back Up Your Existing DAI Server Data.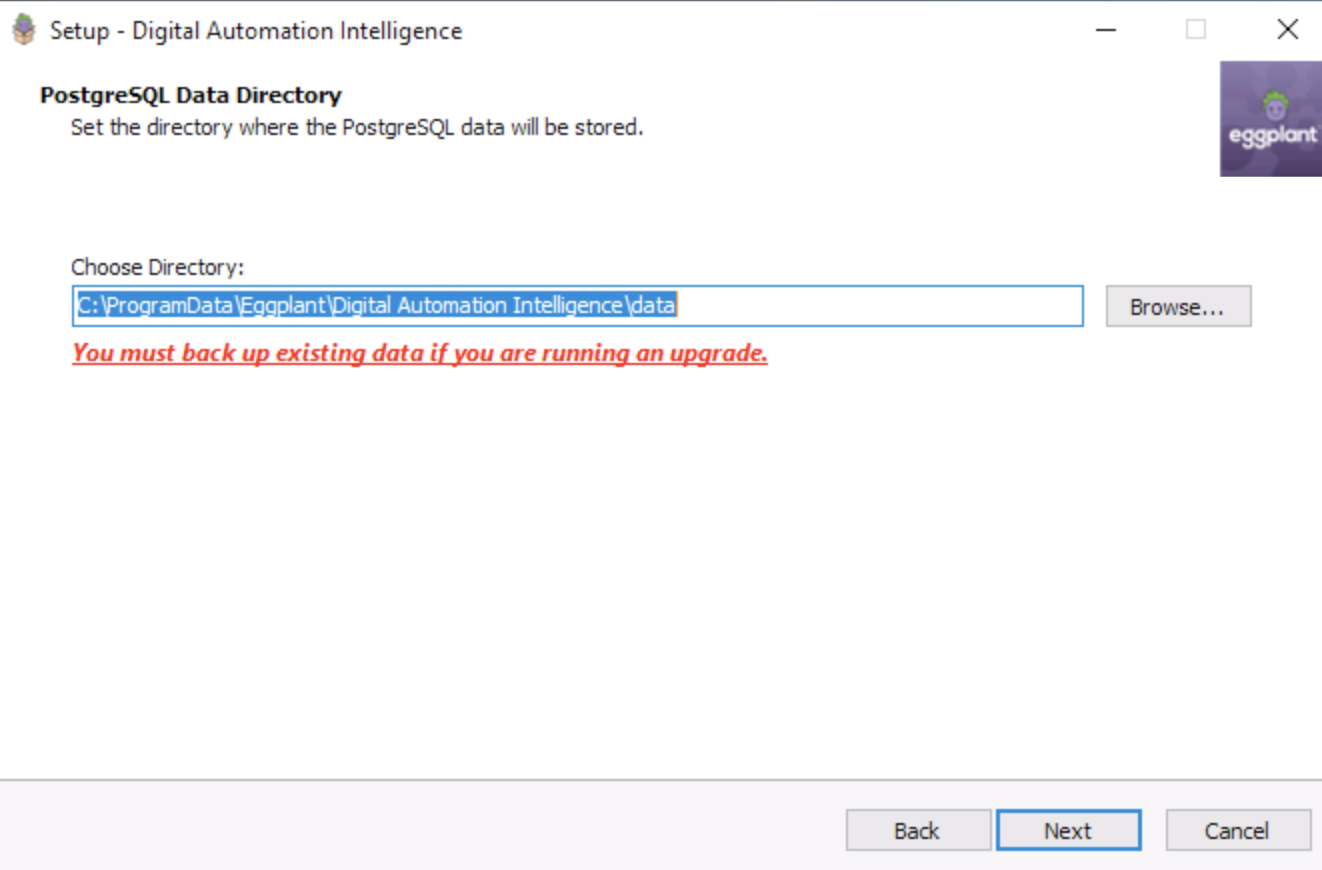
The PostgreSQL Data Directory panel where you can specify a different directory for DAI to store its data
-
Click Browse and navigate to a different directory for your PostgreSQL database data, if you want.
ImportantDAI runs under the
local systemaccount in Windows. You must make sure this account has permission to write to the directory you select, otherwise the installation will fail. Clicking Browse and then choosing the option Make New Folder on the Browse to Folder panel should ensure the right permissions are set when selecting an alternative directory. -
Click Next to proceed to the Keysight diagnostic and usage data panel, where you have the option to share diagnostic and usage data, and to allow cookies (enabled by default).
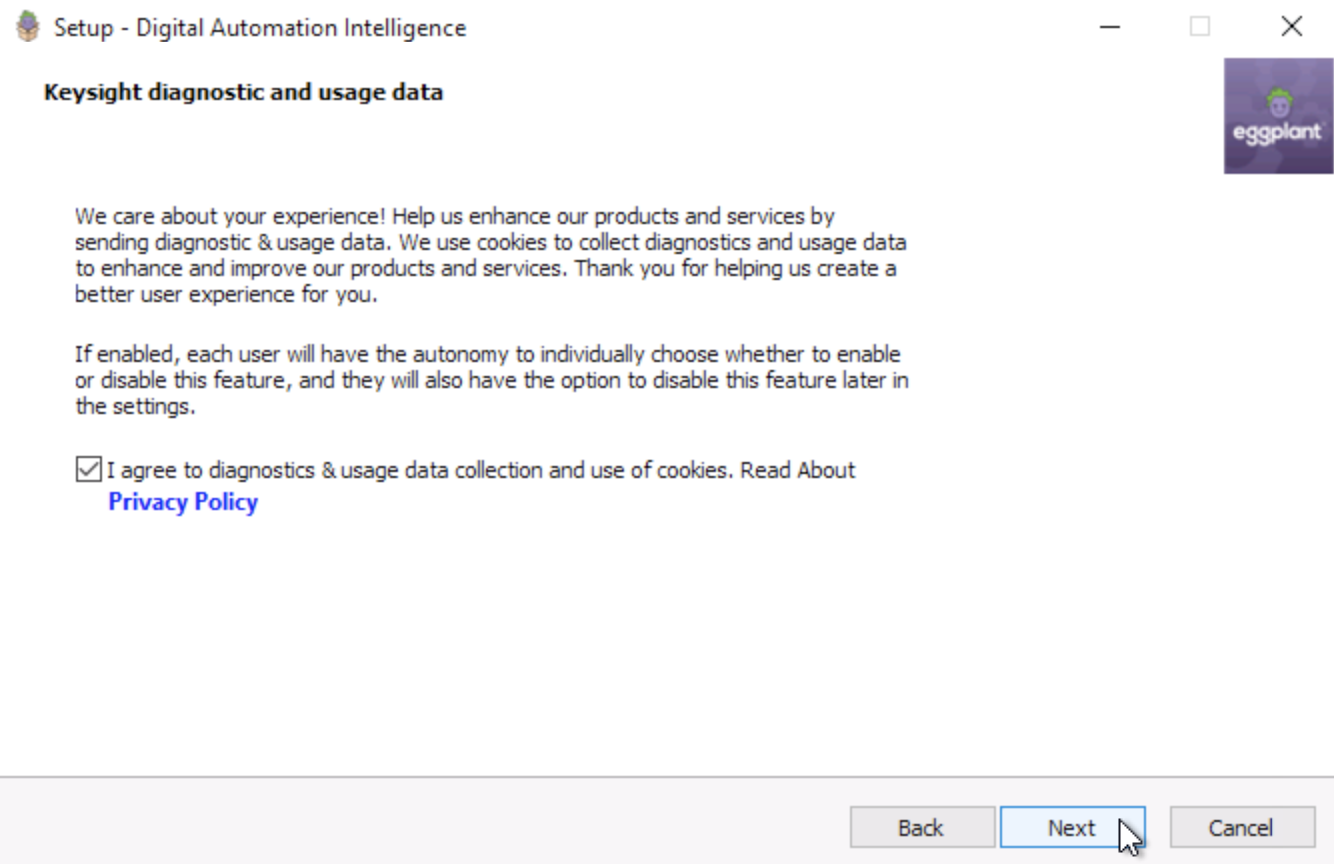
The Keysight diagnostic and usage data panel, where you have the option to share data and allow cookies
-
Leave the checkbox selected to allow cookies and to allow Eggplant to collect these metrics for a usage report: Product Identifier, Product Version, Host OS, Host OS Version, and License (Serial Number) information.
-
Click Next to proceed to the Suites Data Directory panel. The suites are the Eggplant test suites that will contain your test scripts and other test assets. This is the directory that the DAI Design Agent uploads your suites to and might be different from where you’re currently storing them. This panel also reminds you to back up your existing data if you are upgrading.
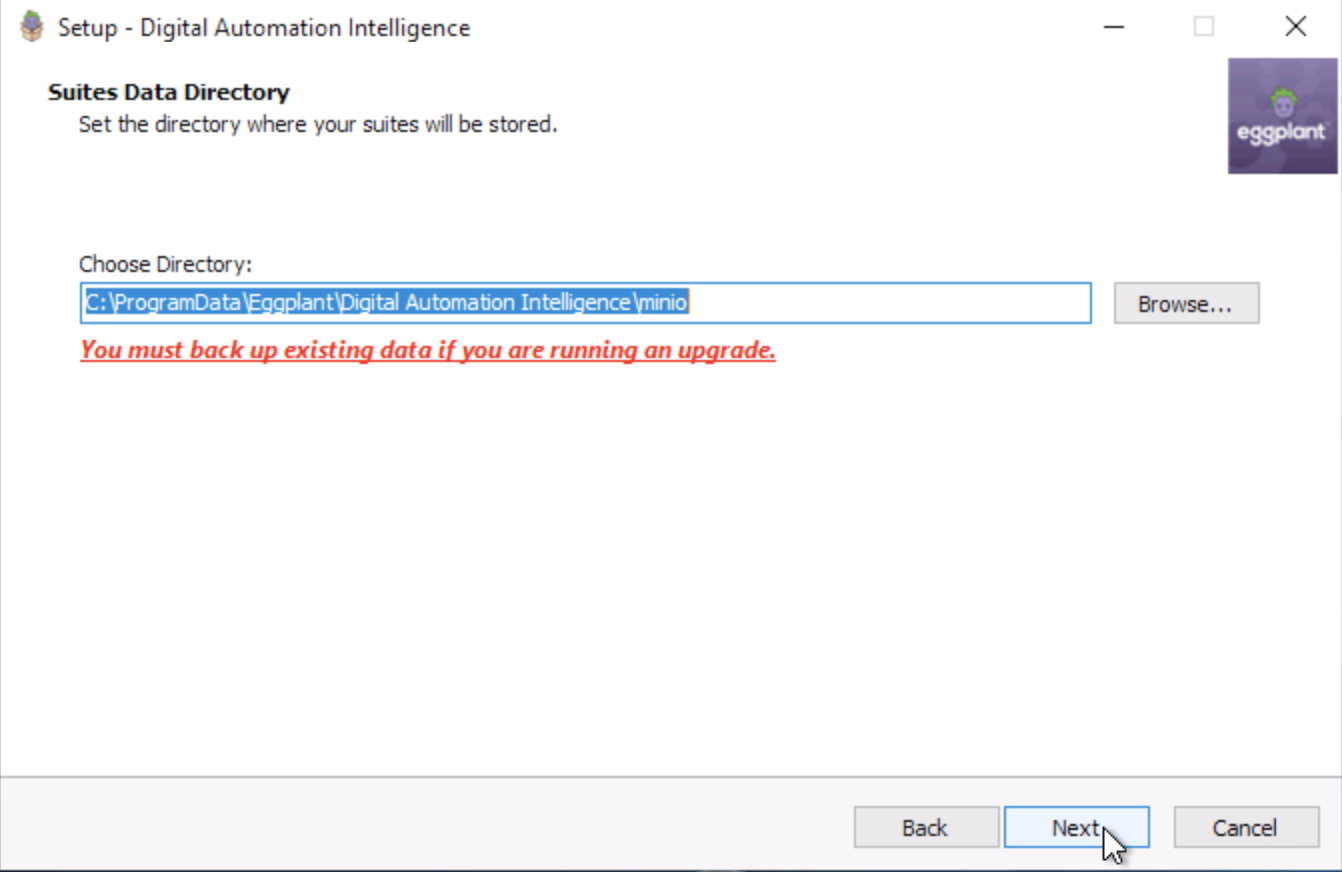
The Suites Data Directory panel, where you can specify a different directory to store your Eggplant test suites
-
Enter a different directory for your Eggplant test suite data, if you want. This step completes the advanced installation configuration options. The remaining steps are part of the standard installation process.
ImportantDAI runs under the
local systemaccount in Windows. You must make sure this account has permission to write to the directory you select, otherwise the installation will fail. Clicking Browse and then Make New Folder on the Browse to Folder panel should ensure the right permissions are set when selecting an alternative directory. -
Click Next to proceed to the Administration Settings panel, which is where you specify information for two administrator user accounts.
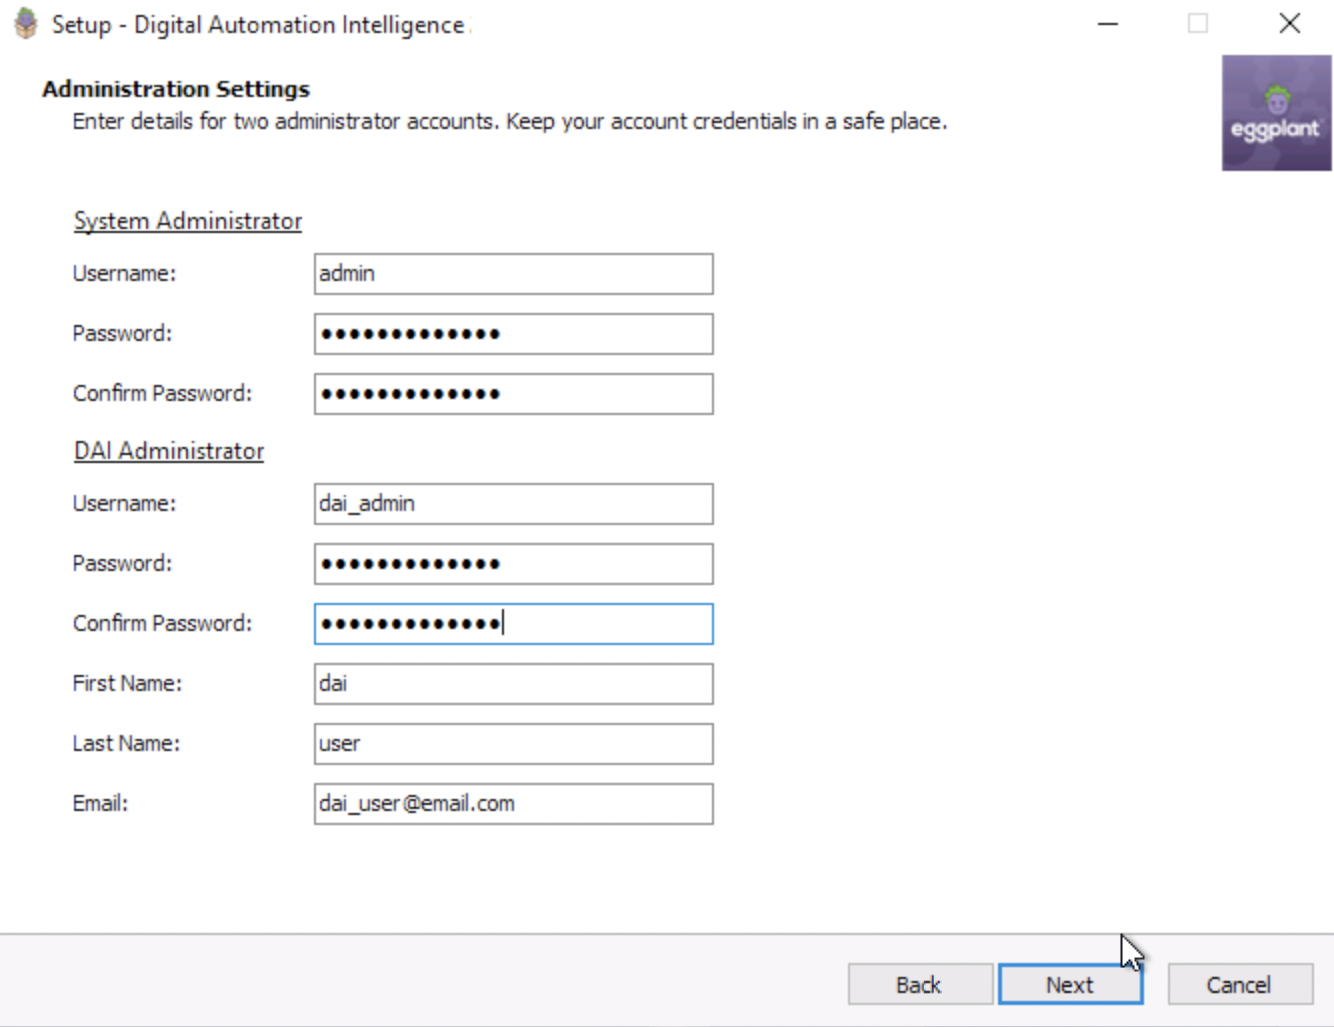
The Administration Settings panel, where you specify two user accounts for your DAI installation
-
Under System Administrator, enter the username and password credentials for an administrator of Eggplant's identity access management (IAM) system.
- Username: Enter only ASCII printable characters excluding both uppercase letters and these characters:
< > \ / { } " % ! ^. - Password: Enter between 12 and 128 characters using ASCII characters excluding
" \ { } % ! ^. - Confirm Password: Re-enter the same password to confirm it.
ImportantKeep the credentials for the System Administrator account in a safe place. Under certain circumstances, an Eggplant Technical Success Manager might ask you to find and use them.
- Username: Enter only ASCII printable characters excluding both uppercase letters and these characters:
-
Under DAI Administrator, enter credentials and personal details for the DAI administrator.
- Username: Enter only ASCII printable characters excluding both uppercase letters and these characters:
< > \ / { } " % ! ^. - Password: Enter between 12 and 128 characters using ASCII characters excluding
" \ { } % ! ^. - Confirm Password: Re-enter the same password to confirm it.
- First Name: The DAI Administrator user's first name (shown as
daiin the example above). - Last Name: The DAI Administrator user's last name (shown as
userin the example above). - Email: The DAI Administrator user's email address (shown as
dai_user@email.com).
noteYou will need your DAI Administrator credentials to log into Eggplant DAI for the first time, and to create or update other users. When you've logged in, you can update your password to include the excluded characters listed above along with other languages and characters, for example, Unicode. Administrator usernames cannot be updated.
If you want to use single sign-on (SSO) authentication with DAI, you configure it after you install DAI as described in First Login and Licensing and Integrating Single Sign-On (SSO) Authentication with DAI.
- Username: Enter only ASCII printable characters excluding both uppercase letters and these characters:
-
Click Next to proceed to the Select Start Menu Folder panel where you specify the Windows Start menu folder where you want to create the DAI program shortcuts.
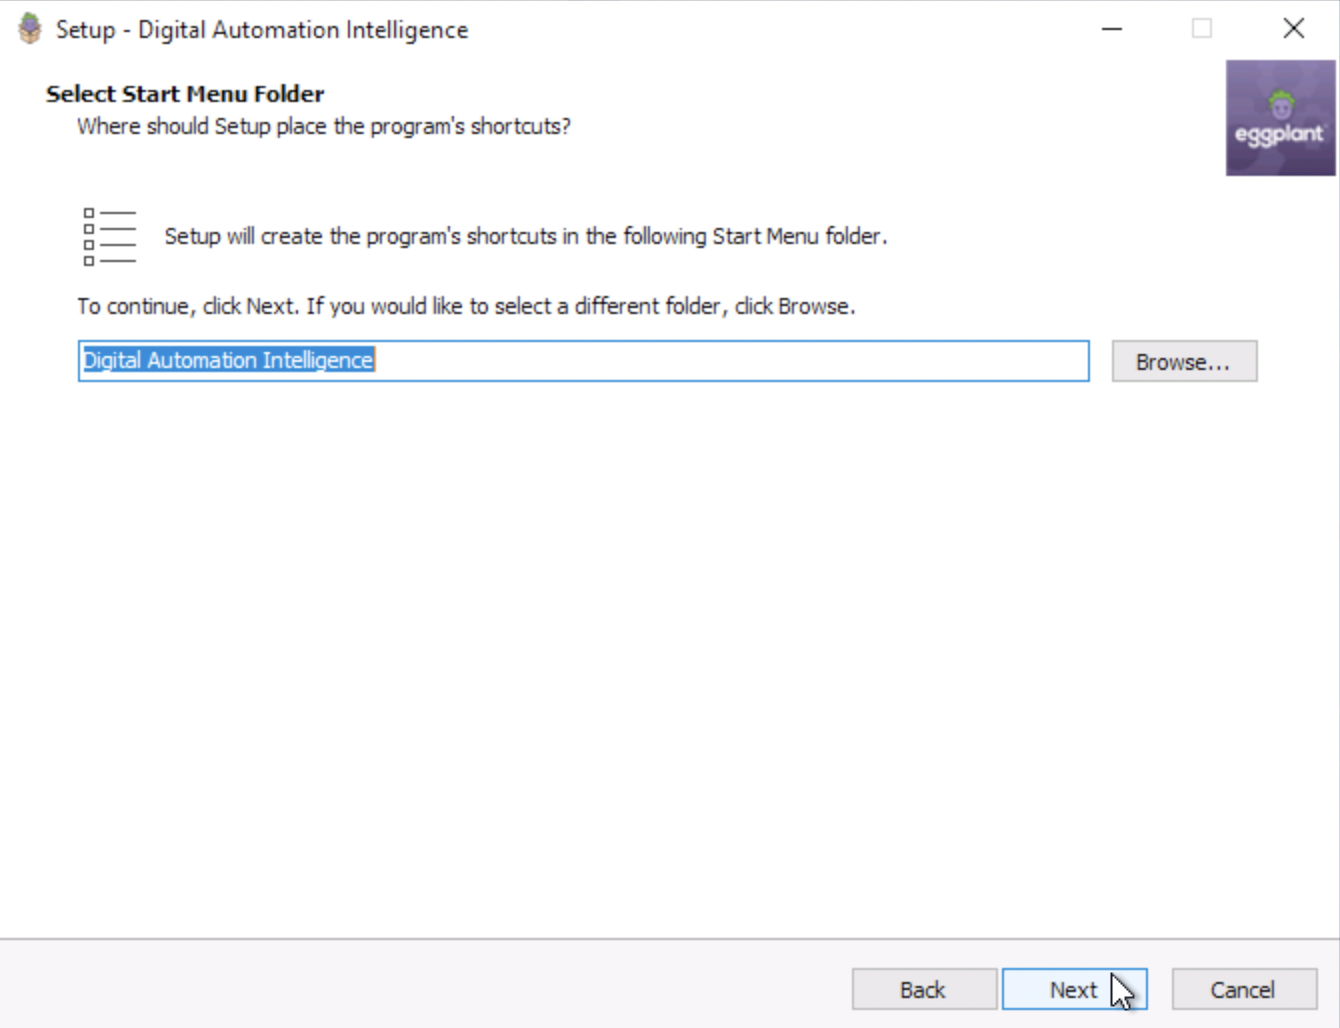
The Select Start Menu Folder panel, where you specify where you want to create the DAI program shortcuts
-
Accept the default folder name Digital Automation Intelligence or click Browse… to navigate to and select a different folder.
-
Click Next to proceed to the Ready to Install panel, which summarizes the installation options you chose. If you want to change any of the settings, click Back as many times as needed to find the information you want to change and change it.
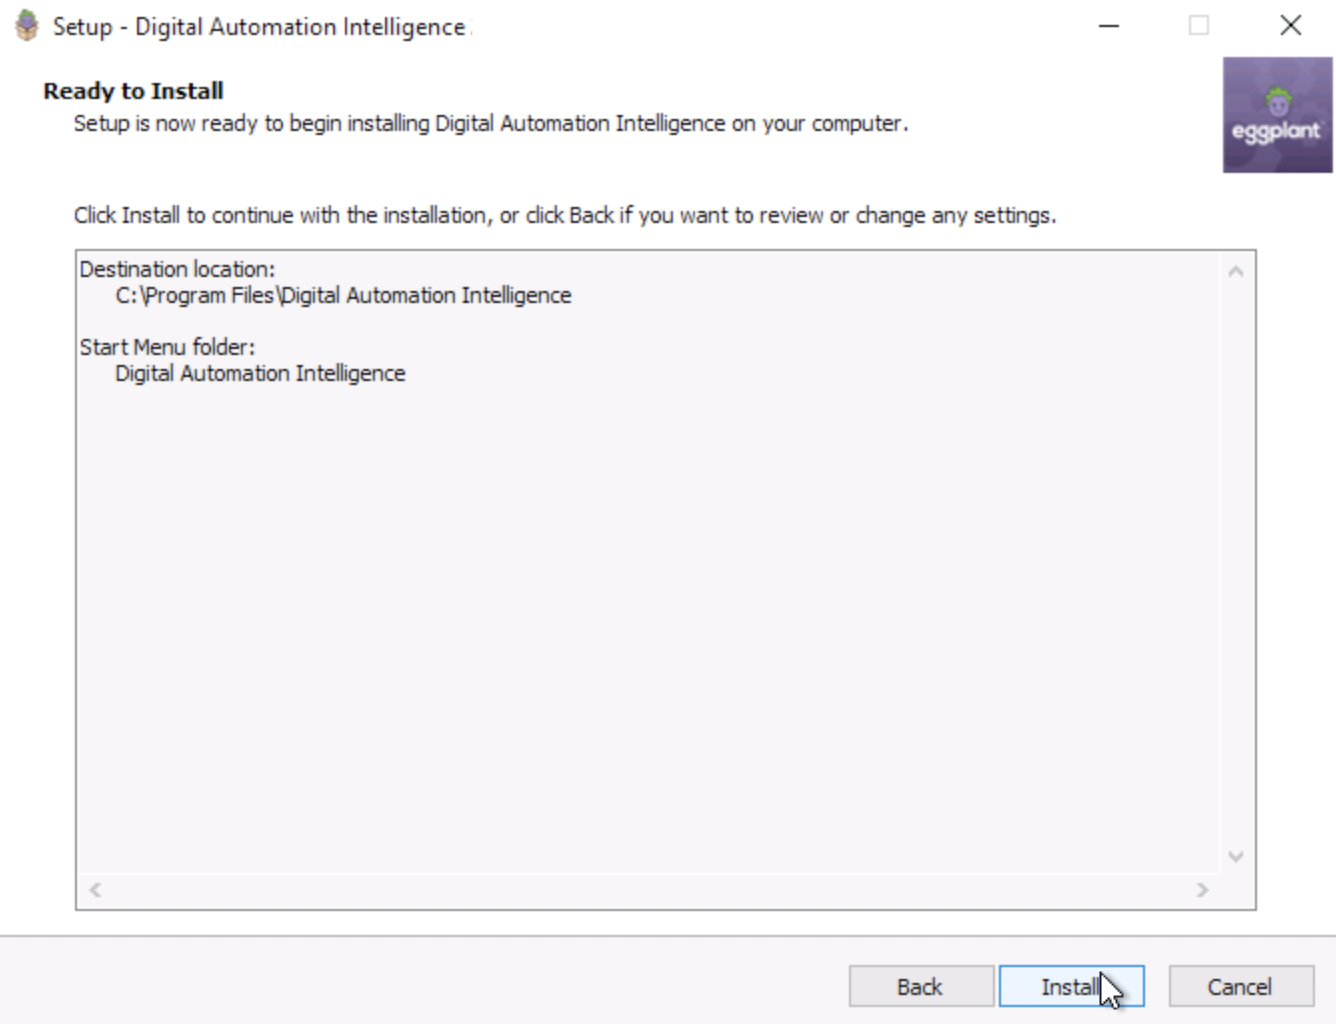
The Ready to Install panel, where you verify you are ready to start installing or go Back to change any settings
-
To start the installation, click Install. After the installation is done, the DAI Windows Service Start-up panel will appear where the DAI service will initiate for the first time. This process may take up to 10 minutes and may include migration activities, if applicable.
An HTML DAI Windows Service Start-up Report will be opened on your default internet browser, listing the services that are started successfully. The migration process is done successfully if all DAI services are started successfully as indicated in the said Start-up Report. Any error that occurs during start-up is detailed here to aid troubleshooting.
-
When the setup is complete, click the Finish button.
-
If the DAI service fails to start-up successfully, you may need to restart the DAI service through the Windows Services manager or restart your PC.
-
Continue to First Log in and Licensing.
DAI uses a message broker (RabbitMQ) for inter-process communications. Because DAI uses HTTPS, you have the option to encrypt the Rabbit MQ communications by modifying settings in the DAI configuration file (config.yml). See Encrypt RabbitMQ Communications for instructions.
First Login and Licensing
When Eggplant DAI is installed and running, you must access the application from a browser. Follow these steps to log in, license, and start to use Eggplant DAI.
-
Enter the appropriate URL from a browser to display the login screen. For example,
https://<serverhostname>:8000, where<serverhostname>is the hostname you specified during installation and8000is the default port. -
If you chose the option during installation to have a self-signed certificate generated for you, you will be prompted to download the generated certificate when you attempt to access the DAI URL.
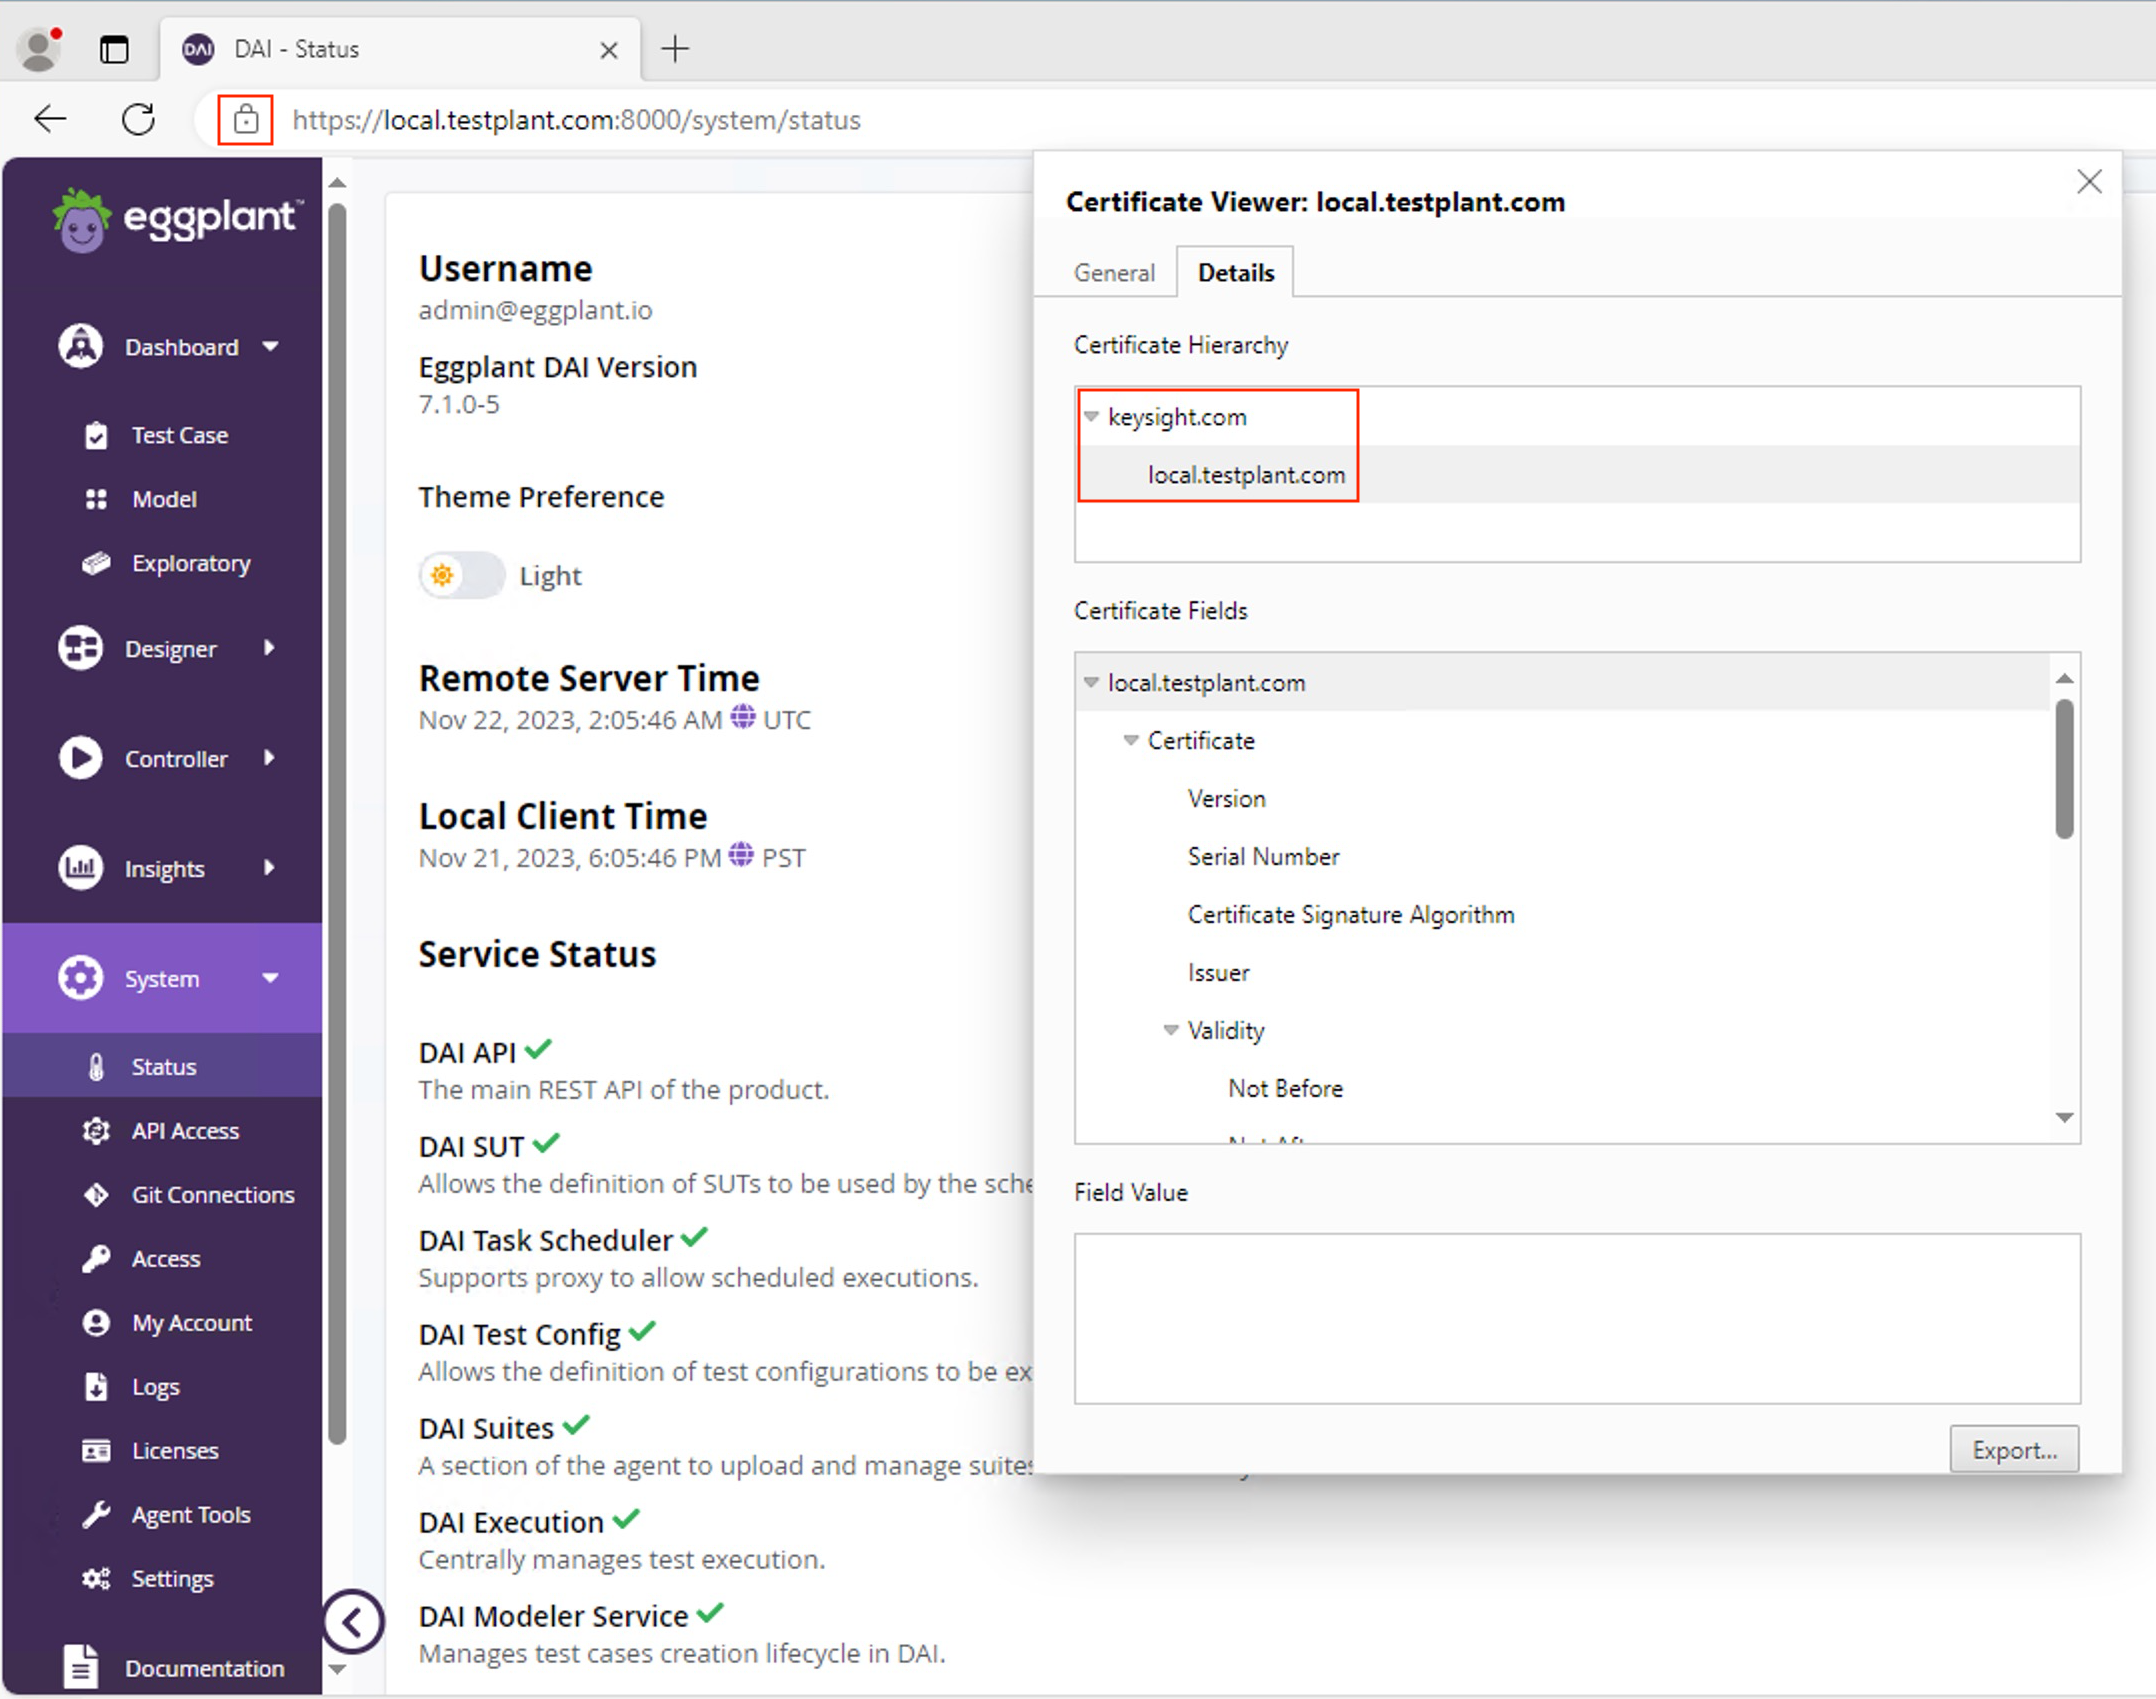
noteRegardless of how you configured the CA certificate during installation, you can display the CA certificate when you enter the DAI URL in your browser. For example, if you are using Chrome, you can click the button to the left of your URL, which says View site information when you hover over it. This opens a pop-up showing information about the site, including links you can follow: Connection is secure > Security > Connection is valid, which you can click to display the Certificate Viewer and see your certificate.
-
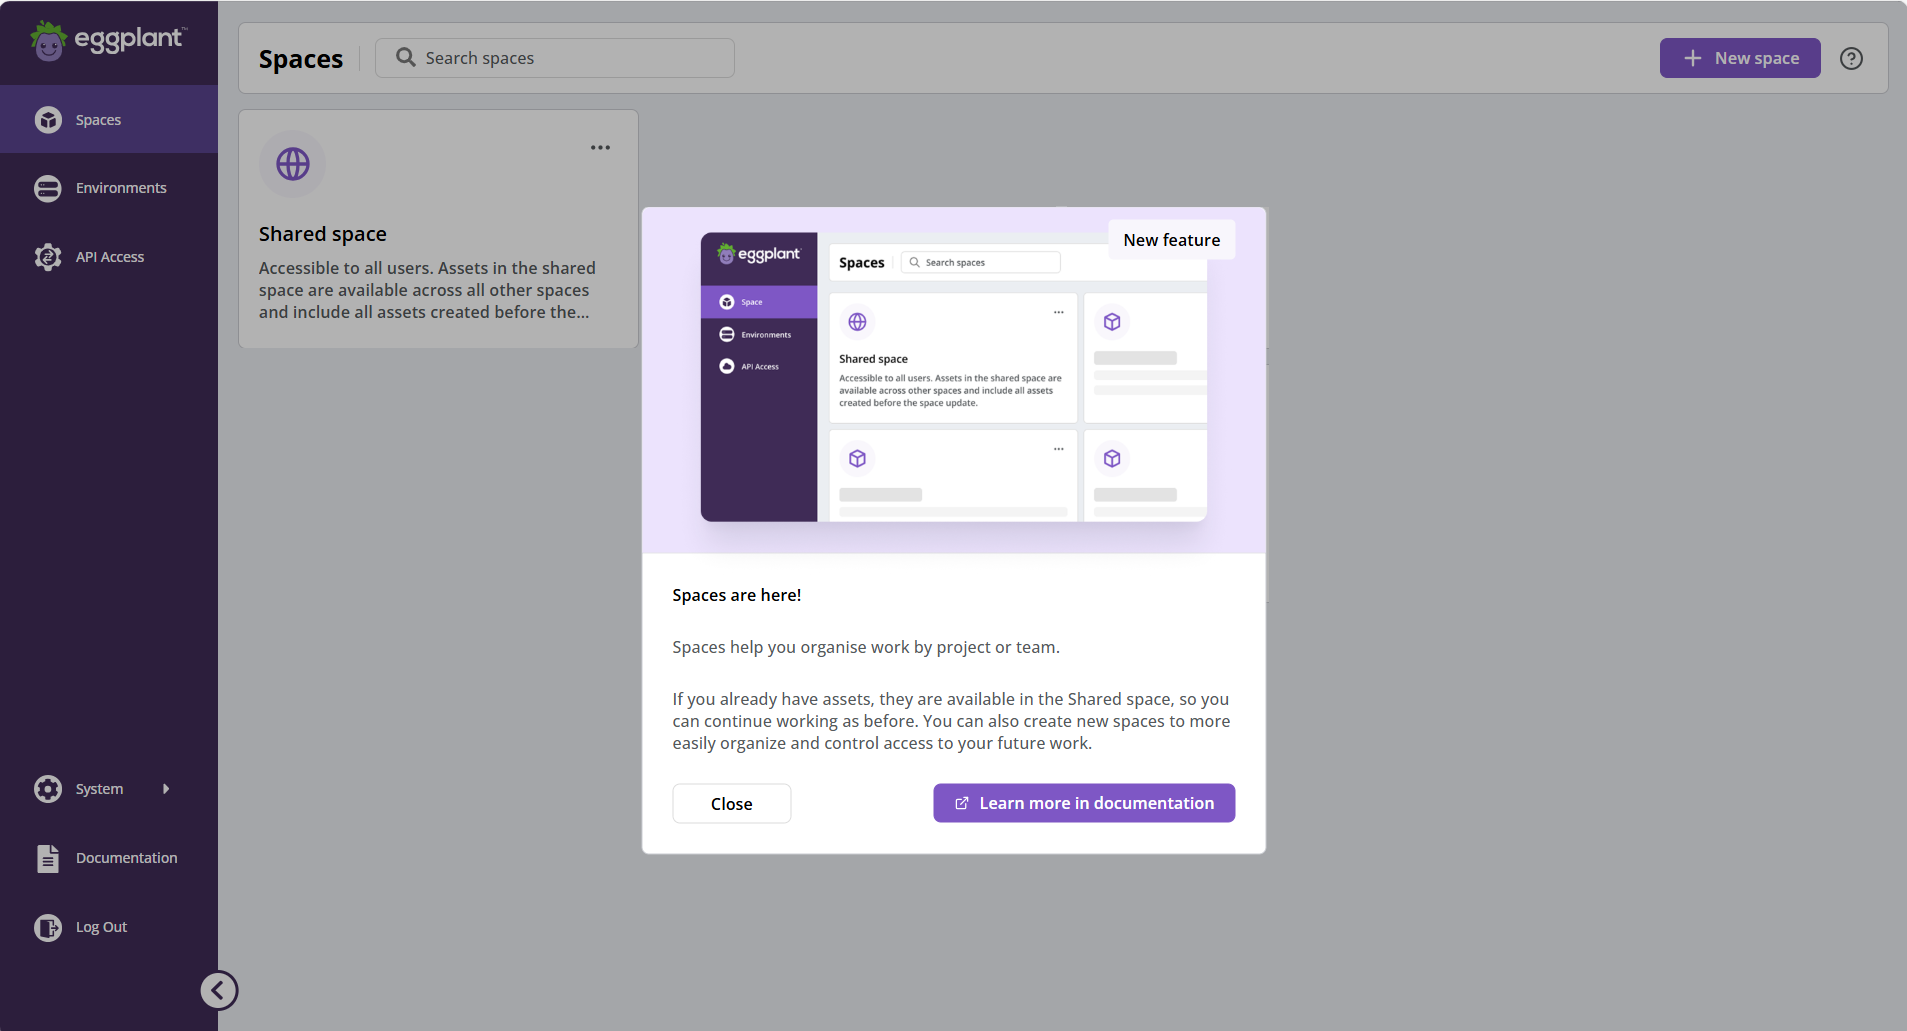
When the DAI login page appears, enter the username and password for the DAI Administrator account that you set up during installation, and click OK. The DAI Spaces page opens, showing the common Shared space, and any previously created private spaces in your DAI instance.
noteDAI 26.2.0 introduced the Spaces feature and changed the landing page you see when you log into DAI to the Spaces page. If you are upgrading to DAI 26.2.1, you will see the Spaces are here! message the first time you log in after upgrading to inform you of the change. Prior to version 26.2.0, you saw the Test case dashboard when you logged in. See About DAI Spaces for more information about spaces.
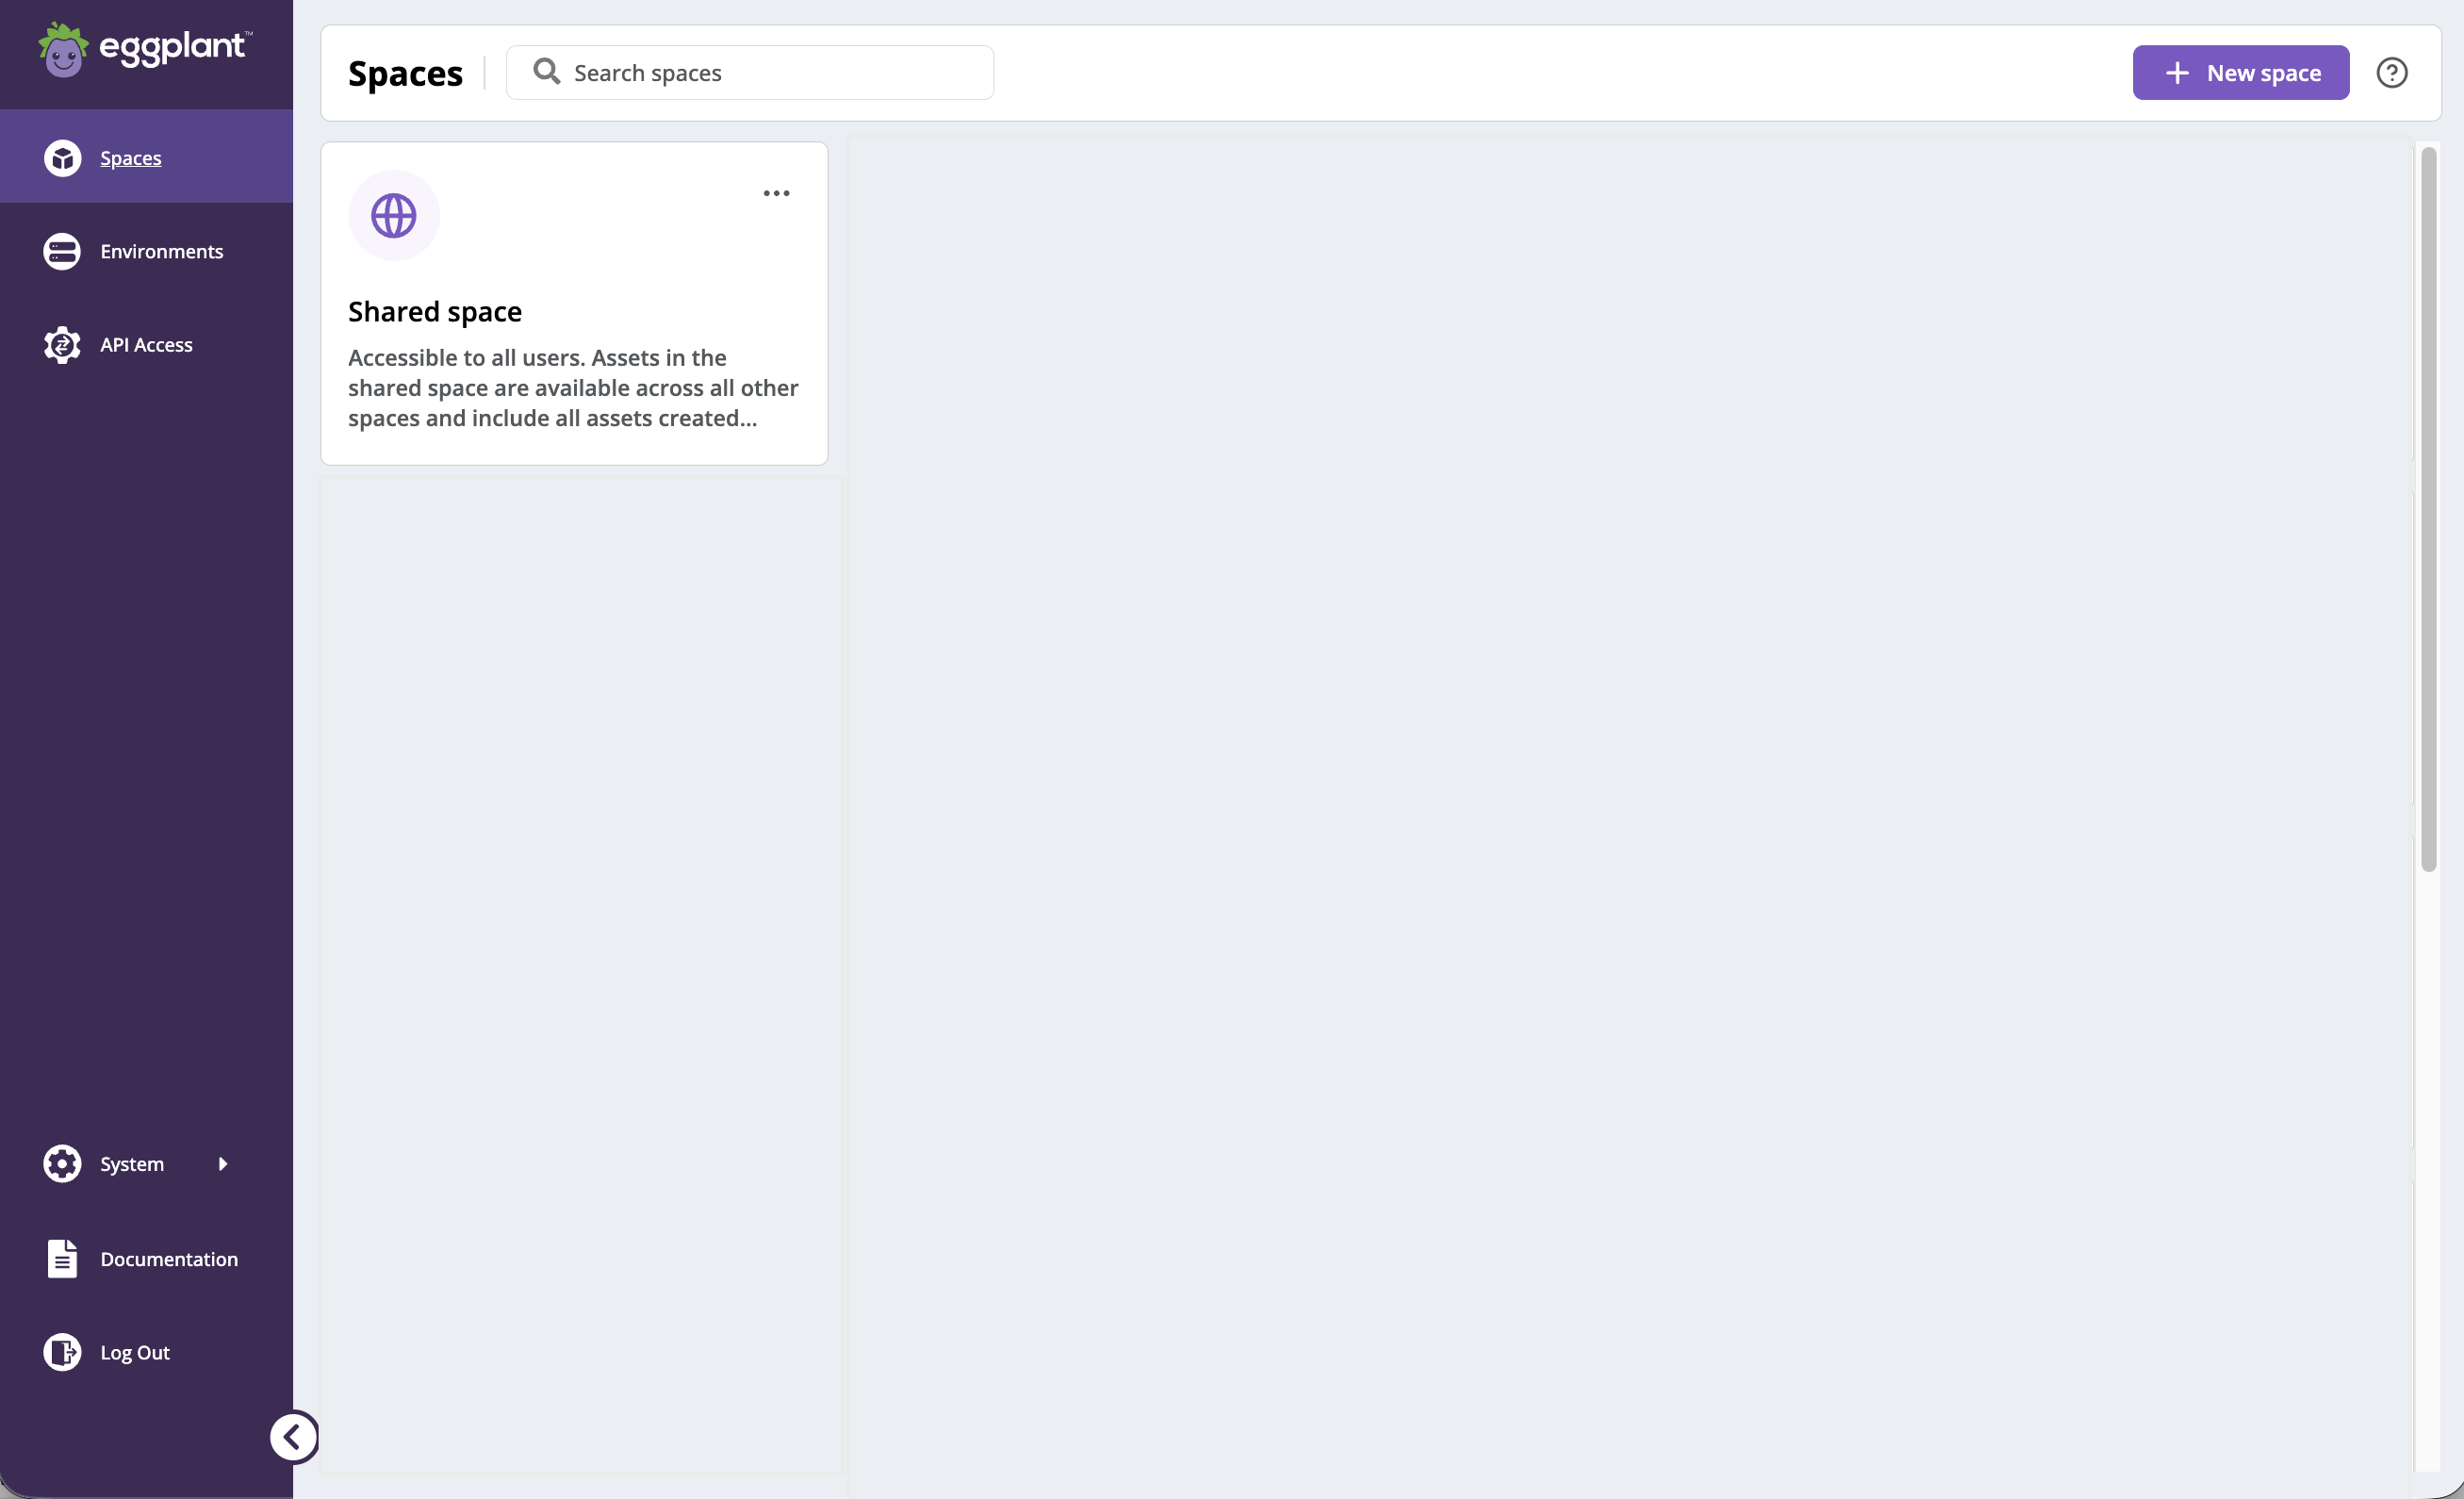
Additionally, when you upgrade, you will notice fewer menu options on the left. You need to open a space to see more of the DAI menu options. For example, if you click the Shared space, which is the common space available in all DAI instances, the Test case dashboard would open and you would see more DAI menu items.
-
Click Close on the Spaces are here! panel to dismiss it if you see it. The Spaces page remains open.
-
Display the Licenses page by choosing System > Licenses from the menu on the left side of DAI.
-
In the License page, enter your License Key and click Agree. A copy of the Eggplant Software License agreement can be read and downloaded before clicking Agree. You can generate your license in the Keysight Software Manager (KSM). After your license is accepted, the Settings page is displayed for you to set up emails. With emails configured new DAI users can set their own password. You can skip this step; however, you must provide a temporary password to the users.
-
You can now make updates to user accounts. Click Access on the left menu of the Eggplant DAI interface.
noteIf you want to use single sign-On (SSO) authentication with Microsoft Active Directory (AD) in DAI, see Integrating Single Sign-on (SSO) Authentication with DAI).
-
To open the Admin Console in a new browser tab, click Manage users.
-
To edit a user, type the first few letters of the username in the search box to find matching users then click the ID of the correct record.
-
Enter your email address and select Save.
-
Go to the Managing Users section to learn more about the administration environment or Getting Started if you're using the application for the first time.