The Image Viewer
Image Preview
When you click an image once in the Images pane, it opens in preview mode, with a light gray screen over the Image Viewer area. This mode lets you browse and view images but not edit them.
Double-clicking an image or clicking in the preview display fully opens the image.
Image Viewer Components
The Image Viewer consists of several distinct areas where you can browse between and manipulate images in your suite.

Image Well
When you select an image in the Images pane, it loads in the top of the Image Viewer. The image's hot spot is marked by red crosshairs. You can change the location of the hot spot by Ctrl-clicking (Cmd-clicking in Mac) and dragging it to a new location. You can also nudge the hot spot one pixel at a time with Ctrl+arrow key (Cmd+arrow on Mac). Adding the Shift key moves the hot spot in ten-pixel increments.
By default, images display on a pale gray background. Click the background to change this color. The choices range from white to black with several shades of gray in between, so you can use the one that looks best with your images or change it as you view each image.
Click Edit Image to load the image in the Image Editor.
Image Name Field
Displays the name of the image file. You can use this field to change the name of the image if needed.
Search / Tags / Description Tabs
This section of the Suite window contains supplemental information about the selected image and lets you change certain properties.
Search Tab
SearchType: The method used by Eggplant Functional to find a match for your target image on the SUT (System Under Test). This drop-down list lets you select from the following basic search types related to the image search:
- Adaptive to Image: Uses a flexible search algorithm to analyze individual pixels and then also look at the overall similarity before determining a match.
- Tolerant of Background: Accepts matches that have slightly different pixel colors caused by background and transparency changes. Tolerant searches are more forgiving than precise searches, so they reduce the chance of a script failing because of a minor variation in rendering.
-
Smoothed for Text: Allows for dynamic font smoothing (text anti-aliasing) in images that contain text. If Eggplant Functional sometimes fails to locate an image that contains text, try changing the search type to Smooth.
Additional Search Types
These search types are not visible by default. This setting can be changed in the Eggplant Functional General Preferences under Other Options.
- Precise to Pixel: Requires a very high degree of precision to consider an image matched with the SUT display. This setting is useful for low-contrast images or images with subtle color differences.
- Pulsing to Element: Allows for pixel colors that can change. One application for this is on older Mac platforms where blue pulsing buttons are used.
- Smooth and Pulsing: Allows for both changing pixel colors and text anti-aliasing, such as on older Mac platforms where pulsing blue buttons with text can be seen.
Tolerance: Adjusts the amount of color variation allowed between the original captured image and a match on the SUT. A low value like 1 requires a near-perfect match. The higher the tolerance value, the more variation is allowed in the overall image when considering a match.
Tech Talk
The exact meaning of Tolerance depends on the search type selected:
Tolerant of Background:
When used with the Tolerant search type, the tolerance value represents the maximum difference between an original pixel’s RGB value and the RGB value of a presumed match on the SUT screen.
Default value: 45, or as set by the Standard Image Tolerance in the Eggplant Functional Run Preferences.
Adaptive to Image:
The way Adaptive to Image search uses tolerance has a similar effect to the Tolerant of Background image search tolerance, but is functionally different, as this search type not only analyzes individual pixels, but the similarity of an image match overall.
Default value: 30 or as set by the Adaptive Image Tolerance in the Eggplant Functional Run Preferences.
Precise to Pixel:
This tolerance value works just like the Tolerant search tolerance, but by default is set to a much lower value, and so requires a very small variation in pixel color to be considered a match.
Default value: 1 or as set by the Precise Image Tolerance in the Eggplant Functional Run Preferences.
Discrepancy: Lets you adjust the percent or number of pixels that can be ignored when finding a match to the image. The percentage of pixels (with a percent sign) or number of pixels (with no percent sign) by which the image and a match in the Viewer window can differ.
Note: Discrepancy can be slow to use and can result in false positive matches. Preferable approaches include setting the Search Type to Smoothed for Text in the Image Update panel, cropping the image using the Image Editor, or creating an Image Collection that includes several acceptable versions of a basic image. You can also capture a new image if the current image can only be found using a discrepancy search.
Image Size: Displays the dimensions of the original image in pixels.
Hot Spot: Move the image hot spot by entering new coordinates. Click Center to return the hot spot to the center of the image.
Scale: Scale the original image.
Rotate: Rotate the original image.
Capture Screen Size: Displays the screen size of the SUT on which the original image was captured, and lets you change the values.
Image Update Panel: Opens the Image Update panel.
Edit Image: Opens the Image Editor interface.
Tags Tab
Suggested image tags appear below the Tags field. Click a suggested tag to add it to the image. You can create new tags in the Tags field, as well. Type in the tag name you want to use, then hit the Enter key or comma key to commit the tag. To remove a tag from an image, delete it from the Tags field.

Description Tab
Add an optional description of the image in this field.
Image Diagnostics
The Image Diagnostics section lets you adjust the search criteria for images that are not being found in the SUT Viewer window. Using Image Diagnostics requires an active connection. To use Image Diagnostics, select an image in the Image pane, then click the Search button. As the searches complete, the results for each type of diagnostic appear in this area.

The searches include:
- Standard Search: Searches for the image in its normal state with no adjustments.
- Dynamic Tolerance: Searches by adjusting the image's tolerance setting. It starts at the image's normal tolerance setting and gradually raises the tolerance until the image is found on the SUT.
- Alternate Types: Searches by applying increasingly lenient search types until a match is found.
- Scaling Search: Searches by looking for the image at a variety of different scales, ranging from 0.5 to 2.0, until a match is found.
- Discrepancy Search: Searches by gradually increasing the image's discrepancy setting until a match is found.
- OCR Search: Searches for text in your image and attempts to find instances of that text on the screen.
- Prior Location: Searches the location where your image was last found in a successfully completed test.Note: You can choose a test run other than the most recently completed run by using the Mark As Prior Run button on the Results pane for the script.
- Original Location: Searches the location of the selected image at the time of original capture.
- Crop Edges: Searches by progressively cropping in on the image, looking for smaller and smaller images. As long as the inside of the image does not match anything else on the screen, the edges are not important.
- MatchingDOM: Searches for an asset using DOM properties. This remedy works for mobile WebDriver connections only and can be useful when testing across mobile platforms.
The Status column displays the found status of each diagnostic. If the particular diagnostic search found the image in the Viewer window, the screen coordinates of the image are displayed in the Status column.
The Info column displays information about how much each successful diagnostic changed the search criteria to produce a match.
Working with Image Diagnostics
The buttons below the diagnostic results become active when you select a diagnostic from the list. Options are available only for those diagnostic searches that produced successful results, and not all options are available for all diagnostics.
- Fix: Replaces your image's original search criteria with the search criteria that produced the diagnostic image match.
- Recapture: Recaptures your image at the location where the diagnostic image is found.
- Add Rep: Turns your original image into an Image Collection and saves the diagnostic image as part of it. For more information, see Creating an Image Collection.
Image Browser
This browser previews the images and folders in your suite.
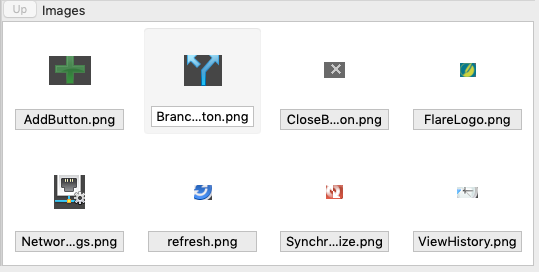
The image browser, visible in the Image Viewer in an Eggplant Functional suite.
To open an image from here, click it. To open a folder, double-click it. Click Up to return to the main Images folder in your suite.
![]() Eggplantsoftware.com | Documentation Home | User Forums | Support | Copyright © 2022 Eggplant
Eggplantsoftware.com | Documentation Home | User Forums | Support | Copyright © 2022 Eggplant