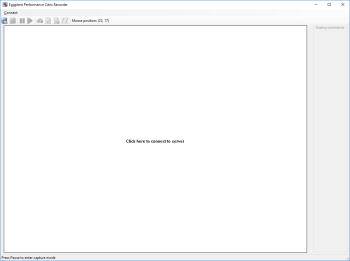
The Eggplant Performance Citrix Recorder is used to record the data that is sent to and from a Citrix server. Once the Connection Properties have been confirmed, the recorder window opens:
Citrix Recorder Before Connecting
Connecting to the Published Application
To start the capture, click anywhere inside the recording frame or press the Connect toolbar button. You should see the status message change from Connecting to Connected.
The Connect, Connection Properties menu item opens the Connection Properties dialog box, and changes are applied the next time you connect. Any previous failed connections attempts and connection settings are recorded, so you need to remove the code associated with these recorded entries from the script.
Connection Errors
If the status message changes from Connecting to There is no Citrix XenApp server configured on the specified address after a long wait, it is likely that the Host:Port address entered into the Connection Properties dialog box is incorrect or the ICA Address value is incorrect. It could also mean the XenApp server is not available.
If you see a message such as You have not been granted access to this published application or The requested session access is denied, check that the user has access to the application or the application name is correct.
The message Protocol Driver error can occur if the connection properties are invalid such as the address field is incorrectly formatted.
If you get the Windows Server Login page instead of the expected application, check your Domain/User and Password.
Citrix Recorder After Connecting
On successful connection to a Citrix server, all mouse and keyboard actions are recorded unless you enter capture mode to pause the recording.
Pausing the Recording Using Capture Mode
To break out of the recording and enter capture mode, press the keyboard Hotkey (this is the Pause key by default) or click the ![]() toolbar button. Using the Hotkey has the advantage that the mouse cursor is not moved in the Citrix session. Using the toolbar button is usually not a problem when using the default setting of not including mouse moves in the script.
toolbar button. Using the Hotkey has the advantage that the mouse cursor is not moved in the Citrix session. Using the toolbar button is usually not a problem when using the default setting of not including mouse moves in the script.
The capture mode buttons:
![]() Enter capture mode, pause the recording of mouse and keyboard actions. You can also use the hotkey.
Enter capture mode, pause the recording of mouse and keyboard actions. You can also use the hotkey.
![]() Exit capture mode and continue recording, The capture mode hotkey will also exit capture mode.
Exit capture mode and continue recording, The capture mode hotkey will also exit capture mode.
![]() Take a screenshot of an area of the screen that must be found on replay to synchronize during replay or to time a response. See Synchronize on an image for more details.
Take a screenshot of an area of the screen that must be found on replay to synchronize during replay or to time a response. See Synchronize on an image for more details.
![]() Capture a Citrix event to synchronize on during replay or to time an event. See: Synchronize on a Citrix event for more details.
Capture a Citrix event to synchronize on during replay or to time an event. See: Synchronize on a Citrix event for more details.
![]() Insert a WriteMessage call in the script. Use this to have messages included in the log on replay.
Insert a WriteMessage call in the script. Use this to have messages included in the log on replay.
![]() Insert a comment in the script code. Use this to document the recording.
Insert a comment in the script code. Use this to document the recording.
As you capture images, these images appear beneath Existing Screenshots in the right side of the Citrix Recorder. You can reuse these captured images to add commands to your scripts instead of capturing identical images multiple times. For instance, you might need to find or click the same image multiple times during a recording. To remove an image that you don't plan to use in your scripts, right-click the image, then select Delete in the context menu.
Being able to send unrecorded keyboard actions during capture mode can be used to correct for a mistake made during recording. You can reset the session to the required point but you must manually remove or correct the incorrect recorded actions in the script. You should mark incorrect groups of recorded script calls using a progress point or message so you know to deleted these from the generated script.
Reconnecting and Re-starting a Recording
From the Connect menu you can re-open the Connection Properties dialog box. Changes will then apply the next time you connect.
From the Connect menu you can clear the current recording. This is useful if you want to re-start a recording or to just record part of the workflow.
