1. Select file
When you begin the process of importing your requirements document into Eggplant Generator, the first thing you do is select your requirements document on the Select file tab.
You can only import one requirements document for each collection.
-
Ensure the requirements file you want to import is in an Excel (.xlsx) or comma-separated value (.csv) format with at least an ID column, a column with a description you could use for your requirement Description column, and, optionally, a third column for extra information, such as a name for each requirement.
-
If you have not already done so, choose Import + > Requirements in the Eggplant Generator menu on the left, or click Import in the top right corner of the Collections page. The Import requirements document page opens with the 1 Select file tab in focus.
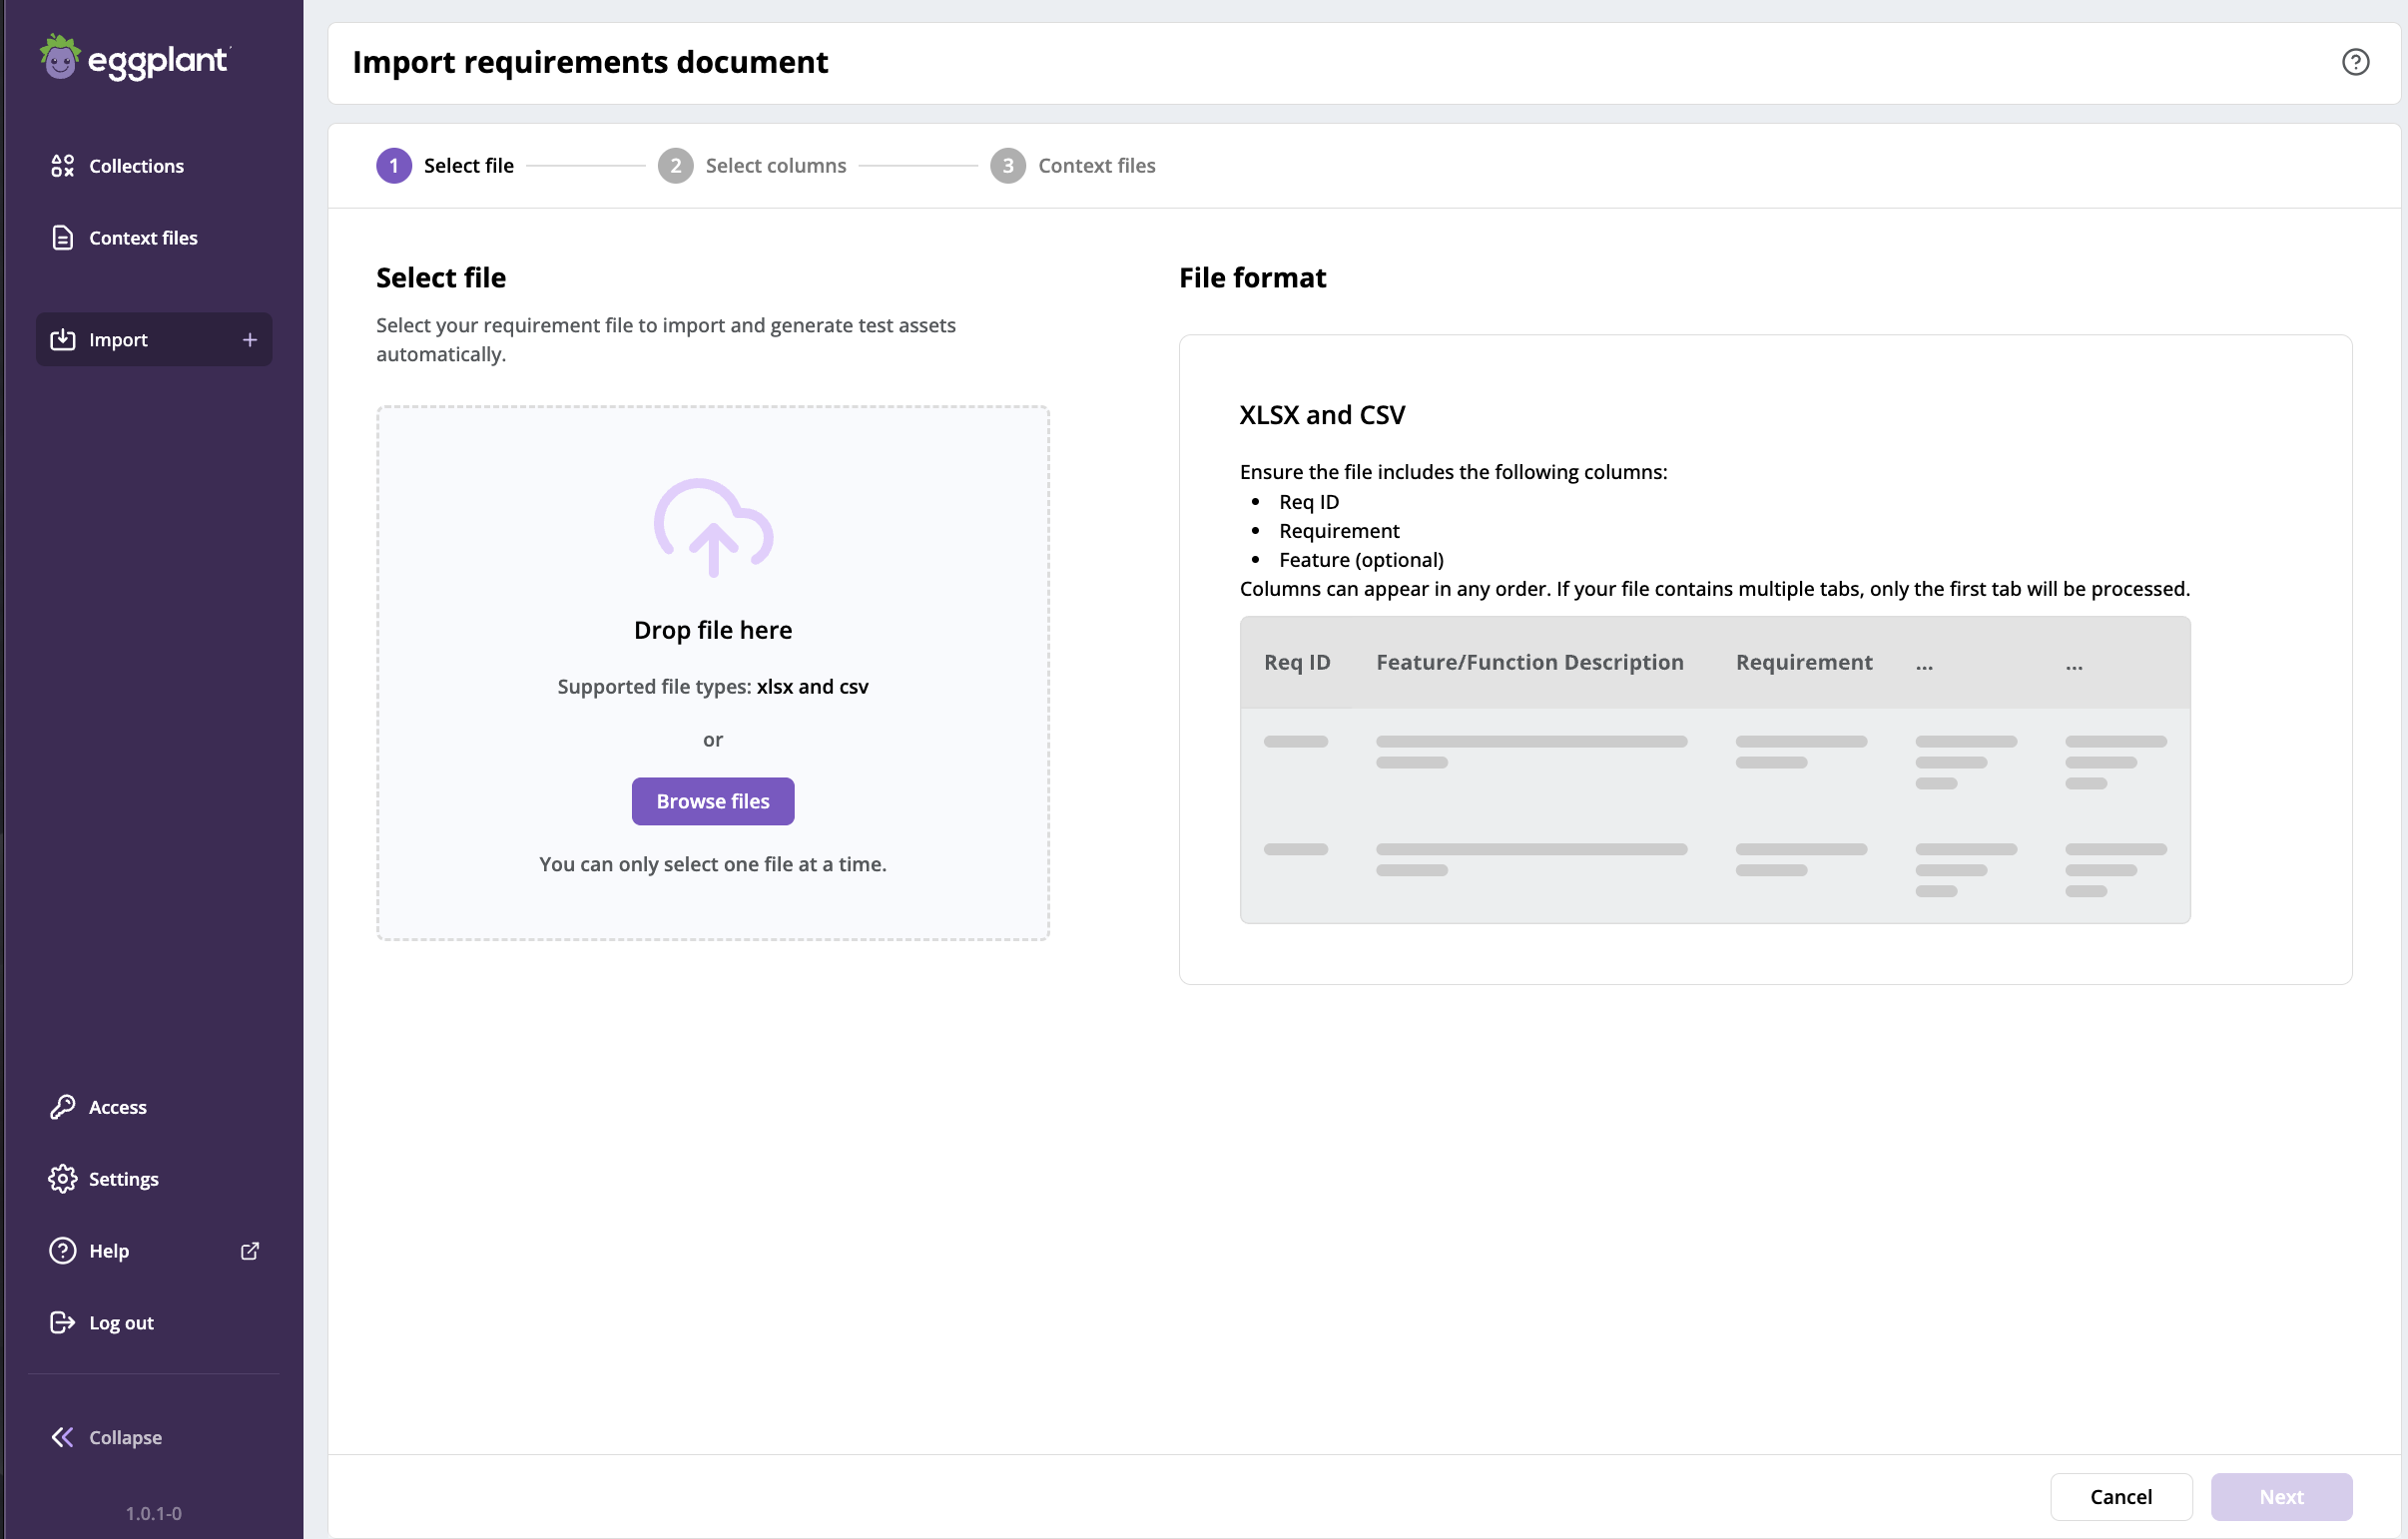
Step 1 in the Import requirements document process where you select and upload your requirements file
-
Upload the requirements document by dragging it, or browsing to and selecting it, in the Drop file here box, below Select file. When you do, the file name and size display in the box. A Preview of your imported document replaces the file format information on the right side of the page and shows you the imported file's columns.
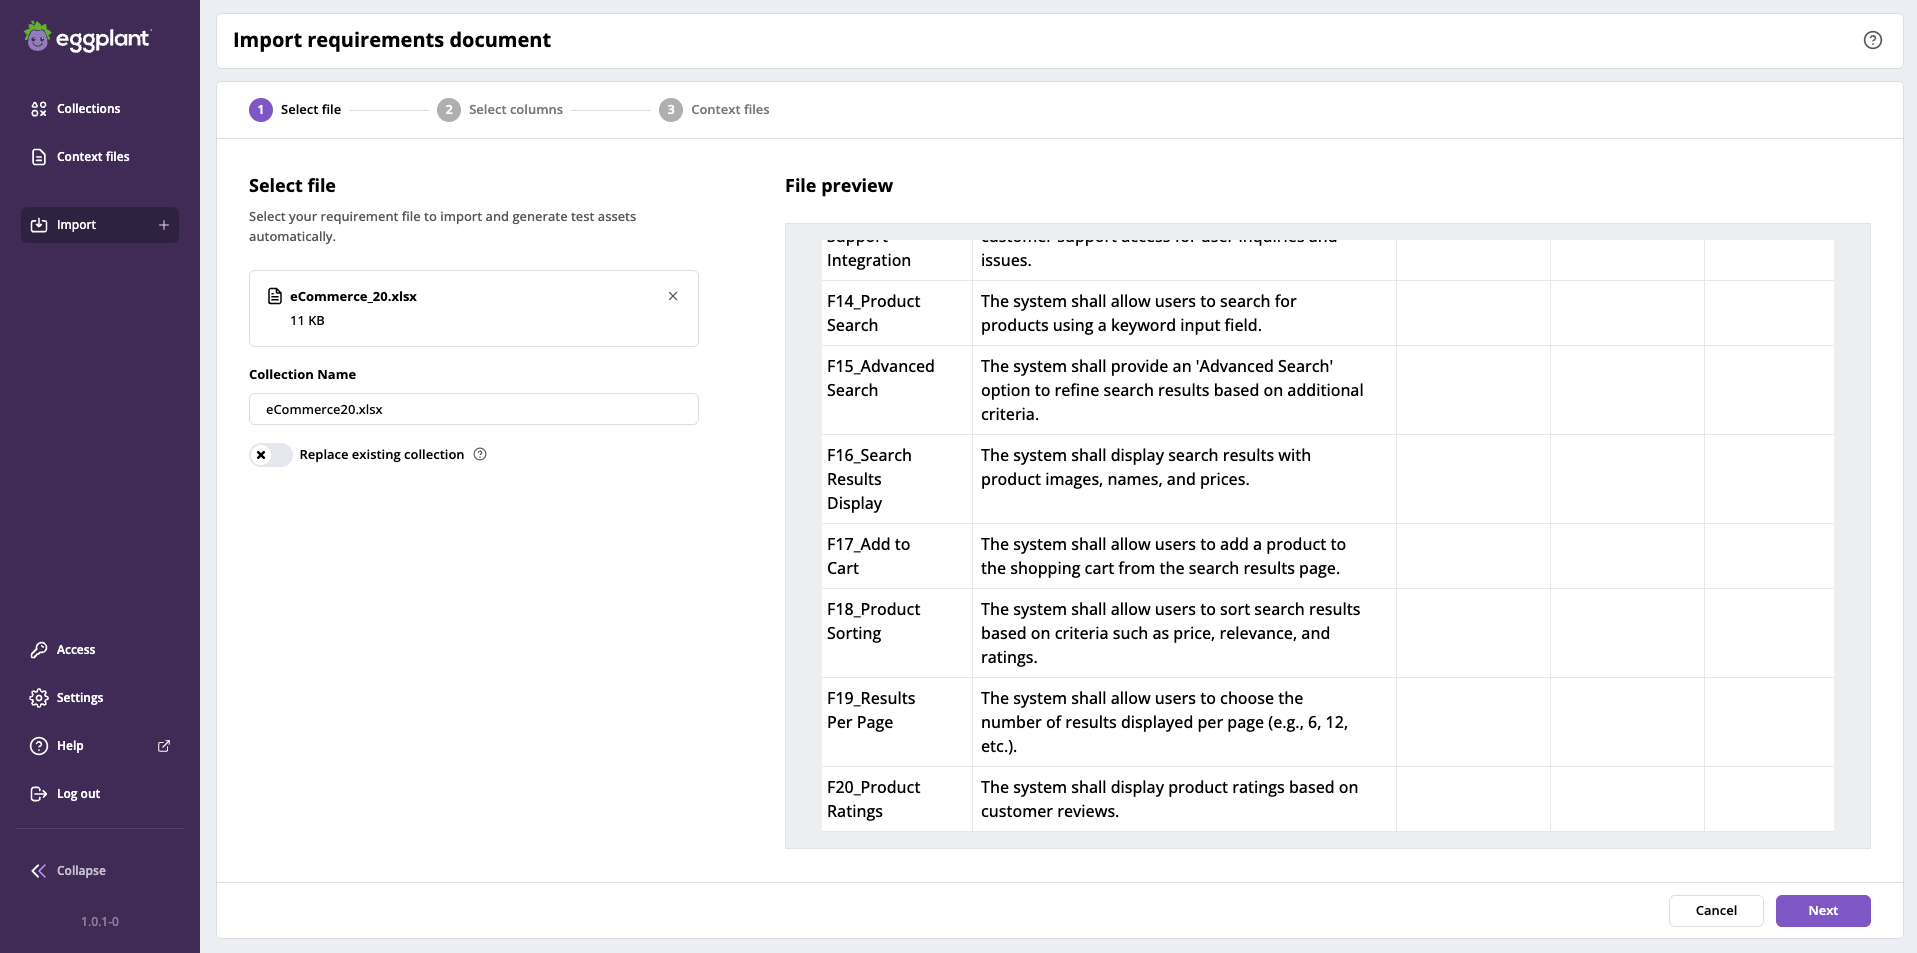
An example of the preview you see when you upload a requirements document in step 1
-
In the Collection name field, provide a name for the new collection or use the default name that Eggplant Generator suggests from the uploaded requirements file name.
-
If you are updating an existing collection, you can enable the Replace existing collection slider, which will overwrite the existing collection with the data imported from this document.
-
Click Next to proceed to 2 Select columns.
Next Steps: 2 Select columns
Please click Next below on this page to continue to 2 Select columns, where you select your requirements document.