Testing with iOS Simulators
The iOS Gateway application can simulate physical devices running iOS 9.0 up to 15.4. You can connect to these simulated devices in Eggplant Functional and run tests as you would on a physical iPhone or iPad. Follow these steps to get started.
Connect to Simulators in Eggplant Functional
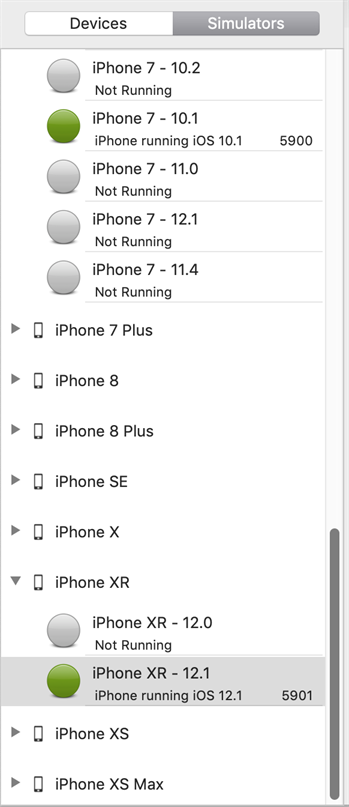
In iOS Gateway, make sure that the Devices/Simulators pane is in Simulators context.

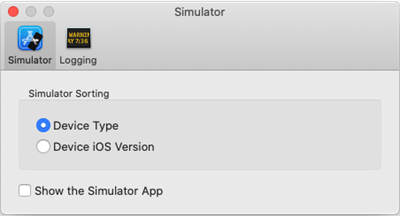
To change how the available simulators are sorted, go to iOSGateway > Preferences > Simulator. You can sort by device type or iOS version.

Select the device and iOS version combination that you want to simulate from the list, then click Start in the General tab.
In Eggplant Functional, open the Connection List from the Connection menu.
Create a connection to the simulator. The simulated device’s IP address displays in the title bar of the main iOS Gateway window. The port number displays in the Simulators list in the iOS Gateway UI.
To work with multiple simulators, repeat steps 2-4 as needed.
noteThe more simulators you have running at once, the more performance can degrade.
Create or Delete Simulators
You can create and delete iOS simulators as needed. The types of simulators your can create are determined by the active version of Xcode and the OS version running on your Mac.
Step by Step: Create a Simulator
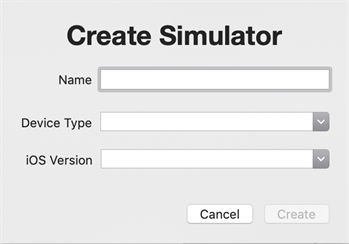
To create a new simulator, go to Simulators > Create. The Create Simulator dialog window opens.

Name your simulator, then select the Device Type and iOS Version that you want to simulate. Click Create.
Now, iOS Gateway creates the simulator and adds it to the Simulators list, grouped with simulators of the same device type or iOS version (depending on how you've chosen to sort the list).
Delete a Simulator
To delete a simulator, select the simulator you want to delete in the Simulators pane, then go to Simulators > Delete Selected.

The remove simulator window opens. Click Remove to delete the selected simulator.
Apps on Simulators
You don't install .ipa files on an iOS simulator like you do on a physical iOS device. Instead, you install compressed .app bundles in .zip format.
Create an iOS App to Install on Simulators
In Xcode, run your project on an iOS Simulator. Wait for the iOS simulator to display your application.
Compress the .app file produced at this location:
~/Library/Developer/Xcode/DerivedData/<AppName>-<some appendix>/Build/Products/Debug-iphonesimulator/<AppName>.appi.e.,
/Users/mobileqa/Library/Developer/Xcode/DerivedData/MyApp-glsaqcpwolnnmaedrcqfqfnedoop/Build/Products/Debug-iphonesimulator/MyApp.appTo compress a .app file in the Finder on a Mac, right-click its icon and select Compress.
Use the compressed .zip file for installing your app onto an iOS simulator for testing.
i.e.,
InstallApp ResourcesFolder("MyApp.app.zip")
Install Apps on Simulators
To install an app on a connected simulator, follow these steps.
- Go to Apps > Install Application.
- Find and open the app you want to install from your Mac.
- The app appears in the list of installed apps on the right side of the iOS Gateway window.