The overall process of Eggplant Automation Cloud deployment is outlined below. Read through this outline before beginning your Eggplant Automation Cloud installation. You'll need to design, set up, and test your network, then install Eggplant Automation Cloud software on the machine you'll use as the Eggplant Automation Cloud server.
システム要件
Eggplant Automation Cloud can run on Windows, Mac, and Linux, provided you're using a supported distribution and supported browser.
Supported Operating Systems
Windows: Windows 10, Windows 8, Windows 7, Windows Server 2016, Windows Server 2012, Windows Server 2008
Mac: macOS 10.12. OS X 10.11, OS X 10.10, OS X 10.9
Linux: Red Hat Enterprise Server 6 or later (and compatible distributions)
Supported Browsers
- Internet Explorer 11
- Microsoft Edge
- Recent versions of Google Chrome
- Recent versions of Firefox
- Recent versions of Safari
Prepare to Install Eggplant Automation Cloud
- Design a network infrastructure. It's important to have a clear picture of this network in mind before beginning the Eggplant Automation Cloud setup process.
Best practice is to place all the SUTs you intend to use with Eggplant Automation Cloud on a private subnet with the Eggplant Automation Cloudserver as the only access point. However, there's no requirement that you use such a configuration. Work with your network administrator to establish the network configuration that's appropriate for your environment.
- Configure the Eggplant Automation Cloud server machine. This step does not include installing the Eggplant Automation Cloud software.
- Set up the network. Set up your test systems and any other network infrastructure appropriate to your environment, such as a router for the Eggplant Automation Cloud network, network interfaces on the Eggplant Automation Cloud machine, and so forth.
- Test the network. Make sure that all necessary communication is possible.
- Install the Eggplant Automation Cloud software. Follow the appropriate instructions for your operating system. Note: The installer package includes both Eggplant Automation Cloud and Eggplant Manager. Each application requires a separate software license.
Step by Step: Installing Eggplant Automation Cloud
These instructions guide you through installation:
- Download the Eggplant Automation Cloud installation package from the Eggplant Downloads website.
- Open the installation package and run the Setup wizard.
- On Mac and Windows, double-click the installation package.
- On Linux, open a terminal, navigate to the downloaded installation package file, and enter the following commands:
Extract commands:
gunzip ./<name_of_file>.tgz
tar -zxvf ./<name_of_file>.tar
Run command:
sudo ./<name_of_file>.run
Note: The Eggplant Automation Cloud Setup wizard also installs Eggplant Manager. Your license determines which features you can use. - Proceed through the Setup wizard. Setup installs and configures Eggplant Automation Cloud, and starts its processes. If there wasn't a license for a previous install on this computer, the Setup wizard displays the License Key panel, where you can enter your license key. If there was a previous installation, the browser displays the Eggplant Manager login page.
If you need an Eggplant Automation Cloud license, contact your account manager or Eggplant Support.
- Follow the on-screen instructions to complete and close the Setup wizard. The Eggplant Automation Cloud processes are now running.
- Continue to Initial Login for login instructions.
Initial Login
If you are installing a new Eggplant Automation Cloud server, the first thing you'll need to do is enter a license. You can get your license through Greenhouse, Eggplant's web-based license management system. If you need to purchase licenses, contact your account manager or sales@eggplant.io.
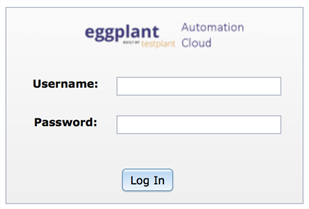
Navigate to Eggplant Automation Cloud through a browser on the computer where Eggplant Automation Cloud server is running. When you start the Eggplant Automation Cloud server, it launches your default browser and takes you automatically to the Eggplant Automation Cloud login page. If the current machine is unlicensed, you'll need to enter a valid license key before logging in:
If you don't see the login screen, go to 127.0.0.1:8080 in your browser.
Log in as administrator using the following credentials:
- Username: admin
- Password: admin

After your initial login, you can change your administrator credentials and create additional accounts as necessary. To learn more about the primary admin account and other administrative features in Eggplant Automation Cloud, see Eggplant Automation Cloud Administration.
The first time you log in, you'll be directed to the Settings tab, where you can enter network configuration information specific to your environment, if necessary. You can also manage your Eggplant Automation Cloud licenses on this page.
Manually Starting Eggplant Automation Cloud
You can start or stop Eggplant Automation Cloud processes from the command line.
Windows
Use the start.command script or the stop.command, both of which can be found in /TestPlant. Use the uninstall script to uninstall Eggplant Automation Cloud.
Mac
Use the start.command script or the stop.command script, found in /Library/TestPlant. Use the uninstall script to uninstall Eggplant Automation Cloud.
Linux
Use the start or stop command script, found in /opt/TestPlant. Enter the appropriate command:
sudo service eggPlantManager start (or stop)