Jira is a project and issue tracking software used by software development teams to plan, track, and release software. To use Jira with Eggplant Manager, you must first configure Eggplant Manager to authenticate with Jira using either Basic or OAuth authentication. After you create the integration between Jira and Eggplant Manager, you can create issues in Jira using Eggplant Manager Jira exports. You can also attach files to these issues during the Jira export.
The information you need to configure the integration between Jira and Eggplant Manager, then create issues in Jira using Eggplant Manager Jira exports, is described below.
Using Basic Authentication
Complete the following steps to integrate Eggplant Manager with Jira using Basic authentication:
- Select <username> > Account Settings from the upper right side of the Eggplant Manager UI to open the Account Settings page.
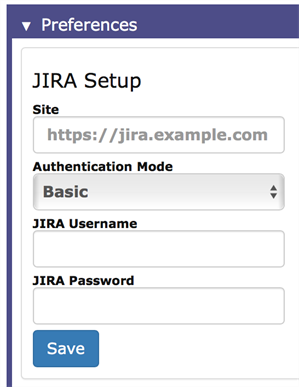
- Beneath Jira Setup, located in the Preferences panel, make the following entries:
- Enter the Jira server link, including the port and path. For example, you might enter https://jira.myserver.com:8443.
- Select Basic from the Authentication Mode drop-down menu.
- Enter your Jira credentials in the Jira Username and Jira Password fields. Consult with your Jira system administrator to obtain these credentials.
- Click Save to save your entries or Reset to clear all stored Jira credentials.
- After you click Save, look for a new panel that shows your the username as it appears in your Jira profile.
Your Eggplant Manager integration with Jira using Basic authentication is now ready to use.
Using OAuth Authentication
You can this method to configure the integration to communicate between Eggplant Manager and Jira servers without sharing any user credentials. Complete the following instructions to integrate Eggplant Manager with Jira using OAuth authentication.
Configure the Application Link
For this integration to work properly with OAuth authentication, you must set up a communication link between Eggplant Manager and the Jira server. You must do this before configuring Eggplant Manager to authenticate with Jira using OAuth.
Complete the following steps as a Jira Administrator:
- Log on to your Jira server as a Jira Administrator.
- Select Applications to open the application settings.
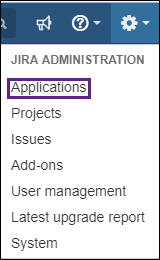 Note: Provide your Administrator credentials if an Administrator authentication form appears.
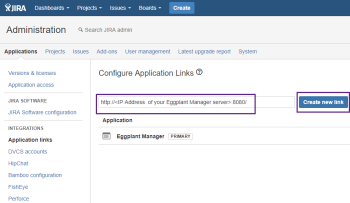
 - From the left menu, click Application Links located beneath Integrations.
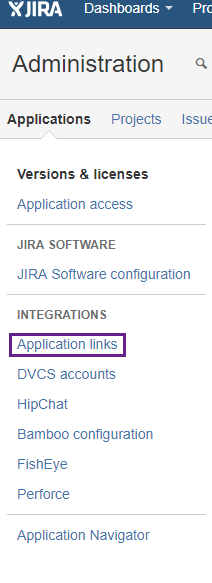
- Enter the URL to your Eggplant Manager server. Include the IP address and the port number (normally 8080) of the computer in your environment where Eggplant Manager is running. Click Create new link after your finish your entry.
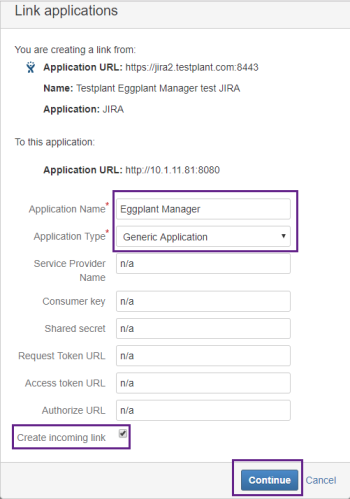
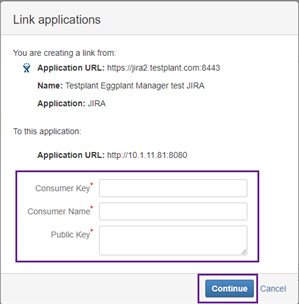
- Fill out the Link applications form as shown here. The fields that are set to n/a must be filled in to create the link, but are not used for the Eggplant Manager integration. Make sure to select the Create incoming link checkbox. Click Continue after you fill out this form.
- After the Link applications form appears, do the following:
- Navigate to Admin > System Preferences in Eggplant Manager.
- Copy the Jira OAuth Consumer Key and Jira OAuth Certificate Public Key from the Eggplant Manager System Information panel into the Consumer Key and Public Key fields on the Jira Link applications form.
- Click Continue in the Link Applications form after entering this information.
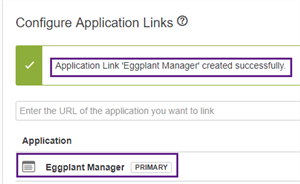
- Look for the following success message to appear after completing the above steps:
Configure OAuth Authentication
Complete the following steps to integrate Eggplant Manager with Jira using OAuth authentication.
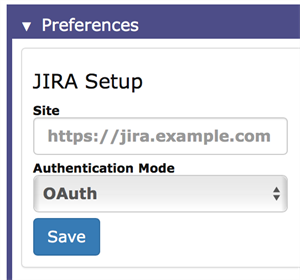
- Select <username> > Account Settings from the upper right side of the Eggplant Manager UI to open the Account Settings page.
- Beneath Jira Setup located in the Preferences panel, make the following entries:
- Enter the Jira server link, including the port and path. For example, you might enter https://jira.myserver.com:8443.
- Select OAuth from the Authentication Mode drop-down menu.
- Click Save to save your entries. A new panel appears, prompting you to take authorization steps.
- Click the here link in the panel.
- Log in to Jira, if required, after a new tab opens. Then click Allow:
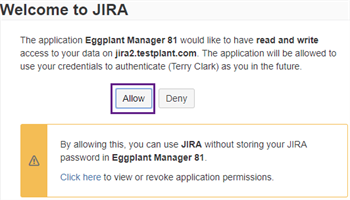
- Look for a message similar to the following: OAuth Authorization complete. You can close this tab and return to Eggplant Manager.
- Close the tab and return to the previous tab (the Eggplant Manager UI). Click Complete in the Jira Setup section.
- Look for a new panel showing your username as it appears in your Jira profile.
Your Eggplant Manager integration with Jira using OAuth authentication is now ready to use.
Creating Issues in Jira
After configuring the Eggplant Manager integration with Jira, you can use Eggplant Manager to export test run report information as issues into Jira. Use the information located in Viewing Eggplant Manager Test Results as a reference when working with these Jira exports. Use the following information to export test run report information into Jira from Eggplant Manager:
- Log in to Eggplant Manager.
- Click Results, then select a test run.
- Review the components of the test run.
- Right-click a test run in the browser and view the context menu. The amount of report information available to export decreases as you select locations lower in the browser structure. Select Jira Export.
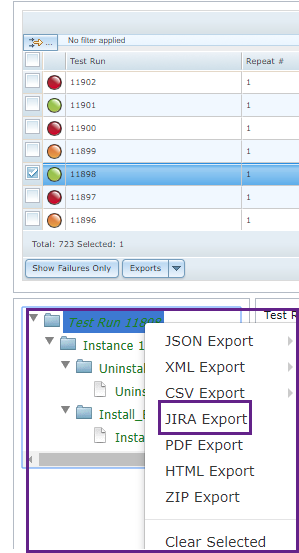
- After the Jira Export panel appears, select a project from the drop-down menu. For this example, select Bug from the Issue Type drop-down menu. Other available selections are Improvement, Task, Sub-task, New Feature, or Epic.
- Add a summary and description to this export. You can also click Attachments and follow the instructions to add attachments to this issue. Click Submit when you are finished entering your issue information.
- Look for a message similar to this. Note that you can click the provided link to view the newly created issue in Jira:
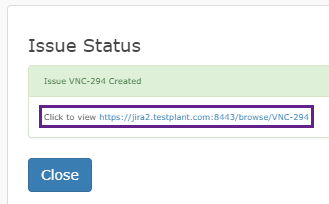
- Click Close when you are finished with the export.
