メインコンテンツまでスキップ
バージョン:23.4

Creating an Image Collection

An Image Collection is a folder of related images that are all acceptable versions of a basic image for use in your Eggplant Functional testing. For example, an Image Collection might contain a "normal" image of a button, a selected version, and a disabled version.

There are two ways to create an image collection:

Step-by-step instructions for both methods follow.

Step by Step: Creating an Image Collection During Script Creation

This section talks about how to create an image collection with no previously captured images. This can be done during script creation using the assisted scripting functionality of Eggplant Functional.

  1. Capture an Image

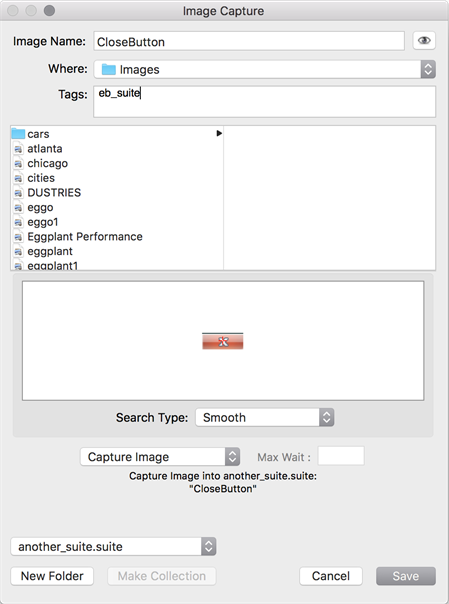
    Open a Viewer window showing an active connection to your system under test (SUT). Enter Capture Mode and move the capture area to select the image you want to capture. In this case, a browser window is open in an active state, so that the close button appears red.

    Choose the action you want to execute in your script with that image. For example, choose the Click icon on the Viewer window to capture an image of the close button on a window and click it.

    Step 1 of Eggplant Functional Image Collection process

    The Image Capture panel opens. Name the image. When naming, keep in mind that this will be the name of your image collection (though this can always be changed later). Add Image Tags, if you're using them. Click Save. Three things happen simultaneously:

    • The captured image is saved into the images folder of your suite with the name specified.
    • The action executes on the SUT (in this case, the close button is clicked on the open browser window).
    • A line of SenseTalk code is inserted into the script (in this case, Click "CloseButton" ).

    In the suite, the captured image can be seen in the Images pane, and the SenseTalk code is shown in the script editor for the current script.

  2. Capture a second image to create the collection

    On the SUT, make sure that the second instance of the image is present on the screen. In the Viewer window, go into capture mode, and move the capture area so that it highlights the image you want to capture.

    Capture a second image using the Capture Image icon in the toolbar of the Viewer window.

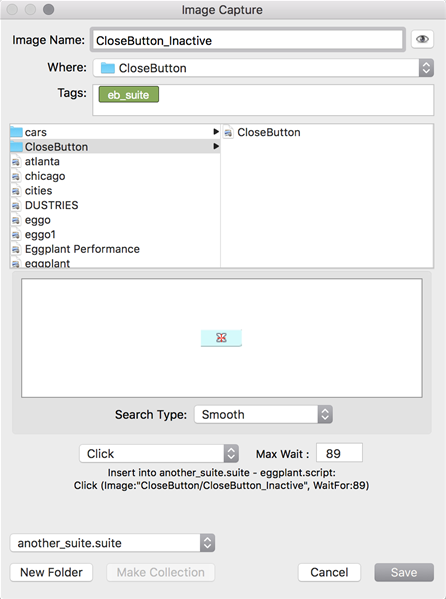
    The image capture panel opens. In the file browser area of the panel, select the first image you captured. The Make Collection button at the bottom of the panel is enabled. Click Make Collection.

    Step 2 of Image Collection process in Eggplant Functional

    This creates a collection folder within your images folder, and move the first image into the collection folder. Rename the image uniquely (in this case CloseButton_Inactive), to distinguish it from the first image. Then click Save.

    Step 3 of Image Collection process in Eggplant Functional

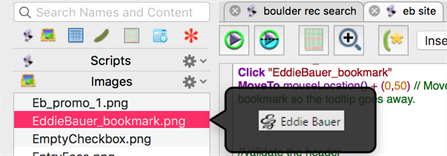
    The image collection is now visible in the Suite, both in the Images pane and Image Viewer.

Step by Step: Creating an Image Collection During Run Time

This section talks about how to create an image collection during runtime using the Image Update Tools.

The below script and previously captured image will be used in this example:

Initial Script and Image in Eggplant Functional

If you are doing this intentionally to create a collection, then open a remote connection in the Viewer window that is active, and bring up the instance of the image that you want to add to a collection using the initial image. Run the line of code referencing the image in question.

Otherwise, run a script, and if an image is encountered that cannot be found with the current search settings and you would like to use an Image Collection to resolve the issue, follow the steps below.

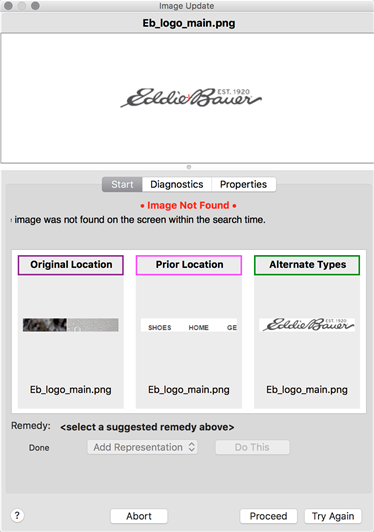
  1. When the image search fails, the Image Update panel opens.

    Initial Image Update Panel in Eggplant Functional

  2. Select one of the images from the center of the panel. The Remedy changes depending on the option you choose. Available remedies are:

    • Apply Fix: This option performs the selected fix to the current image.
    • Replace Image: This option automatically recaptures the image without changing any of its properties. The search is then run again.
    • Add Representation: This option adds a new representation of the image, with a different name, to the current suite. The new representation is added to the same collection as the original image.
    • Capture to Helper: This option captures a new version of the desired image and saves it in a helper suite.

    Select the Add Representation Remedy, then click Do This. This creates an image collection or adds to an existing collection.

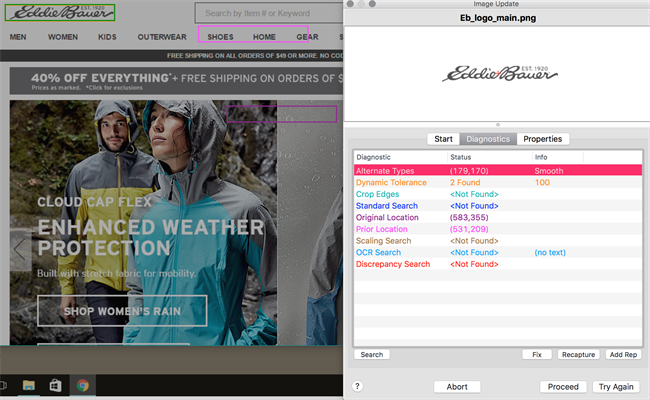
    You can also click the Diagnostics tab to get more information about the results of the tests Eggplant Functional has run to find your image:

    Image Update Panel 2 in Eggplant Functional

  3. The Image Update panel conducts a variety of diagnostic searches to see which search types can be used to find the image, the results of display in the panel.

    The locations of found images are highlighted in the Viewer window in colors corresponding to the different search types and settings that the Image Update panel is using.

    It is possible that multiple search types will find the image, or that multiple instances of the same image will be found with a single search type.

    At this point there are a few options for how to create the image collection.

    • If there is only one instance found and you wish to use that search type to create your image collection, select it from the list. This enables the Fix, Recapture, and Add Rep buttons.

      Choose Add Rep, which stands for Add Representation. This is what creates the collection folder within the images folder of the current suite and adds this newly captured image to it.

      Click Try Again to continue execution of the script using the newly created image collection.

    • Select the highlighted square in the Viewer window that corresponds with the image you want to use to create the collection. Click the arrow to the right of the image capture box to open a drop-down menu.

      Select Add Representation <Image Name> and Try Again to create the image collection and continue execution of your script using that new collection.

      The name used for the new image is determined by what is in the New Representation name field on the Start tab of the Update Image panel. You now have an image collection, comprising multiple images, to use in your searches.