Transaction Logging
Transactions are one of the main ways to gather performance statistics, so it is important to include start and end transaction commands in a script. Most script generation features in Eggplant Performance Studio will automatically insert these commands into a generated script, if the transaction information is available.
Transactions can be recorded in real-time using the Transaction Log.

Some of the built-in script recorders available in Eggplant Performance Studio use this dialog to enable you to start and stop transactions as you perform the actions that you are recording.
If a built-in script recorder has launched the Transaction Log, it will appear with an additional Stop Recording button:
Launching Transaction Log Separately
If you are creating a recording using software other than Eggplant Performance, you can launch the Transaction Log separately and then use the log.event file it saves to insert the transactions into the script when generating in Studio. Go to Tools > Record Transaction Log File to open the log.
Recording Transactions
Typically, transactions are recorded at the same time as you perform user actions in the browser or interface you are trying to record for a script. Each transaction should start before and end after one or more user actions which have significance for performance testing, such as logging into a website, or searching a database. When running the generated script in a test, the time taken for each transaction will be reported.
- To record the start of a transaction, enter an ID and optional Comment, and then click the Start Transaction button
- To record the end of a transaction, click the End Transaction button
The ID you enter is what will appear in the script inside the StartTransaction() and EndTransaction() method calls. It will also be used in Test Controller and Analyzer to identify the transaction when reporting timings.
Click the Details button to see a list of recorded transactions, and extra options.
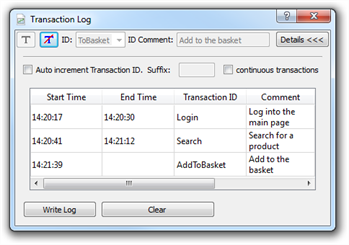
Auto increment Transaction ID
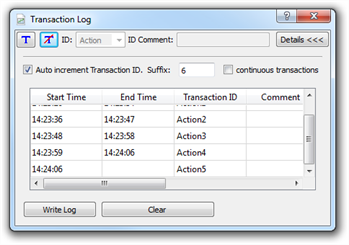
If the Auto increment Transaction ID option is selected, then when a transaction is started, it will have the number in the Suffix box appended to the end of the ID. The number will increment by 1 each time the Start Transaction button is clicked. You can change the Suffix number at any time by typing in the box.
Continuous Transactions
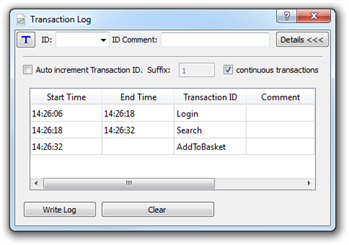
If the Continuous transactions option is selected, then the End Transaction button will be hidden. In this mode, whenever Start Transaction is clicked the current transaction will end and a new one will start immediately.
Saving the Output
These options are not available if a built-in script recorder has launched the Transaction Log, because Studio will automatically use the output in conjunction with the recording to generate the script.
To save the output as a .event file, click Write Log, or close the Transaction Log window. A Save File window will appear.
The .event file can be imported into Studio wherever a transaction log file is requested.
Viewing the .event File
-
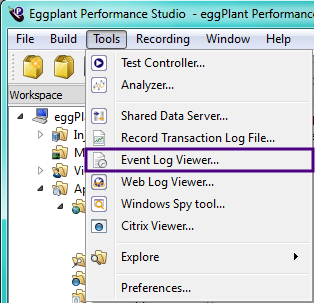
In Studio, click Tools on the menu bar, and then click Event Log Viewer.
-
Drag the
.eventfile from Windows Explorer into the Event Log Viewer window.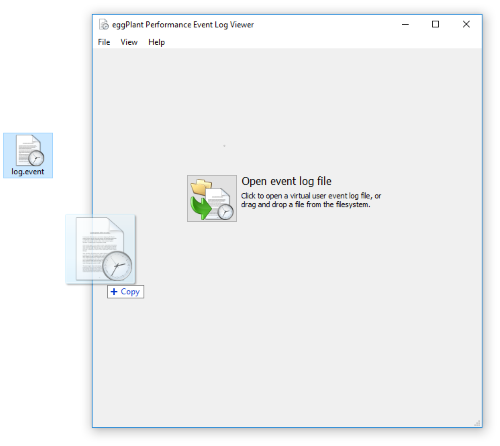
-
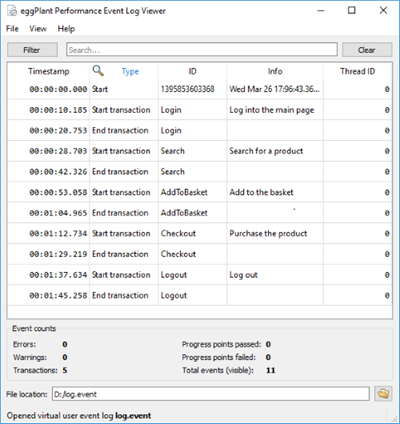
The Start transaction and End transaction events appear.
