Requirements Traceability
DAI's Requirements Traceability feature enables you to import your application requirements, which are typically managed in external systems, into DAI and connect them directly to test cases and results. This integration helps you to ensure that each requirement is thoroughly tested and properly accounted for, providing clear traceability between a requirement and its corresponding test cases and results. You can also generate a requirement coverage report based on your successful tests and view it in DAI.
Licensing the Requirements Traceability Feature
The Requirements Traceability feature is not enabled by default. Before you can use it, you must obtain a license and then add it into DAI.
The Requirements Traceability feature requires a license. However, the license is free at this time.
The following steps describe how to request and add a DAI Requirements Traceability feature license:
-
Contact our Customer Support to request a Requirements Traceability feature license for DAI.
-
When you receive the license, navigate to System > Licenses and enter it as described in Adding licenses on the DAI License page.
-
Navigate to Controller > Requirements to display the Requirements page.
Importing Requirements
Before you can assign requirements to a specific test case's steps, you must import the requirements to a requirement group within DAI.
Importing requirements into DAI from a file consists of the following three steps:
-
Select file
-
Select columns
-
Group requirements
The top of the Import requirements page shows you which step you are in during the process.
To import requirements, proceed through the three steps as described below.
Step 1: Select file
-
Log into Eggplant DAI.
-
Display the Requirements page by navigating to Controller > Requirements.
-
Click Import requirements. This action opens the Import requirements page to the first step of the import process, which is Select file to import. This is where you begin the process of importing your requirements.
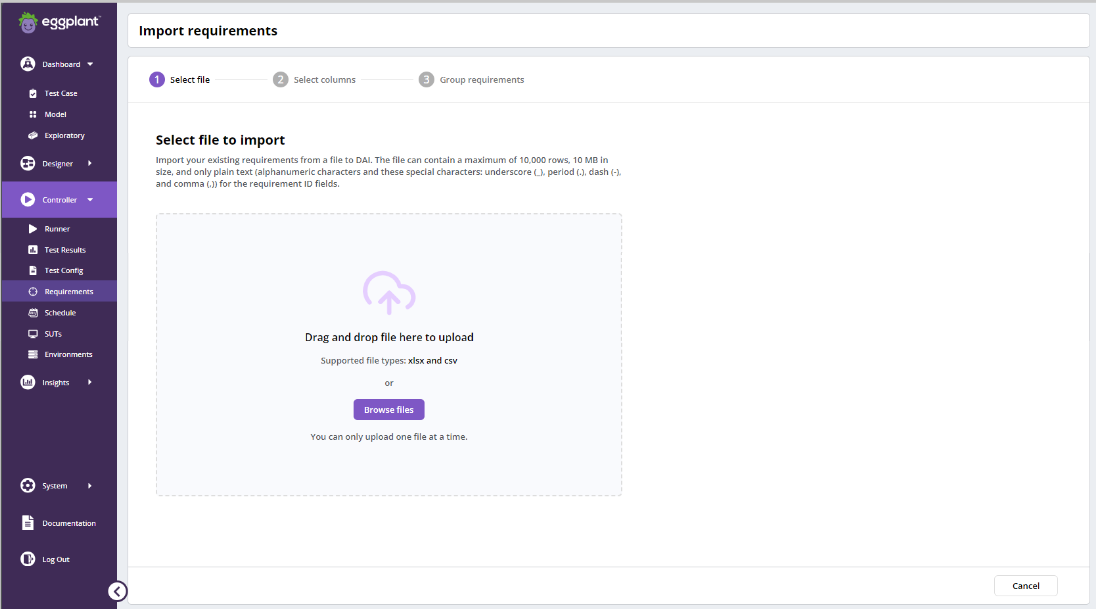
Import Requirements Step 1: Select file
-
Select the file that contains the requirements you want to import. You can either click Browse files to search for the file or drag and drop it directly from your computer folders.
ノート-
The supported file types for import are Micrsoft Excel Open XML Format (.xlsx) and comma-separated value (.csv) format. Ensure the file is formatted correctly before uploading to avoid data mapping issues.
-
The file can contain a maximum of 10,000 rows, or be a maximum of 10 MB in size, and can contain only plain text (alphanumeric characters and these special characters: underscore (
_), period (.), dash (-), and comma (,)) for the requirement ID fields. -
Only upload one file at a time.
-
Step 2: Select columns
A preview of the file you selected for import opens in the Select columns to import step of the import process.
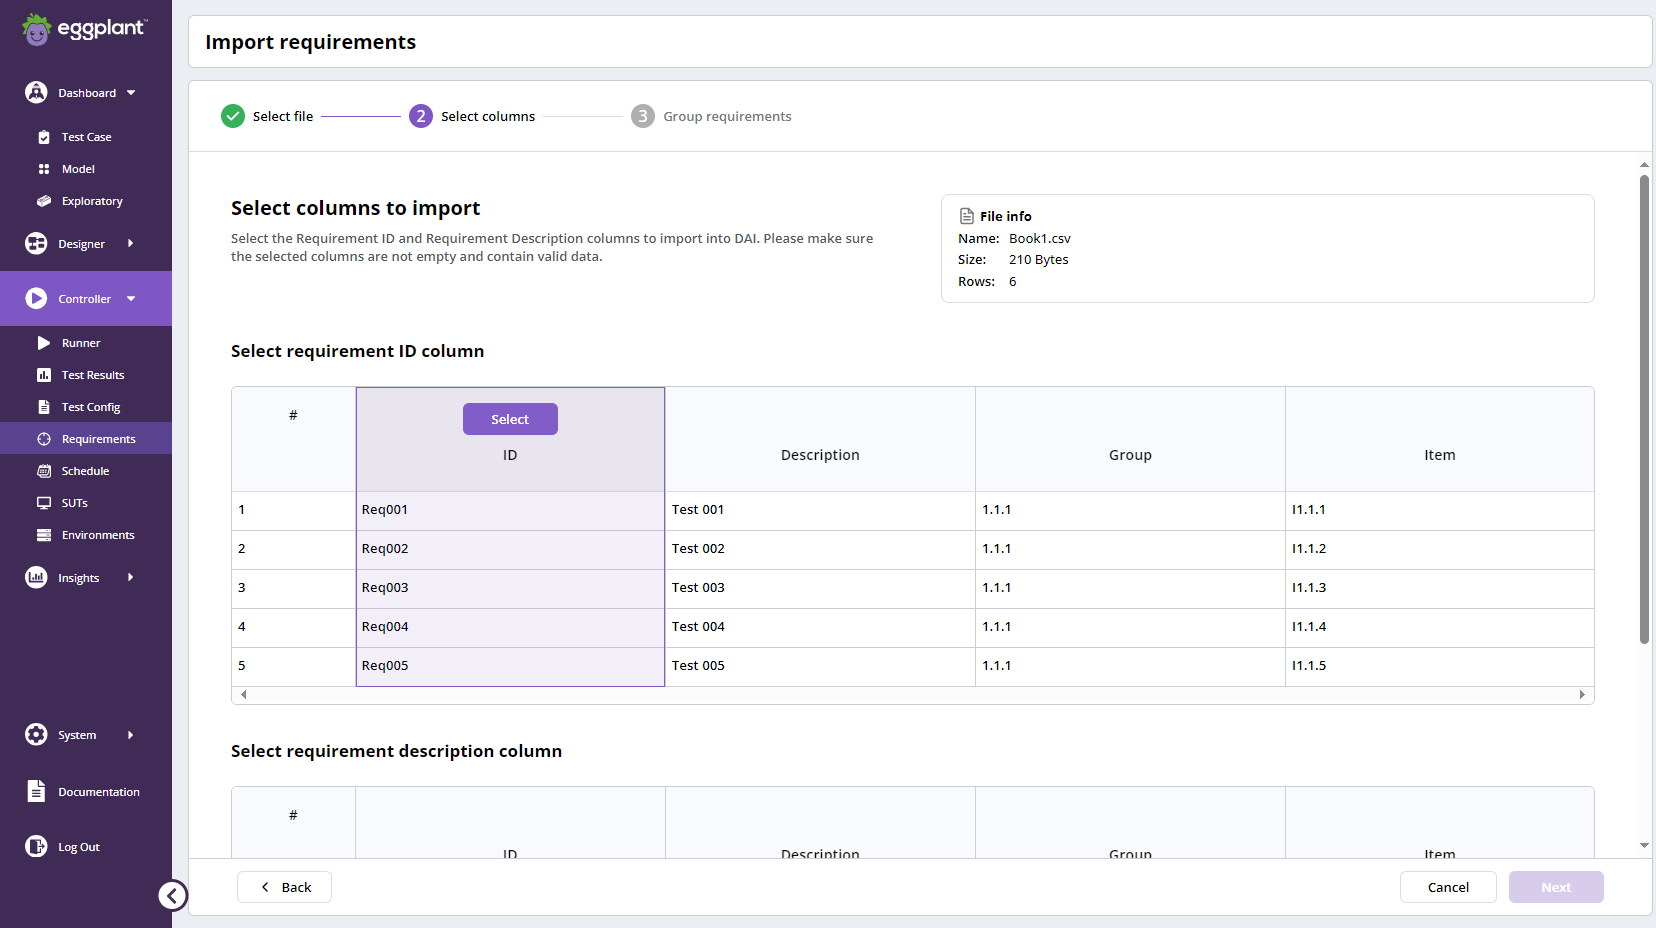
Import Requirements Step 2: Select columns
-
Select the requirement ID and Description columns from the file you want to import by hovering over the respective column in the preview, as shown in the following sample screen, and clicking Select.
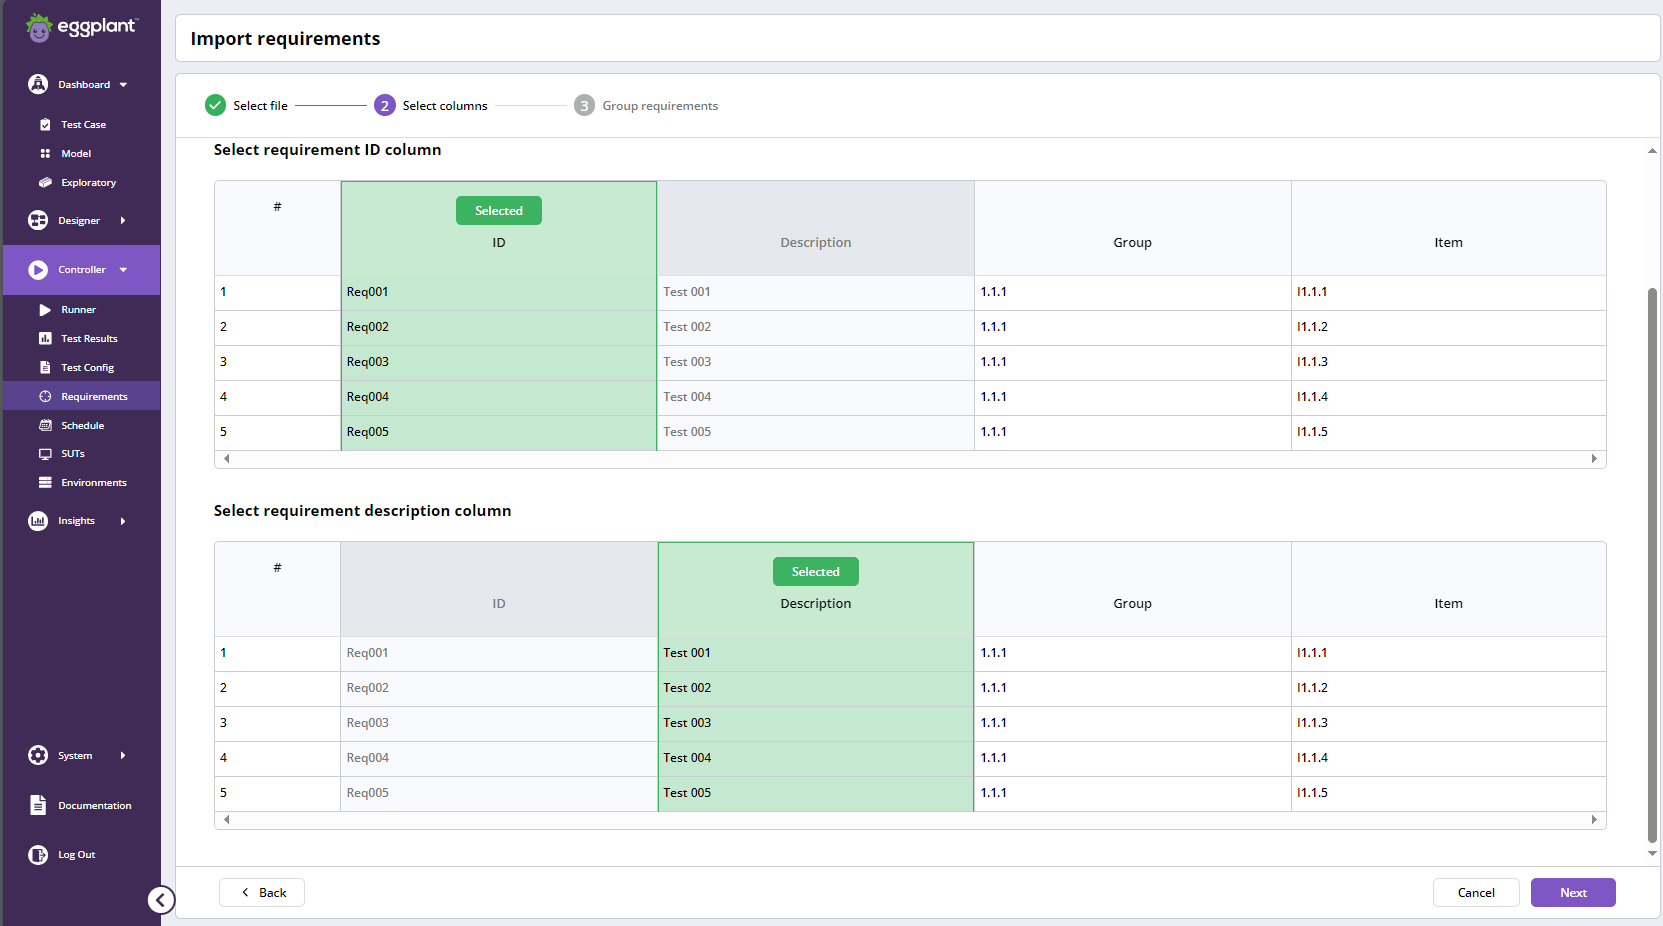
Requirements file columns selected
-
After you select both the requirement ID and Description columns, click Next to proceed to step 3 of the import process.
Step 3: Group requirements
-
Assign the imported requirements to a group. There are two options available: Select an existing group or Create a new group.
ImportantImporting requirements into an existing group replaces the current requirements in the group, which may update or delete them. This deletion also permanently removes the traceability to the associated tests.
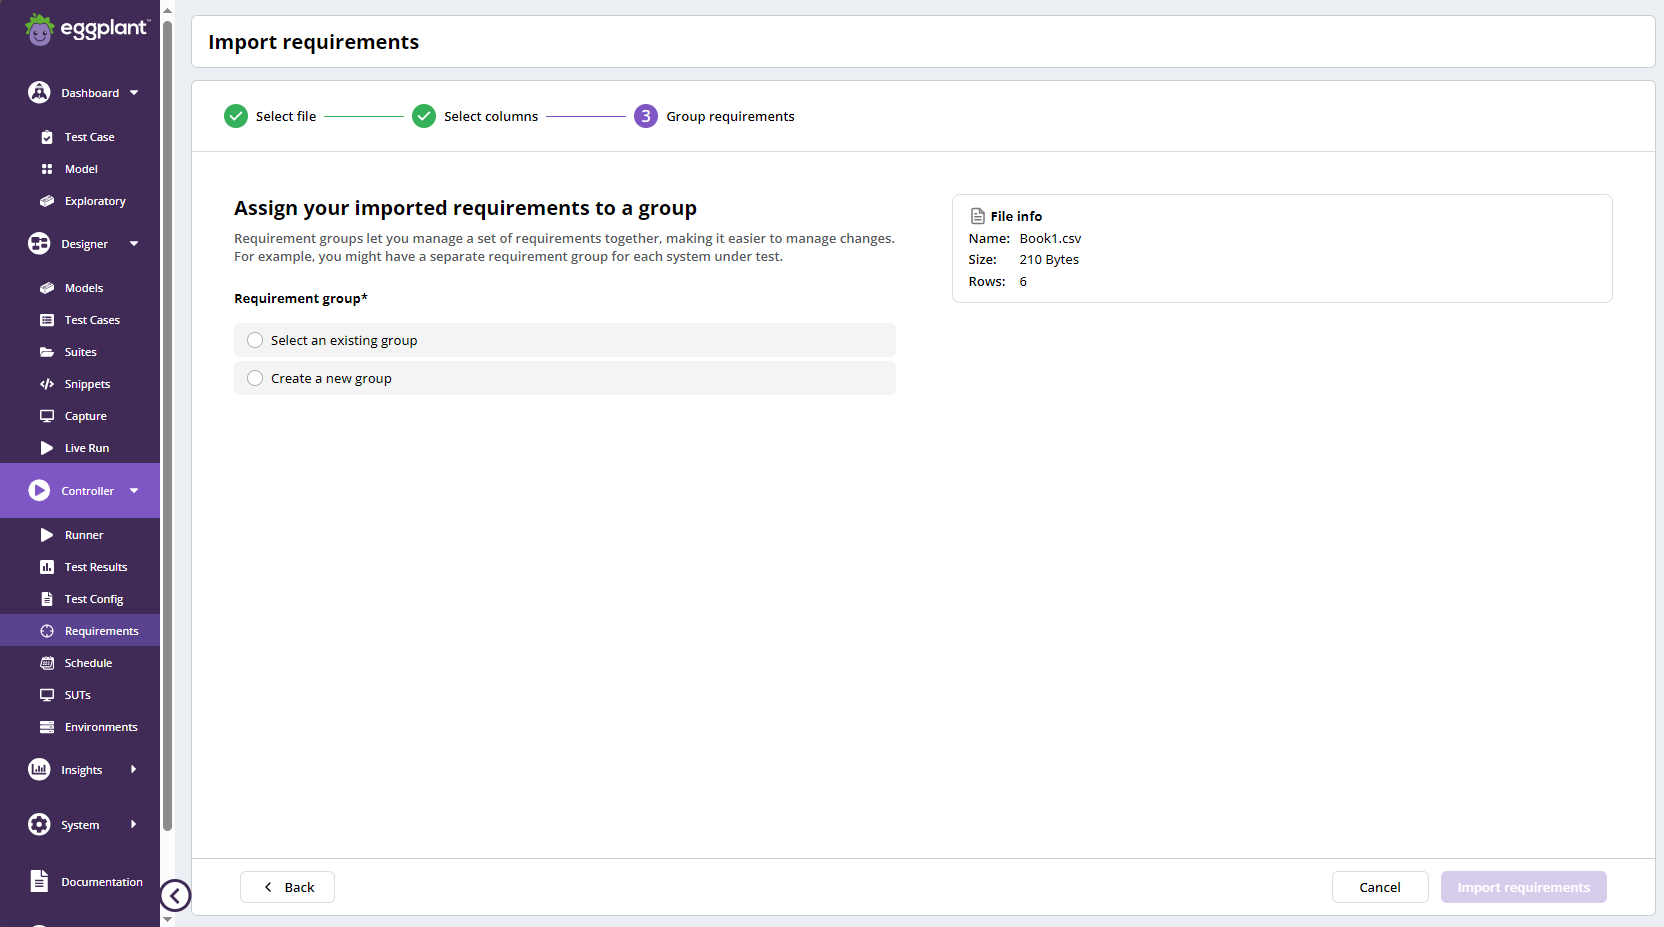
Import Requirements Step 3: Assign requirements to a group
-
After you select the requirement group, click Import requirements in the bottom right corner of the page to import the requirements.
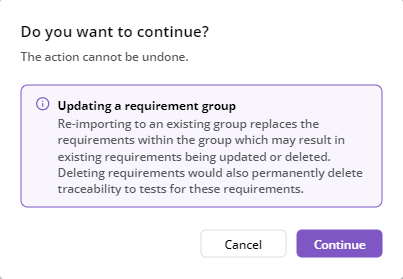
ImportantIf you chose to import your requirements into an existing group, you will be prompted to confirm your selection because of the possibility of overwriting the existing requirements as described above. Click Continue or Cancel to confirm the possible overwrite or not.
Reviewing the Import Requirement Status
DAI assigns one of three statuses to imported requirements: Success, Imported with warning message, or Failure. A description of each status follows:
-
Success: Your requirements imported successfully.
-
Imported with warning message: Your requirements imported successfully, but some rows with invalid entries were filtered, and you see a warning message notifying you about it.
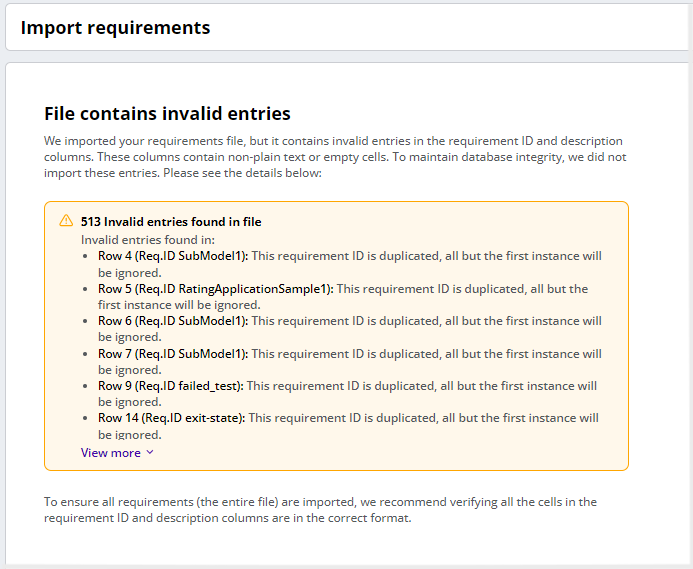
Import requirements warning messages
-
Failure: Your requirements import failed. With this status, you see an error message (like the "Missing requirement descriptions" message shown below), your requirements are not imported, and you are returned to step 3 in the import process. You may need to make adjustments to the requirements file that you previously imported in step 1 before re-importing.
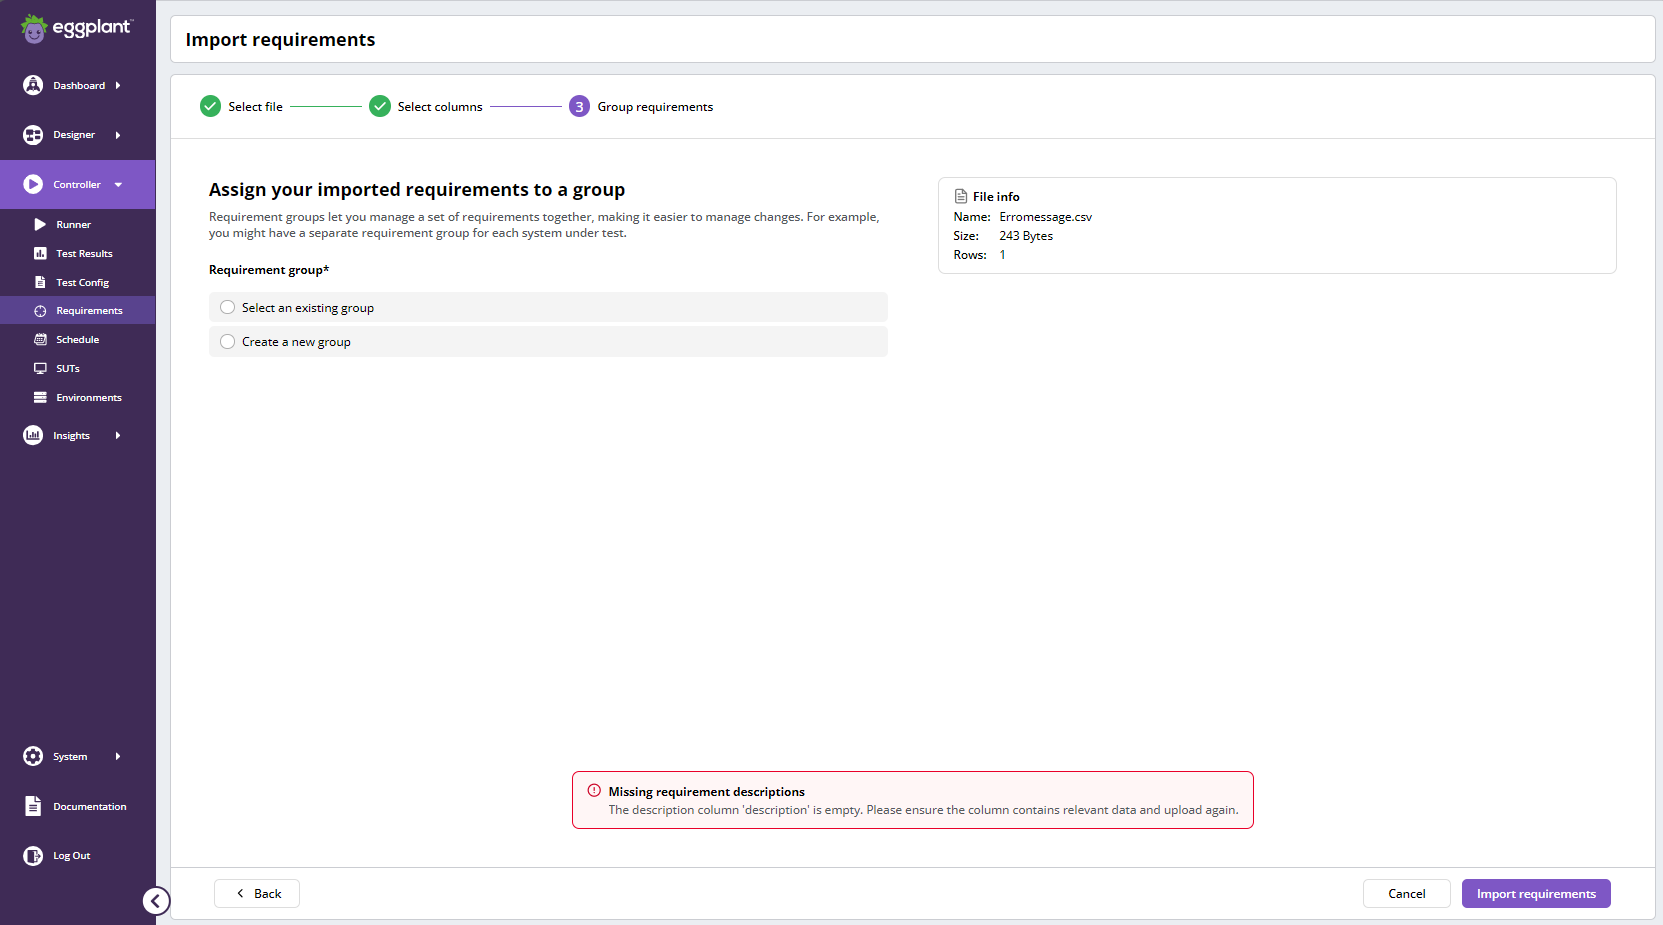
Import requirements failure message
Viewing Requirements
After you import the requirements, you can view them in the Controller > Requirements page. This page provides a clear and organized view of all the requirements in the system, as well as the associated test cases and steps at a glance.
If you find a mistake in the imported requirements, you can always correct it by re-importing the requirements.
Make sure you are not changing the requirement ID or you will lose all the test case steps assigned to the respective requirement.
The Last Updated date, located in the upper-right corner of the table, is the date the requirements were last imported. This date is based on the requirements import, not the assignment of requirements nor the test result status.
Requirements table
Assigning Requirements
Next, you can assign the requirements to the suitable test cases and steps according to your design. Simply, click the expanding button at the end of the row, click Open test case page, and continue from there. See Building Test Cases with Requirements for more information.
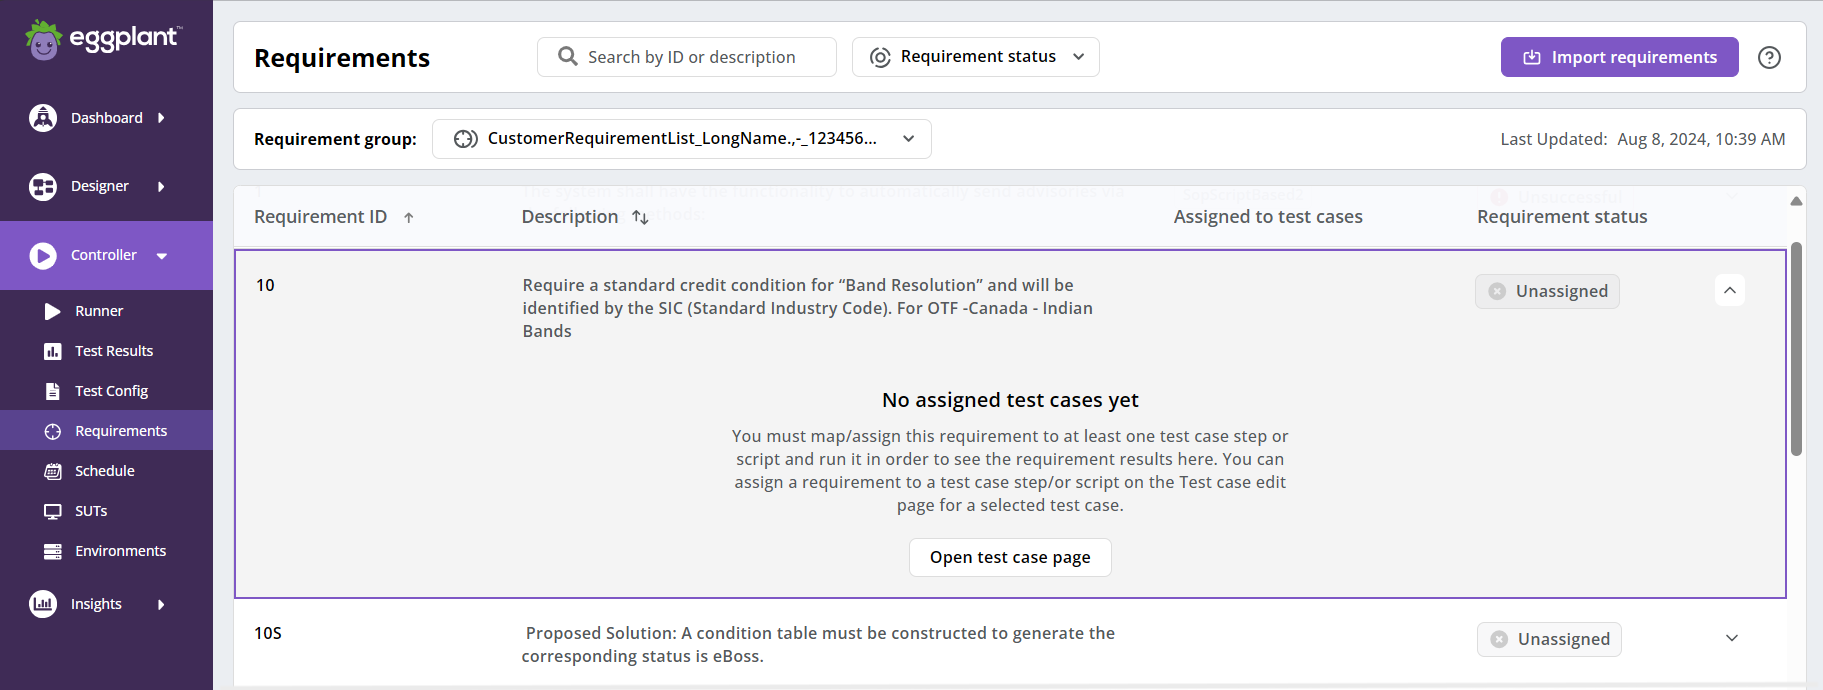
A requirement on the Requirements page showing no test cases assigned yet
After you assign your requirements, you can see the following information about each one in a tabular view:
- Requirement ID: Unique identifier for each requirement.
- Description: A detailed explanation of the requirement.
- Assigned to test cases: A dynamic column displaying the test cases associated with each requirement.
- Requirement status: The current status of the requirement (for example, Untested, Unsuccessful, Verified, or Unassigned).
You can click the Assigned to test cases chip to see a page with details about the corresponding test cases. If there are too many test cases to display, you see an overflow number (for example, +3). Click the number to view all the assigned test cases.
Be careful when you unassign a requirement. Even when you reassign the requirement to the same test case step, the test status resets to Untested, and you will need to rerun the test after the reassignment.
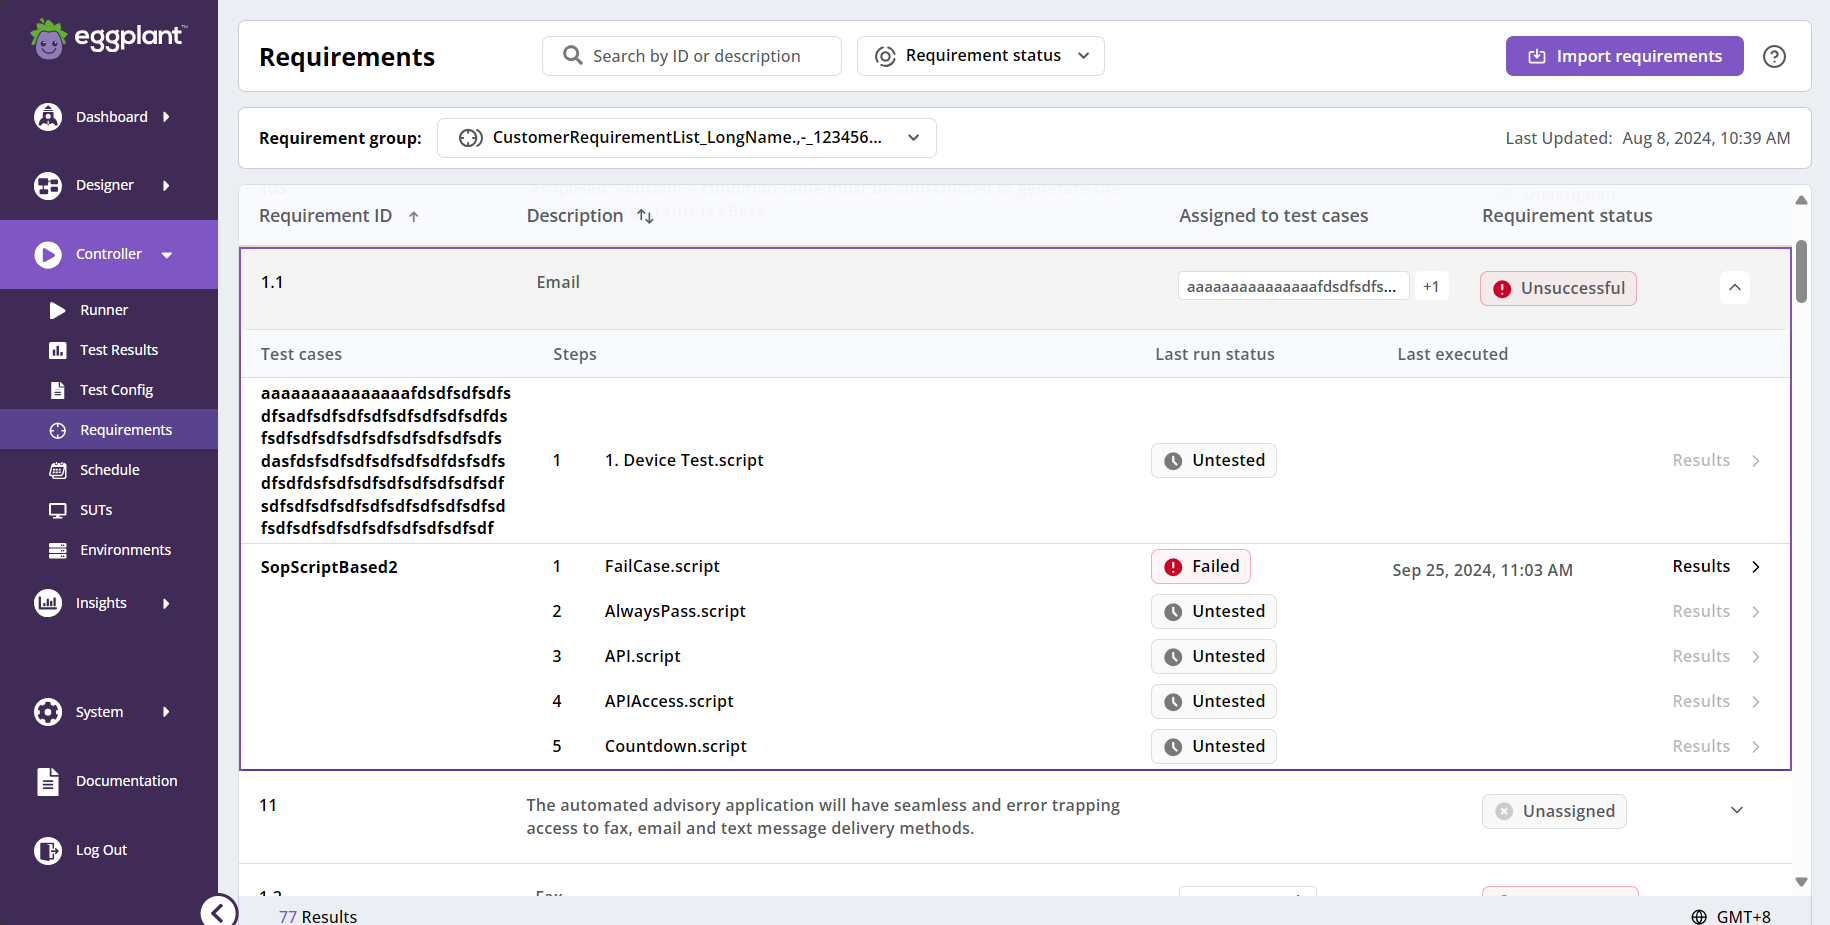
Expanding Requirements to Show the Assigned Test Cases
You can see the test cases assigned to a requirement by clicking the expansion button at the end of the row.
The test case steps are grouped by their test case name.
- Test cases: The name of the test case to which the step belongs.
- Steps: The step index number and the name of the step for a model-based test case. If the test is a script-based test, then you see the script path here instead.
- Last run status: The lastest run status of the test case step (for example, Untested, Error, and so on).
- Last executed: The latest date and time the step executed. Note that this last executed date and time is for the test case step, not the test case itself. Hence, you may see a slightly different Start Time on the Test Result page.
You can click the Test cases to go to the corresponding test case page.
You can go to the detailed test result page by clicking on the Result button at the end of the row if the data is available.
Viewing the Requirement Status
DAI assigns one of the following statuses to requirements based on the Last run status of all the associated test cases as follows:
- Verified: Shown only if all associated test cases have a status of Passed.
- Unsuccessful: Shown when there is any associated test status that is other than Passed.
- Untested: Shown if all associated test cases are "Untested".
- Unassigned: Shown when there are no test cases assigned to the requirement, or when the associated model or suite is deleted.
Filtering Requirements
When loaded, the page shows all the requirements of the first requirement group. You can always filter the list by:
- Search by ID: A search field where you can enter the exact ID of a requirement you want to see.
- Requirement status The status of requirements (for example, Untested, Unsuccessful, Verified, or Unassigned).
- Requirement group: You can filter or change the requirement group using the selection at the top of the table. If the group selection list is lengthy, and it is difficult to find a group, you can simply search for it by typing its name in the search bar.
- Test case: Filter requirements associated with specific test cases. You can click a test case to filter in the list, or you can search for one by test case name as well, like the requirement group filter.

Requirements filters at the top of the Requirements page
Exporting Requirements
For references or analyzing the requirements in your DAI, you can export your requirements as a comma-separated value (.csv) file.
Click the Export button in the top right corner of the Requirements page to export the list of requirements currently showing. This export contains requirements limited by any applied filters, or all the requirements for the selected requirement group if no filter is applied.

Requirements Export button at the top of the Requirements page
Deleting a Requirement Group
You can delete a requirement group from the Requirements page. This action is available only for users with administrative privileges and will delete the group along with all associated requirements.
The Delete action is only available to users with administrative privileges.
-
Locate the Requirement group actions button (the three horizontal dots) in the top-right corner of the Requirements page.
-
Click the action button to open the options menu.
-
In the options menu, select Delete current requirement group. Only Admin users can see this action option. For users without these privileges, the button remains hidden.
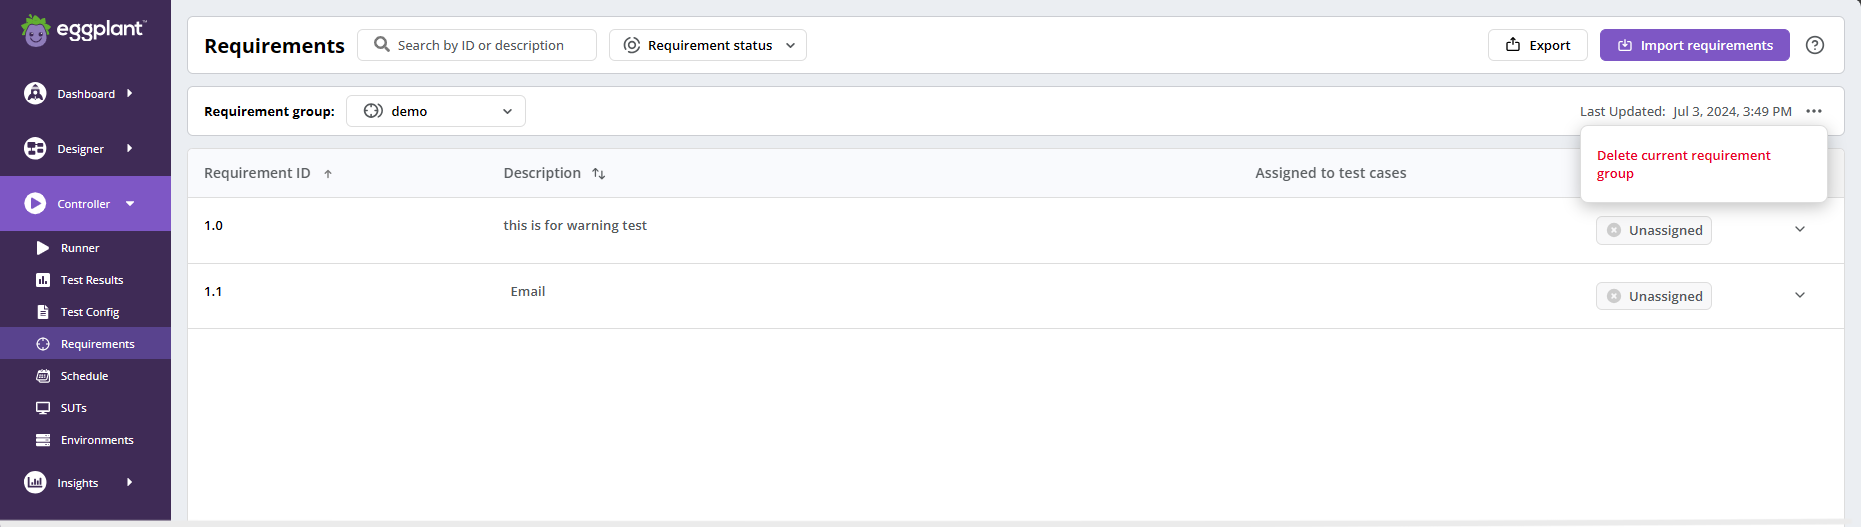
Delete current requirement group
-
When the confirmation dialog box appears asking you to confirm the deletion, click Delete to proceed (or Cancel if you decide not to delete the requirement group).
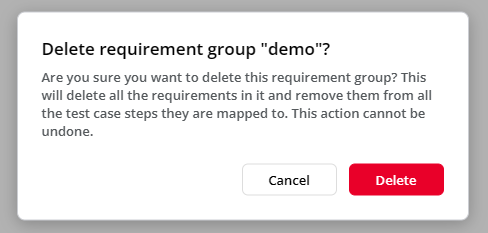
If you confirmed the deletion, the requirement group will be deleted. DAI automatically selects the first requirement group in the list and displays it. If no groups are available, the page shows an empty state.
Deleting a requirement group removes all associated requirements permanently and cannot be undone. All the associated assignments to test cases will be removed as well, and you will need to reassign them to the test cases.