Running Tests in Eggplant Performance Test Controller
Test Controller is the component of Eggplant Performance where you will start and stop your performance test runs. You can also see real-time monitoring of your tests while they run. Remember that you will create and build your tests in Eggplant Performance Studio before you can run them in Test Controller.
To open a specific test in Test Controller, navigate to the test in the Eggplant Performance Studio Project tree, right-click the test, then select Open test in Test Controller from the drop-down list.
You can open the current workspace in Test Controller by selecting Tools > Test Controller from the main menu in Studio, or by pressing the Test Controller toolbar button
The Eggplant Performance Test Controller can be left open in the background while you work on your test in Eggplant Performance Studio. Changes made to the test will be detected by Test Controller. For tips on running large tests in Test Controller, see Large Test Runs.
Starting a Test
To start a test run, press the green Start test button on the Eggplant Performance Test Controller toolbar:
If no test is running, only the Start test button is active. The other buttons become available during a test run, as described below in Working with Running Tests.
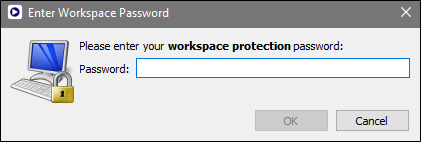
If you are starting a test that uses Public Cloud injectors, you are prompted for your password even if you selected the Remember password option when you set your workspace protection password.
Test Controller performs several pre-test checks, and the results are displayed on the top half of the Start test run dialog box.
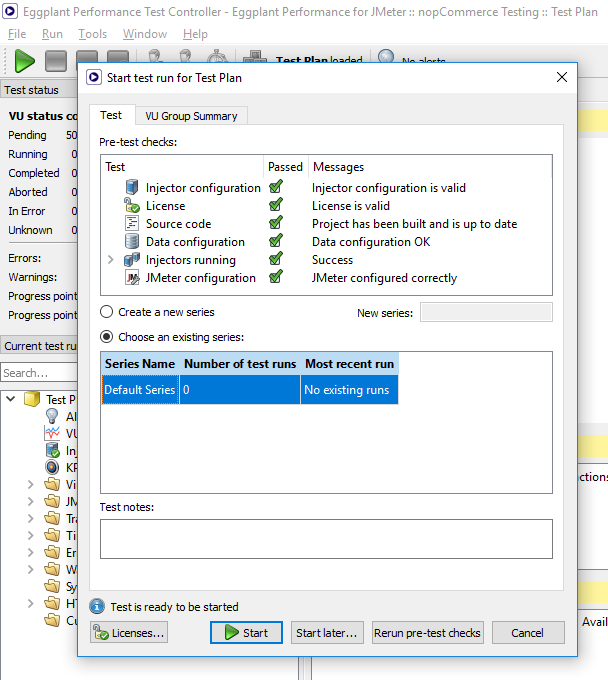
Only if all the checks pass will you be able to start the test. If you need to make changes, you can leave this dialog box open while you return to Studio, then use the Rerun pre-test checks button when you return to verify that the checks all pass.
Test results are saved and grouped by series. By default, the last series you used is selected in the lower half of the Start test run dialog box. However, you can select a different series from the list, or select the Create a new series option, then enter a name in the New series field to start a new series.
You can click the VU Group Summary tab to view detailed information about the test, such as the number of virtual users (VUs) assigned, number of iterations scheduled, and so forth. If you want to make changes to the test configuration, you will have to switch to Studio.
You can add any important information about the test run into the Notes text box at the bottom of the dialog box.
When your information is entered and the test appropriately configured, click Start to start the test.
Starting a Test on a Schedule
It's also possible to start a test at a specific time by using the Start later button on the Start test run dialog box. Your test still has to pass all pre-test checks before this button is enabled.
When you click the Start later button, the Choose test start time dialog box opens. Set the time you want the test to start, then click OK. This dialog box stays open, counting down the time until the test starts.
You are not able to run or schedule other tests while you have a scheduled test pending.
The Starting Test Dialog Box
As the test gets started, the Starting test dialog box opens. This windows displays the steps Test Controller takes to prepare and initiate the test, such as transferring data to injectors and starting cloud injectors when necessary.
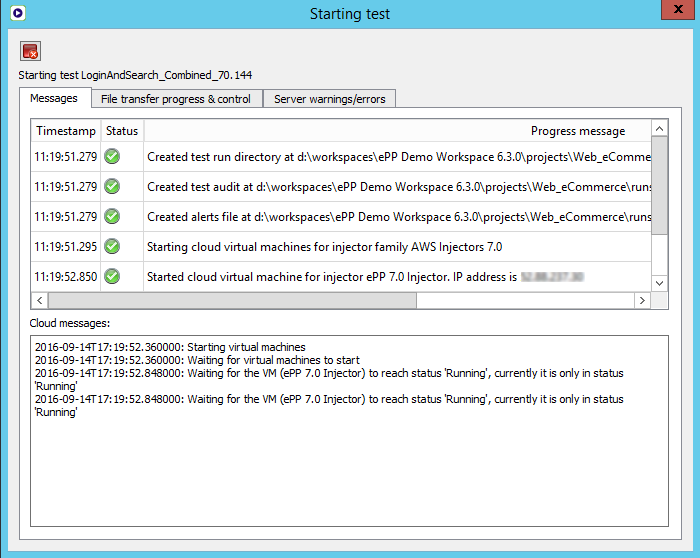
If the steps necessary to start your test run quickly are passed, then you might see this window only briefly.
The Starting test dialog box includes tabs for additional information. The main window is the Messages tab, which displays the steps Test Controller takes to launch the test. Although this screen is primarily informational, if a test fails to start or is slow in getting started, you might find useful information about the cause here.
The second tab, File transfer progress & control, lets you pause or cancel file transfer to injectors during the test start up process.
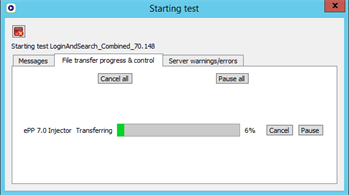
When you click Pause to temporarily stop file transfer, the button changes to Resume. Click the button again when you're ready for the transfer to resume. If your test transfers data to multiple injectors, they are shown on multiple lines. Use the Cancel all or Pause all buttons to affect all transfers at once.
The final tab, Server warnings/errors, displays any warnings or errors encountered during test initiation.
Working with Running Tests
After a test has started, the Test Controller toolbar buttons change so that you can take actions on the running test:

 Stop after current iteration
Click the blue stop button on the toolbar to stop the test by letting each VU complete the current iteration. After you press this button, no further execution of the iterated (repeated) sequence of scripts will be made by any of the VUs in the test.
- Each VU is allowed to complete any scripts in the final section of its workflow.
- If a VU is pending, it is moved directly into a completed state.
 Stop immediately
Click the red Stop immediately button on the toolbar to stop the test in a more abrupt manner. This option stops the test by immediately ending VU script processing.
- All further statements in this script and execution of subsequent scripts in the workflow/sequence are prevented.
- If a VU is pending, it is moved directly to a completed state.
 Abort test
Click the red "emergency" Abort test button on the toolbar to stop the running test immediately by killing (all) engine process(es) in series.
The status column in the VU summary is not updated when the test is aborted with this method, because the VUs are terminated without any opportunity to report their status.
 Add extra virtual users
Click the Add extra virtual users button if you want to increase the number of active VUs during a running test. For complete information about adding VUs, see Add Virtual Users During Test Runs.
 Stop some virtual users
Click the Stop some virtual users button if you want to remove VUs during a running test. For complete information about stopping active VUs, see Stop Virtual Users During Test Runs.
 Set pause factor
Click the Set pause factor button to adjust the performance of VUs while a test is running. For complete information on how this feature works, see Change the Pause Factor During Test Runs.
Monitoring Running Tests
Test Controller provides many ways for you to monitor running tests and view statistics about performance. For information about the charts and tables available for you to view, see Real-Time Test Monitoring in Test Controller.
For more detailed analysis of results after test runs have completed, you can use Eggplant Performance Analyzer.
Concluding a Test
When a test completes, either because it completes naturally or you cancel it by using one of the toolbar options, you'll see the Closing down test dialog box. This window is essentially the same as the Starting test dialog box. However, in this case the middle tab is File retrieval progress & control, which indicates the progress of file transfers back from injectors to the controller machine. You can pause or cancel those transfers, if necessary.
When file transfers are complete, the Closing down test dialog box closes and is replaced by the Test Run Complete dialog box.
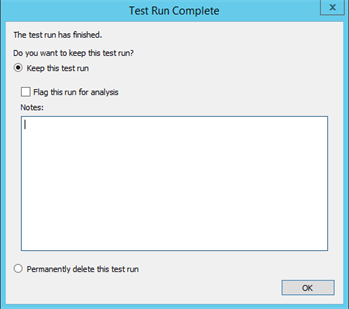
Choose from one of these options:
- Keep this test run: This option, which is the default choice, keeps the data from the test run in the database. You can view statistics about the test in the Test Controller interface (using the Current test run tab until you run another test, and the Previous test runs tab thereafter), and you can use Eggplant Performance Analyzer for deeper analysis of the test run data. When you select this option, two additional choices are available:
- Flag this run for analysis: If you select this checkbox, the test run is flagged so that it stands out when you open the data in Analyzer. Use this as a visual indicator that you want to look at more thorough statistics for the test run.
- Notes: Use this field to add any information about the test that might be useful in analyzing the results. (Optional)
- Permanently delete this test run: This option permanently removes the data for the test run. It will not be available for review either in Test Controller or in Analyzer.
When you've made your choice, click OK.
You can continue to review test metrics for the just completed test in the Current test run tab of Test Controller until you run another test, or until you close Test Controller. Thereafter, you can load metrics from that test run in the Previous test runs tab. For the most complete analysis, you can open test runs in Eggplant Performance Analyzer.