Editing Java Scripts using Eclipse
Eggplant Performance features an Eclipse plug-in that makes it easier and faster to develop Java virtual user (VU) scripts. Eclipse JDT (Java Development Tools) is a powerful integrated development environment (IDE) for developing Java scripts, with benefits such as:
- Syntax highlighting
- Code assist — Eclipse suggests and can auto-complete variable, method, and class names as you type
- Automatic building
- Javadoc support — Hover over a variable, method, or class name, and Eclipse shows relevant help documentation in a pop-up window
Learn more about the Eclipse platform and Eclipse JDT.
Download Eclipse
You can download Eclipse from the Eclipse downloads page. To work with Eggplant Performance, Eclipse version 2019-09 (4.13) or later is required. The package named Eclipse IDE for Java Developers is recommended - it contains the Java development features needed to build and run/debug Eggplant Performance Java Virtual User scripts.
Configure Java
To work with both Eggplant Performance and Eclipse, multiple installations of Java are required. This can get confusing, so here is a step-by-step breakdown:
- Eclipse requires a Java Runtime Environment (JRE) or Java Development Kit (JDK) in order to run. If this is not present, Eclipse will display a dialog on startup stating that no JRE could be located. This Java installation must be:
- 64-bit
- Java version 11 or higher if using Eclipse version 2020-09 (4.17) or later
- The
bin/folder must be on the Windows%PATH%variable in order for Eclipse to find it (Eclipse does not use the%JAVA_HOME%variable) - Alternatively, the path to
javaw.execan be specified using a-vmparameter in theeclipse.inifile found in the Eclipse install directory.
If you use the Eclipse Installer, it is likely that an appropriate version of Java was installed and configured alongside Eclipse, so no further action is needed. However, if you downloaded one of the standalone Eclipse packages, my many need to install a JRE yourself and make sure it is on the %PATH%:
- It is recommended to use Eclipse Temurin (the OpenJDK distribution from Adoptium) version 11 for x64 architecture - unzip it somewhere and put the
bin/folder on the Windows%PATH% - In a command prompt, run
java -versionto check it's working - When you run Eclipse, click the Help menu and then click About Eclipse IDE. On the About Eclipse IDE dialog, click the Installation Details button. On the Eclipse IDE Installation Details dialog, click the Configuration tab:
- Search for
java.runtime.versionto see which version of Java is being used to run Eclipse - Search for
eclipse.vmto see the file location of the version of Java being used to run Eclipse.
- Search for
What else do we need?
Once Eclipse is up and running with the appropriate 64-bit version of Java, there is more configuration to be done. For legacy reasons, Eggplant Performance Java Virtual Users (specifically Web Java Virtual Users) require a 32-bit installation of Java 11. Fortunately, the Eggplant Performance installation directory already contains a 32-bit Java 11 JDK, so Eclipse must be configured to use this to compile and run Eggplant Performance Java Virtual User scripts:
- Launch Eclipse from Eggplant Performance Studio, using the steps below. This will create and open an
eclipse-workspacefolder within your Eggplant Performance workspace directory, and this is where JRE settings are stored (i.e. if you open Eclipse from the Start menu and choose a different workspace location, the below changes will not take effect when debugging VU scripts) - On the Window menu, click Preferences. On the Preferences window, in the left-hand tree, navigate to Java and then Installed JREs
- Click Add and choose Standard VM as the JRE Type
- To set the JRE Home option, click the Directory button and navigate to
C:\Program Files (x86)\eggPlant Performance\re\jdk(or wherever you installed Eggplant Performance); it will set the JRE Name automatically - Click Finish
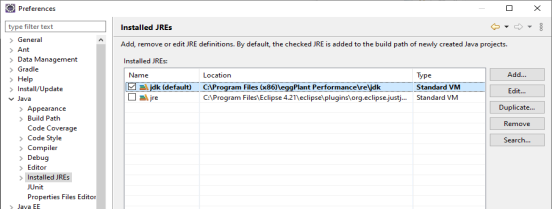
In the Installed JREs list, check the box next to the JRE you just added, then click Apply and Close. Both Eclipse projects will rebuild and this should prevent the following error:
Loading 'javaNativeWrapperCPP'
java.lang.UnsatisfiedLinkError: C:\Program Files (x86)\eggPlant Performance\bin\javaNativeWrapperCPP.dll: Can't load IA 32-bit .dll on a AMD 64-bit platform
at java.base/java.lang.ClassLoader$NativeLibrary.load0(Native Method)
com.facilita.exception.BadValueException: Failed to load javaNativeWrapperCPP. This could be because you are using a 64-bit java runtime to load a 32-bit native library, or because the library could not be found
...
at com.facilita.fc.runtime.LibraryLoader.loadLibraries(LibraryLoader.java:53)
at com.testplant.performance.VirtualUserFactory.loadLibraries(VirtualUserFactory.java:311)
...
Launching Eclipse from Eggplant Performance Studio
With a project open in Eggplant PerformanceStudio:
-
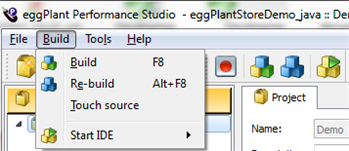
On the Build menu, click Start IDE, and then click Start Project IDE
OR click the Start IDE button on the toolbar.

If you did not configure an IDE, a message appears asking you to locate an IDE.
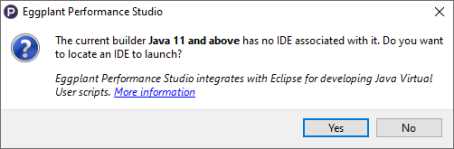
- Click Yes, and then navigate to the directory where you unzipped Eclipse.
- Select eclipse.exe, and then click Open.
Studio installs the Eggplant Performance Eclipse plug-in into the /dropins directory of your Eclipse installation, and launches Eclipse.
If you have previous experience using Eclipse, you might be wondering which workspace directory Eclipse will use. When you launch Eclipse from Studio, Eclipse will use a default workspace, which is located within the Eggplant Performance workspace directory structure.
Managing IDE settings
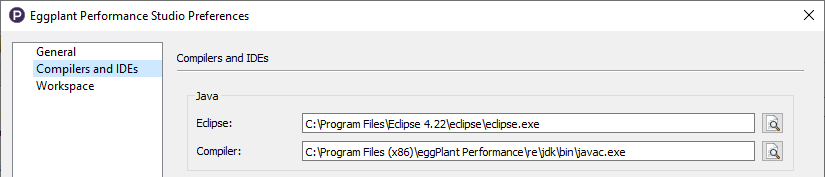
On the Tools menu, click Preferences.
-
In the Eggplant Performance Studio Preferences, select Compilers and IDEs from the list on the left.
-
Under Java, specify a direct path to Eclipse, or use the associated browse button to locate the application.
-
(Optional) Specify a compiler if necessary.
Creating Eggplant Performance Projects in Eclipse
The Eggplant Performance Eclipse plug-in enables you to edit Web Java VU scripts using Eclipse. An Eclipse project is created, which links to an Eggplant Performance project in your Eggplant Performance workspace, containing the Web Java VU scripts.
Before you perform this step, you must build the project using Eggplant Performance Studio at least once.
-
On the Build menu, click Build.
OR on the toolbar click Build.
When you launch Eclipse from Eggplant Performance Studio, an Eclipse project is automatically created for the Eggplant Performance project currently open in Studio. Inside this project you will find the Web Java VU scripts that have been created or generated in Eggplant Performance Studio.
If it doesn't already exist, Eclipse creates a project for the specified Eggplant Performance workspace too. Inside this project you will find code for the custom VUs that exist in the Eggplant Performance workspace.
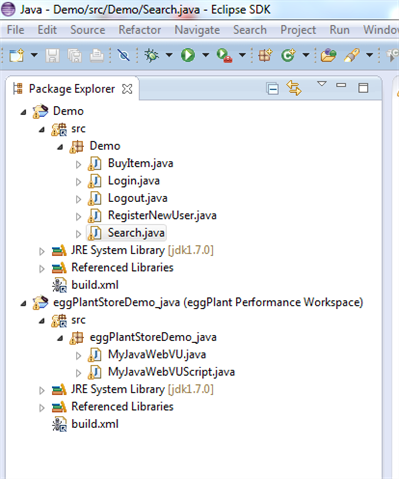
In the Eggplant Store Demo example workspace, each of the Web Java Virtual User scripts are defined as classes which extend eggPlantStoreDemo_java.MyJavaWebVUScript. In this base class is a method named getVU() which returns an object of type eggPlantStoreDemo_java.MyJavaWebVU. This class defines methods that are useful for interacting with the EggplantStore Demo website, and can be re-used in many scripts, such as findFirstSearchMatch() as used in the Search Virtual User script below. Press F3 while the cursor is in a method name and Eclipse will show the code where that method is defined.

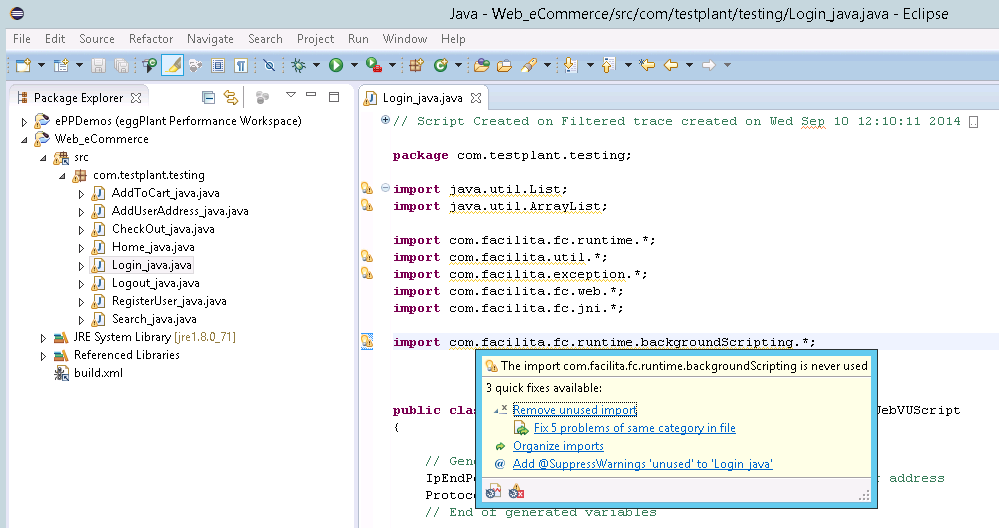
If you hover over an error or a warning in the code editor, Eclipse suggests options for automatically fixing the error or warning. Click the link and the action will be carried out.
Creating Eclipse Projects Manually
In most cases, Eclipse projects are created automatically when you launch them from Eggplant Performance Studio. However, there is a wizard to create Eclipse projects from a specific Eggplant Performance workspace and Eggplant Performance project, which you can use as described below:
-
On the File menu, click New, and then click Project.
OR, if the workbench is visible, on the toolbar click New Project.

-
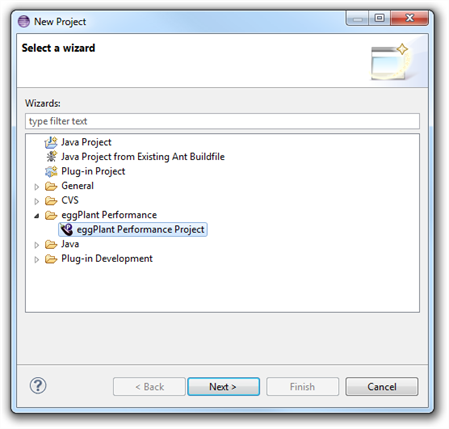
In the New Project window, expand Eggplant Performance in the Wizards list, and then click Eggplant Performance Project.
-
Click Next.
-
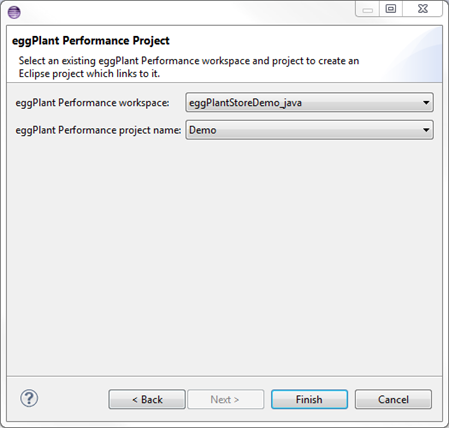
Select the Eggplant Performance workspace and Eggplant Performance project from the lists, and then click Finish.
Developing Web Java Virtual User Scripts in Eclipse
Creating Scripts
In the current version of the Eggplant Performance Eclipse plug-in, scripts must be created in Eggplant Performance Studio for them to be included in tests. However, once a script has been created or generated in Eggplant Performance Studio, it should appear in the Eclipse project. If it doesn't appear, right-click the project in the Package Explorer view, and then click Refresh.
Writing Code
Eclipse has content-assist to speed up scripting and reduce typing errors. This means that as you type code, Eclipse suggests variable or method names that you might be trying to use, and you can press Enter for Eclipse to insert the remaining characters automatically. To bring up the content-assist menu when it is not visible, press Ctrl+Space.
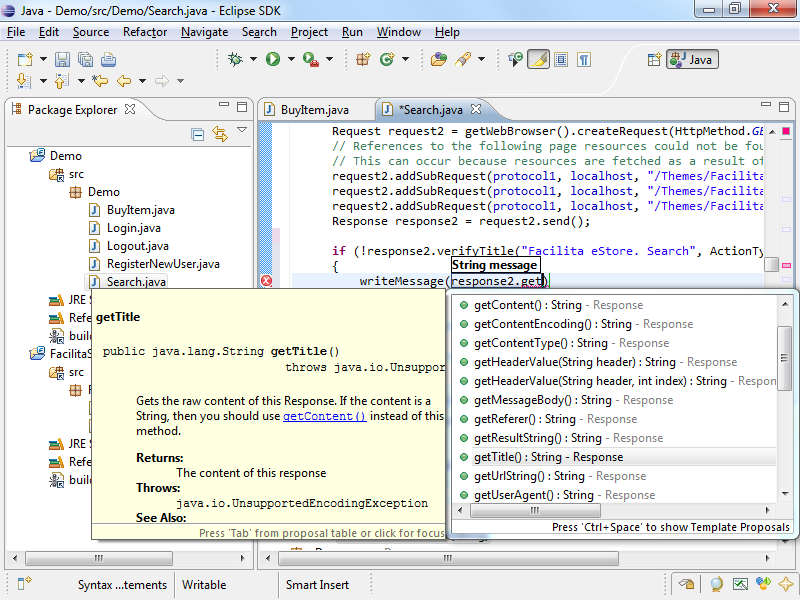
Eclipse also shows javadoc documentation for classes, methods, and variables when using content-assist, and also when the cursor is hovered over a class, method or variable name in the code editor.
Building and Running
By default, Eclipse builds the Eggplant Performance project code automatically whenever a script is modified and saved, by using the build.xml Ant file present in the Eclipse project. This means that you don't have to do anything extra before running a test using Eggplant Performance Test Controller.
To disable automatic building in Eclipse:
- On the Project menu, click to remove the check mark by Build Automatically.
In this case, the project must be built manually before a test can be run:
- On the Project menu, click Build Project.