Managing Monitoring and Alerting Scheduled Maintenance
You can manage monitoring and alerting activity for your monitors by Scheduling a Maintenance period. A Scheduled Maintenance lets you specify when your monitors and alerts are active and available (or inactive and unavailable).
View Scheduled Maintenance
You can see the Monitoring and Alerting Scheduled Maintenance at the bottom of each monitor's individual page by following the steps below:
-
Display a monitor's page by clicking the name of the monitor on the Monitor Overview page. For example, you would click the Eggplant Demo monitor shown in the example screen below.

A monitor named Egggplant Demo on the Monitor Overview page
-
Locate the Monitoring & Alerting Scheduled Maintenance at the bottom of the selected monitor's page.
-
If a Scheduled Maintenance is not set, all the days on the calendar show as enabled
 All day.
 -
If a Scheduled Maintenance is set, you will see the schedule for the next seven days, starting from the Monday of the current week. The schedule contains two rows: the top row is for Monitoring and bottom row is for Alerting. All timings are shown in local time based on the time zone selected for the portal account.
The example monitor page below shows a Scheduled Maintenance that disables Monitoring on Sunday at 10:58 (preceded by a red dot) and then re-enables it at 13:01 (preceded with a green dot). It also disables Alerting on Saturday at 20:58 and then re-enables it at 23:01.

A Monitoring and Alerting Blackout Schedule for a monitor named Eggplant Demo
noteIf you schedule your Maintenance time to start on the hour, but the scheduled time (the time preceded with a green dot) on the calendar is a minute past the hour as shown in the example above, it is because the scheduler allocated a few minutes to ensure any scheduled tests can finish running before the requested Maintenance window starts. The message below the schedule that says, "Disable times may have been brought forward slightly for added contingency," is to inform you that this slight time change may occur.
-
Set Schedule Maintenance
The schedule indicates the settings for a day as follows:
-
When a schedule is not active, you see a green light with the text All day, indicating that alerting or monitoring is enabled all day and there is no Scheduled Maintenance time.
-
When a schedule is set, you see times with either a red dot to indicate alerting or monitoring is disabled, or a green dot indicating monitoring or alerting is enabled.
-
When a schedule is set as inactive, the times appear greyed out with a grey dot, indicating alerting or monitoring is inactive.
-
A pen indicates the schedule is editable for that day.
Add a New Schedule Maintenace
Follow the steps below to add a new monitoring or alerting Scheduled Maintenance:
-
Create a new Schedule Maintenance for either monitoring or alerting by clicking the pen on the date in the appropriate row. The Edit Schedule Maintenance dialog opens with the + Add disable/enable time option.
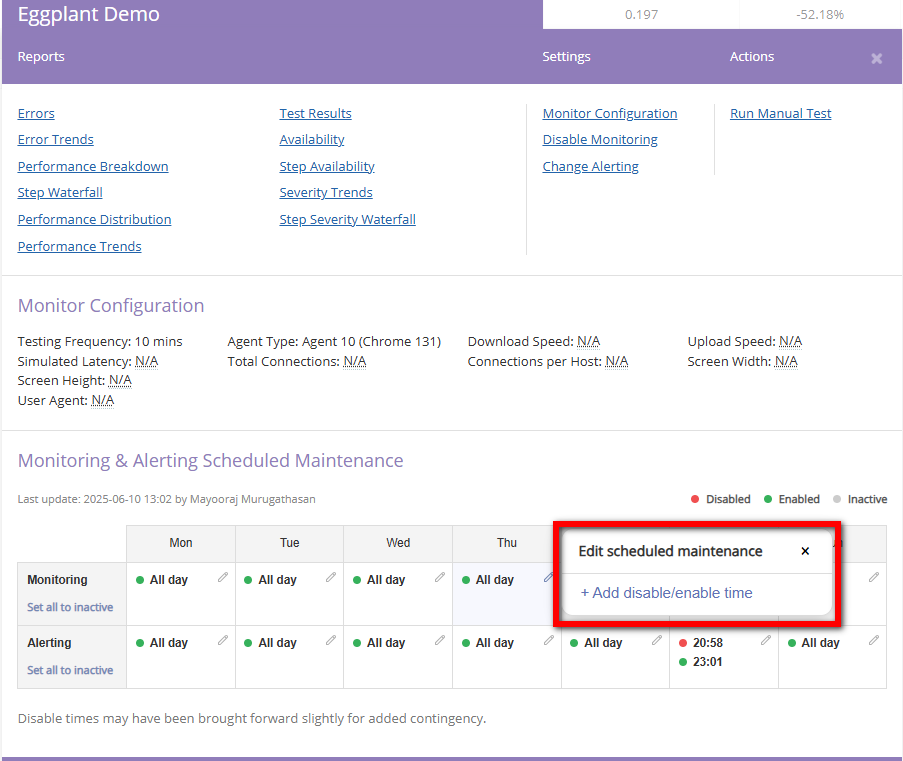
The Edit blackout setting panel
-
Click + Add disable/enable time. The Edit Schedule Maintenance setting dialog box expands to provide Enable and Disable tabs with time selectors, and the Activate Schedule Maintenance setting option. Either tab may be active when the dialog opens depending on whether the current period is enabled or disabled.
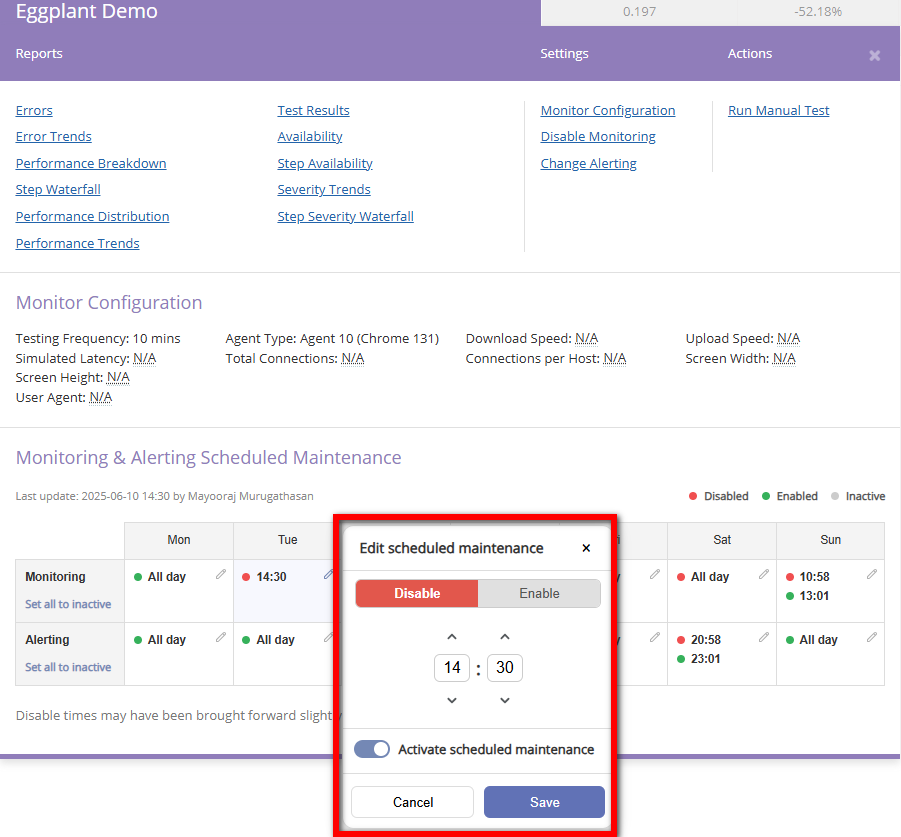
The Edit blackout setting panel expanded with Enable/Disable tabs, a time selector, and the Activate Blackout setting slider
-
Click Disable or Enable and then select the time you want to enable or disable the alerting or monitoring. You can click Cancel at any time to return to the previous view.
noteThe time is in a 24-hour format, which cannot be changed.
-
You can activate this schedule now by enabling (sliding to the right) Activate Schedule Maintenance setting. Otherwise, it remains inactive until you activate it.
-
Click Save to save your schedule.
Editing an Existing Scheduled Maintenance
The steps for editing an existing monitoring or alerting Scheduled Maintenance are essentially the same as when you add a schedule:
-
Edit an existing schedule by clicking the pen on the day you want to edit. The Edit Schedule Maintenance setting dialog opens with the + Add disable/enable time.
-
Follow the steps described in Add a New Schedule Maintenance above to change your existing schedule.
Activating and Deactivating a Scheduled Maintenance
You can activate or de-activate a Scheduled Maintenance by editing your schedule settings as described above and enabling the Activate Schedule Maintenance settings control.