Webhook Notifications
Eggplant DAI supports webhook notifications to give you more options to communicate when your test configuration runs finish. DAI webhooks enable you to set up real-time notifications with third-party apps (such as Slack, Microsoft Teams, PagerDuty, and Jira). You can also use them to trigger notifications in your DevOps workflows. Webhook notifications are an alternative to the other notification option DAI provides, which is email. See Add an Email notification for more information about email notifications.
What is a webhook in DAI? Webhooks typically use HTTPS requests to send a message and other information in a JSON format that, as described above, triggers a notification to your specified app. This JSON format is called a JSON payload.
We use the term webhook loosely in DAI to refer to either a webhook notification or a webhook profile. Specifically, we use the term webhook profile to refer to a saved configuration that specifies a unique name for the profile, the request method, the request headers, the message content, and the app URL. Once you create a webhook profile, you can specify it by name to be used for notifications in a test config. We use the term webhook notification specifically to refer to a notification that is triggered when a webhook profile is specified as the notification option.
Note that webhook notifications are separate from email notifications. Depending on how you set up a webhook within a test config, a webhook notification can always be sent when a test run finishes.
Once you define a webhook profile, you can use it to trigger a notification for a test configuration (test config) in the Controller as described in Add a Webhook notification on the Working with Test Configurations page.
Displaying the Webhooks Page in DAI
The Webhooks page in DAI is where you manage your webhook profiles. Choose System > Webhooks from the DAI menu on the left to display it. The Webhooks page contains a list of any existing webhook profiles. If no profiles are defined, the page is empty, and you see the option to create one.
Only users with DAI administrator privileges can create, edit, delete, or duplicate existing webhook notifications. All other users can only view them.
Creating a Webhook Profile
To create a webhook profile, you must be logged into DAI with a user that has DAI Administrator privileges, and then follow the steps below:
-
Navigate to System > Webhooks where any existing webhook profiles are listed, or you see the option to add a webhook profile.
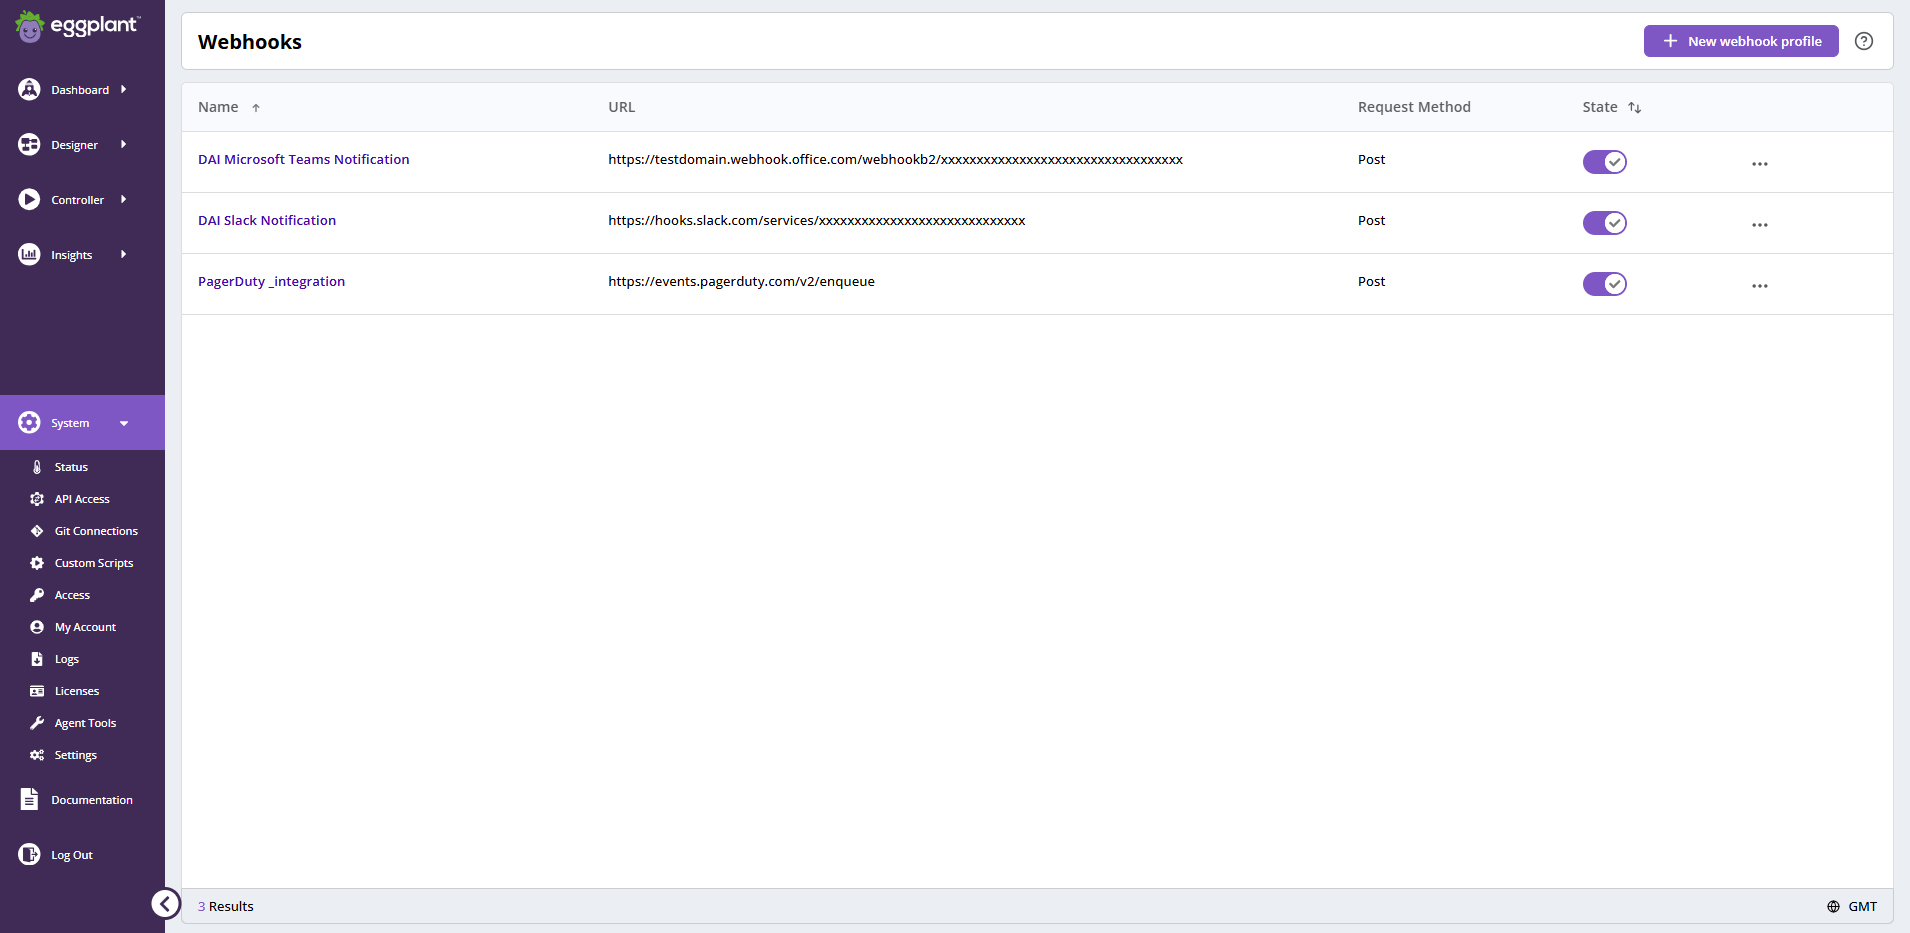
The DAI Webhooks page and profile list
-
Click New webhook profile. The New webhook profile page opens.

The New webhook profile page
-
Fill in the Webhook profile settings fields as described below:
-
Name: Provide a unique name to identify your webhook profile.
-
Description: Provide a description for your webhook profile.
-
Request Method: Select from the available HTTPS request methods: POST, PUT, GET. (Default: POST).
-
URL: Enter the URL for the app to which you want to send notifications.
-
Request Headers: Enter any applicable request headers for the webhook profile, for example, auth tokens or content type. If you have multiple request headers, specify each one on a separate line.
-
Body Payload: The webhook profile uses payload parameters to represent dynamic values sent in the request payload. To construct the body payload, select any of the following parameters from the drop-down menu:
- Test-configurations: Specifies the name of the test config used in the test config run.
- Result-status: Specifies the test result of the test config run.
- Result-url: Specifies the test result URL of the test config run.
- Test-run-completed: Provides the number of test runs completed, including reruns, as part of the test config run. (If there is not a rerun, it will be
1; if there is only one rerun, it will be2.) - Execution-start-time: Provides the start time of the test config run.
- Total-run-duration: Provides the end-to-end total run duration for the test config run, which means from the start of the test config run until it finishes, including any start-up time, for example, acquiring SUTs or environments.
- Test-filter-options: Lists the run-type filters in the Webhook notification if any are used in the test config run. If none are used, the message "No filter applied" will display in the webhook.
- Date format: Specify the string representation of a timestamp format to match your webhook integration. The default timestamp format will be used unless specified otherwise. Please refer to the example timestamp format below.
Timestamp Format Example %d %b %Y, %H:%M:%S (default) 06 Dec 2024, 14:35:56 %A, %d %B %Y at %m:%M %p Wednesday, 02 October 2024 at 2:04 PM %d-%m-%Y %H:%M:%S 28-02-2025 09:54:00 %Y.%m.%d %H:%M 2025.02.28 17:32 %A, %d-%m-%Y %H:%M Friday, 28-02-2025 09:54 %d %B %Y, %H:%M 28 February 2025, 09:54 noteYou must enter a valid timestamp format before saving the webhook profile. You will see a validation error message if the timestamp format string is invalid. Please see datetime — Basic date and time types — Python documentation for more information about building the datetime format string using format codes.
-
-
Set the State of the webhook profile to enabled or disabled using the Enable this webhook profile slider. Note that once you start assigning this webhook to any test configs, disabling the profile will disable the webhook notifications in any test configs that use it.
-
After you enter the required information, click Test webhook to validate your webhook profile configuration.
-
If everything is set up correctly, you see the message Webhook test success as shown in the sample response below, confirming that the webhook profile you created is valid.
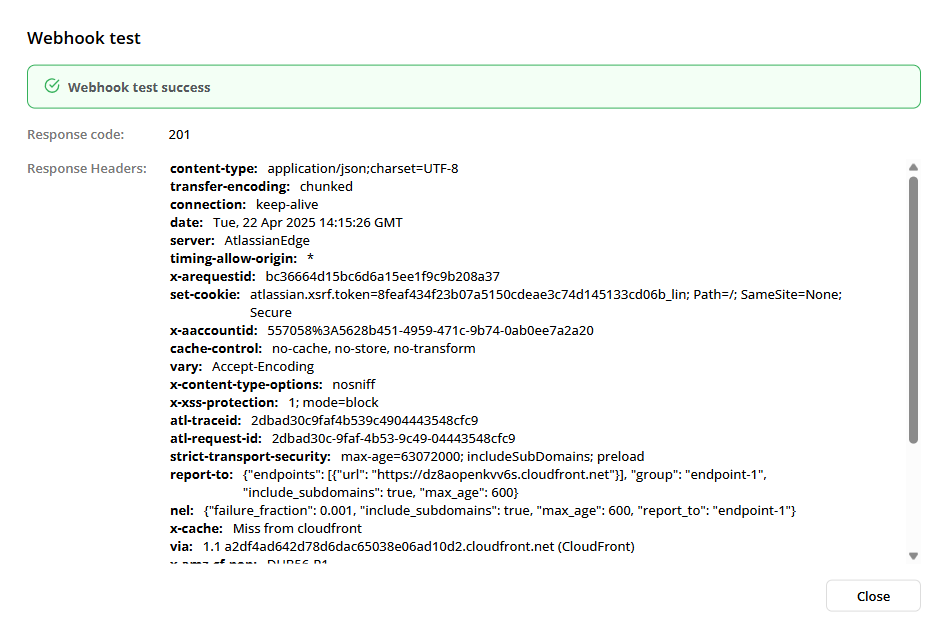
The response for a successful webhook test
-
If you see the message Webhook test failed, you can use the information provided in the response to investigate and resolve any issues with your webhook profile configuration.
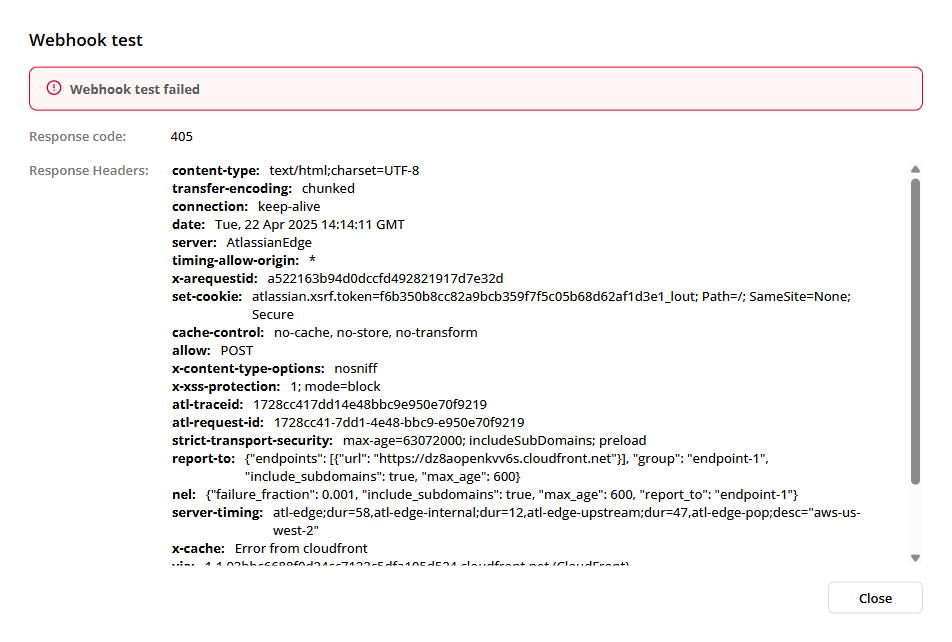
The response for a webhook test failure
-
-
Click Close to close the Webhook test window.
-
When your webhook test succeeds, click Create to save your webhook profile. You will see your new profile listed on the Webhooks page where you can subsequently manage it.
Editing a Webhook Profile
To modify a webhook profile, you must be logged into DAI with a user that has DAI Administrator privileges, and then follow the steps below:
- Navigate to System > Webhooks, where you will see a list of all your existing webhook profiles.
- Locate the webhook profile you want to edit, select it, and, from the
 Actions menu, select Edit.
 - Make the necessary updates to the webhook profile, and then save your changes.
If you disable a webhook (by disabling Enable this webhook profile under State in the Webhook profile settings or using the State slider for a webhook on the Webhooks page), DAI will disable the webhook notifications in any test configs that use it.
Duplicating a Webhook Profile
To duplicate a webhook, you must be logged into DAI with a user that has DAI Administrator privileges, and then follow the steps below:
- Navigate to System > Webhooks, where you will see a list of all your existing webhook profiles.
- Locate the webhook profile you want to duplicate, select it, and, from the Actions menu, select Duplicate.
- Specify a unique name to identify your duplicated webhook profile and create a new one.
Deleting a Webhook Profile
To delete a webhook profile, you must be logged into DAI with a user that has DAI Administrator privileges, and then follow the steps below:
- Navigate to System > Webhooks, where you will see a list of all your existing webhook profiles.
- Locate the webhook you want to delete, select it, and, from the Actions menu, select Delete. A confirmation dialog box opens.
- Click Confirm to proceed with the deletion.
Deleting the webhook profile also deletes the webhook notifications in all the test configs that use it, and this action cannot be undone.
Sample Webhook Integrations with Third-Party Apps
Following are sample configurations for webhooks with third-party applications.
Slack Integration
To integrate incoming webhooks in Slack, follow the steps below:
-
Go to the Configure apps section from your Slack instance by clicking
https://<your workspaces.slack.com/account/settings. -
Search for incoming webhooks in the Apps directory of Slack. If no incoming webhooks are found, then create one for the Slack app by following the Slack incoming webhooks documentation. You may need to contact your IT administrator to approve the webhook app based on your Slack workspace configuration (see the Slack docs for more information).
-
After creating the app, go back to your Slack Account > Configure apps section and search for the newly created incoming webhooks app.
-
Select the app and enable the incoming-webhook for posting messages to a channel or individual. This will generate an Incoming Webhook URL. To get approval for this process, you may need to contact your IT administrator. Here is an example URL for an Incoming webhook in Slack:
https://hooks.slack.com/services/T00000000/B00000000/XXXXXXXXXXXXXXXXXXXXXXXX -
Create a new Webhook Profile with the Slack Payload .
Slack Payload
{
 "text": "Notification from Eggplant Digital Automation Intelligence: \n>>>Test Configuration: {{test-configurations}}\nResult: {{result-status}}\nTest runs completed: {{test-run-completed}}\nExecution start time: {{execution-start-time}}\nTotal Run Duration : {{total-run-duration}}\nLink to Digital Automation Intelligence Report: To check the status of this test run and view further information, <{{result-url}}|click on this link>!\n"
}
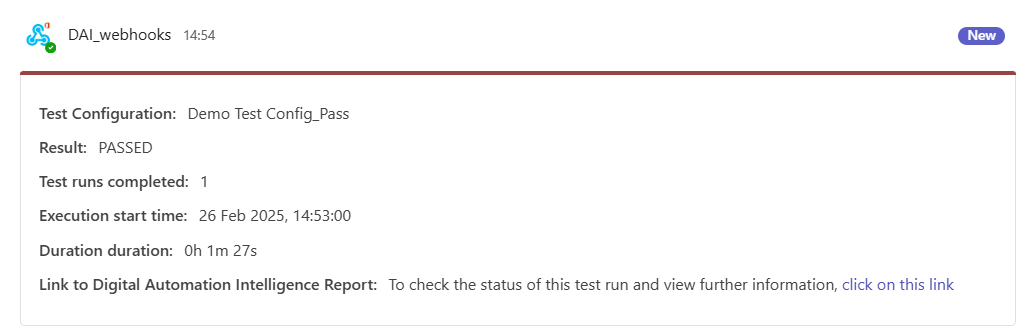
Slack Example Notification
For example, this is how incoming webhook notifications in Slack appear:
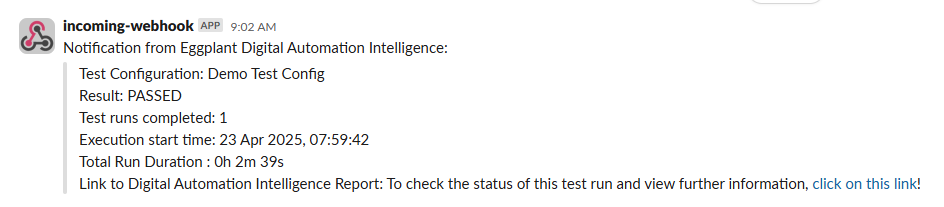
Slack sample webhook notification
Microsoft Teams Integration
To integrate webhooks notifications within Microsoft Teams, follow these steps:
- Create a webhook connector by following the Microsoft Teams webhooks and connectors guide.
- Copy the URL and create the webhook profile using the URL with the sample Microsoft Teams payload. Add an integration for the service with the Microsoft Teams payloads as described below.
Microsoft Teams Payload
{
  "@type": "MessageCard",
  "@context": "https://schema.org/extensions",
  "themeColor": "994444",
  "summary": "Notification from Eggplant Digital Automation Intelligence: {{result-status}} for {{test-configurations}}",
  "sections": [
    {
      "facts": [
        {
          "name": "Test Configuration:",
          "value": "{{test-configurations}}"
        },
        {
          "name": "Result:",
          "value": "{{result-status}}"
        },
        {
          "name": "Test runs completed:",
          "value": "{{test-run-completed}}"
        },
        {
          "name": "Execution start time:",
          "value": "{{execution-start-time}}"
        },
        {
          "name": "Total Run Duration:",
          "value": "{{total-run-duration}}"
        },
        {
          "name": "Link to Digital Automation Intelligence Report:",
          "value": "To check the status of this test run and view further information, [click on this link]({{result-url}})"
        }
      ]
    }
  ]
}
Microsoft Teams Example Notification
A sample of incoming webhook notifications in Microsoft Teams.
Microsoft Teams sample webhook notification
PagerDuty Integration
To integrate webhooks notifications in PagerDuty, follow these steps:
- Set up the Pagerduty integration for your service by following these instructions.
- Copy the PagerDuty integration Key for the service you are monitoring, which will be used as
routing_keyin the PagerDuty payload. - If you're using Event API V2, create the webhook profile using the URL:
https://events.pagerduty.com/v2/enqueue. For more information about Event API V2, see the PagerDuty Developer Guide. - Use the same PagerDuty Integration Key as the
routing_keyin the PagerDuty payload when creating the webhook profile.
PagerDuty Payload
{
  "payload": {
    "summary": "Notification from Eggplant Digital Automation Intelligence: The Test Configuration {{test-configurations}} run has {{result-status}}",
    "timestamp": "2015-07-17T08:42:58.315+0000",
    "severity": "critical",
    "source": "Eggplant Digital Automation Intelligence Test Configuration: {{test-configurations}}",
    "component": "DAI Test Webhook App",
 "custom_details": {
  "Test Configuration": "{{test-configurations}}",
  "Result": "{{result-status}}",
  "Number of Test runs completed:": "{{test-run-completed}}",
  "Execution start time:": "{{execution-start-time}}",
  "Total Run Duration": "{{total-run-duration}}",
  "Link to Digital Automation Intelligence Report:": "To check the status of this test run and view further information, [click on this link]({{result-url}})"
    }
  },
  "routing_key": "6aaf98607a9c4104c1c20e2809198492",
  "dedup_key": "Test Configuration {{test-configurations}}",
  "event_action": "trigger",
  "client": "Eggplant Digital Automation Intelligence",
  "client_url": "{{result-url}}",
  "links": [
    {
      "href": "https://exampledomain.com/",
      "text": "Eggplant Digital Automation Intelligence"
    }
  ],
  "images": [
    {
      "src": "https://exampledomain.com/logo.png",
      "href": "https://exampledomain.com/",
      "alt": "Eggplant Digital Automation Intelligence"
    }
  ]
}
Example PagerDuty Notification
When a failure is detected in a test config, the webhook will trigger a new incident in PagerDuty.
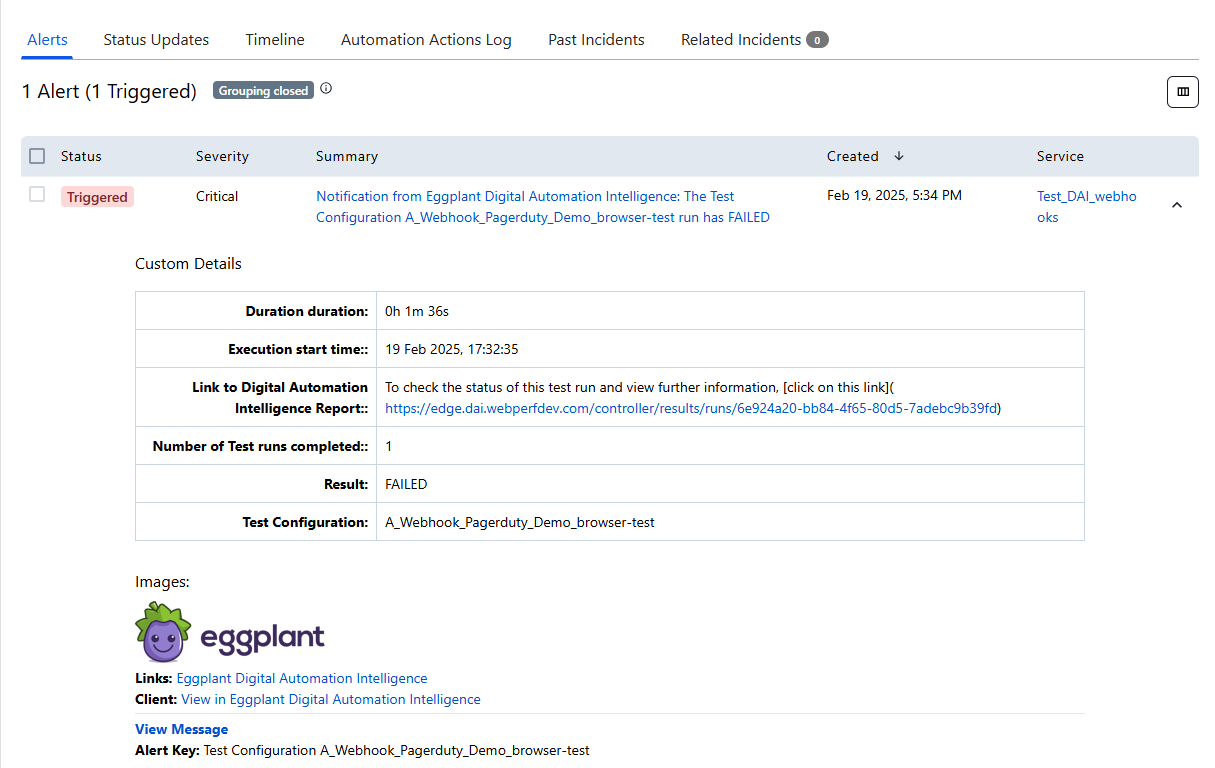
PagerDuty sample webhook notification
Jira Integration
-
Create a Jira API basic token using the Jira Integrations Guide.
-
Create a webhook with your Jira API URL.
-
Use the token as the Request Header in the webhook configuration.
Authorization: Basic <<mysecuretoken>>
Content-Type: application/json -
Use the sample Jira payload for sending webhook notifications to Jira API.
{
    "fields": {
        "issuetype": {
            "id": "15"
        },
        "project": {
            "key": "MON"
        },
        "description": "Test Configuration: {{test-configurations}}\n\nLink to Digital Automation Intelligence Report: To check the status of this test run and view further information, click on this link {{result-url}}\n\nResult: {{result-status}}\n\nNumber of Test runs completed:{{test-run-completed}}\n\nExecution start time:{{execution-start-time}}\n\nTotal Run Duration:{{total-run-duration}}\n\n",
        "summary": "Test Configuration: {{test-configurations}} Result: {{result-status}}"
    }
}
Example Jira Story
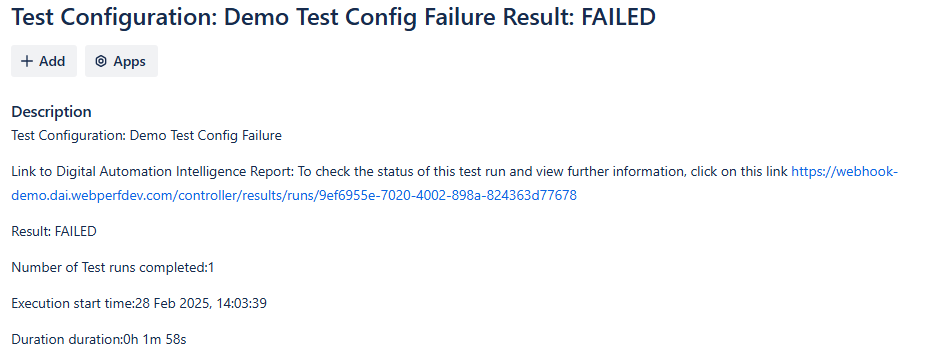
Jira sample webhook notification