Creating an Eggplant Performance Test Manually
The easiest way to create an Eggplant Performance test is to use the Objectives feature in Eggplant Performance Studio. However, as you get more familiar with all the elements that make up a performance test, and as you develop more test assets across your workspace and projects, you might choose to create your tests from scratch instead.
This page takes you through the step-by-step process of manually creating a test in Eggplant Performance Studio:
- Creating a Workspace
- Creating a Virtual User (VU)
- Creating a Project
- Creating a New Script
- Generating a Script From Your Recording
- Creating a Workflow
- Creating and Configuring a Test
- Building Your Project
The test creation method provided is one of the several ways you can create a test in Eggplant Performance. The following sample test focuses on the functionality of Eggplant Performance Studio, and how you can use it to manage virtual users (VUs) and tests.
Creating a Workspace
Before you create an Eggplant Performance test, you must either open an existing workspace or add a new one in Eggplant Performance Studio.
The workspace contains all environment-specific data such as injector details, default editors, compiler locations, and custom VU types. A workspace allows you to switch between different environments easily. For example, you can switch between a test and a live environment, both of which can have different injector configurations.
To create a new workspace
-
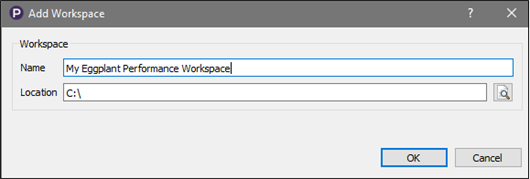
In Eggplant Performance Studio, select File > New > Workspace. The Add Workspace dialog box opens.
-
In the Name box, enter a name for your new workspace.
-
Enter the Location path where you want to save your new workspace.
-
Click OK. A message tells you whether or not your new workspace was created successfully. If it succeeded, the message prompts you to switch to the new workspace.
-
Click Yes. Your new workspace opens in Eggplant Performance Studio.
Creating a Virtual User
Before you can generate scripts for use in your test, you need a virtual user (VU). You must create a new VU type before you can create your first script, but it is not always necessary to create a new VU before creating a new script.
Prerequisite
Add a new web VU type, which supports the record and replay of user interactions with web-based applications and servers using HTTP and HTTPS protocols. You can create a Web Java or C# Web VU, depending on your preference.
To create a new VU:
-
If the Workspace tree is not already displayed, open Eggplant Performance Studio and display the Workspace tree.
-
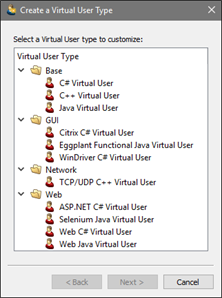
In the Workspace tree, right-click Virtual Users and select New Virtual User from the menu. The Create a Virtual User Type dialog box opens.
-
Select Web Java Virtual User or Web C# Virtual User (your preference) from the list and click Next.
noteThese examples use the Web C# VU. The name panel automatically opens with the Extends and Namespace fields populated. If you're creating a Java Web VU, you see a Package field instead of a Namespace field.
-
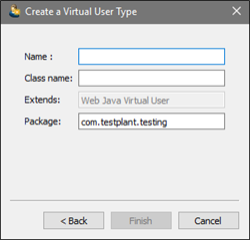
Provide a Name for the new VU. The Class name populates automatically as you type.
-
Click Finish. Your new VU is created and made available in the main window.
Creating a Project
Eggplant Performance is a project-based load testing tool. Scripts, workflows, data, and tests are all stored in a project. You must either open an existing project, or create a new one.
To create a new project:
-
Select File > New > Project or on the toolbar, click the New Project. The New Project dialog box opens.

-
Enter a name for your new project in the Project Name box.
-
Click OK. Your new project is created and opens in the main window.
noteTo save a project, select File > Save or click Save on the toolbar.
Creating a New Script
You can create virtual user (VU) scripts using any of these methods:
- Use a script recorder
- Use a standard template
- Import an existing source file.
These instructions create a VU script from a recording. To generate a new script from a recording:
-
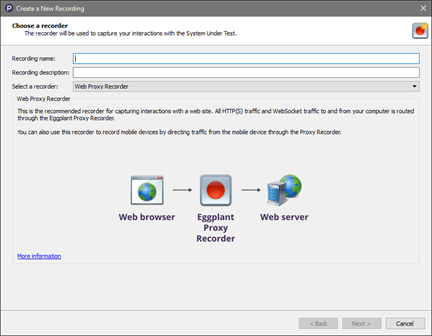
With your project open in the Project tree, right-click Recordings, and then select New Recording or on the toolbar, click New Recording.
-
Enter a name for your recording.
-
From the Select a recorder list, select Web Proxy Recorder, and then click Next. The next step in the script creation process is displayed.
-
From the Applications list, choose the web browser that you would like to record your script against, then click Next.
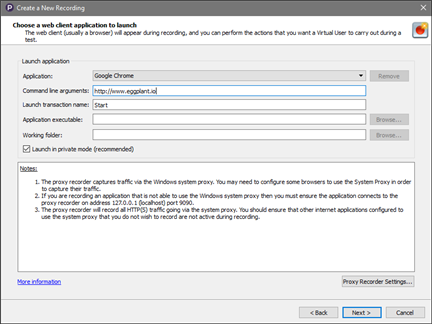
-
In the About to start recording panel, click Start recording.
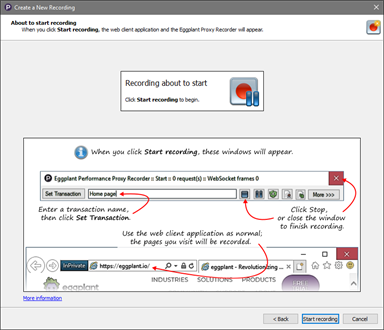
The browser opens a blank page and the Eggplant Performance Proxy Recorder opens. When you are prompted to, install a certificate to record the HTTP traffic, if necessary. The wizard remains open in the background displaying the Recording in progress panel.
-
In the web browser, perform the actions you want to record. These will be included in your first transaction. The default name of the first transaction, which is
Start, was set on the Choose a web client application to launch panel (see step 4). -
At the top of the Proxy Recorder, in the Set Transaction field , enter the name you want for the second transaction you would like to record, then click Set Transaction.

-
Perform the actions in the web browser that you want to include in the second transaction.
-
Repeat the two previous steps until you are satisfied with the content of your recording.
-
Click Next.
noteYou can cancel your recording at any time and start the wizard again to create a new recording.
noteThe following list provides an example of the transactions that you might want to include your recording:
- Second transaction name:
goToWebsite, click Set Transaction and enter the URL for the Google home page in the browser that appears. Internet Explorer opens by default with the proxy recorder. - Third transaction name:
performSearch, click Set Transaction, and enter the Eggplant website in the Google search window. - Fourth transaction name: we entered
selectResult, clicked Set Transaction, and then selected one of the results for the Eggplant website.
- Second transaction name:
-
On the Proxy Recorder toolbar, click More to view your recorded transactions. Alternatively, click the Requests tab to see the requests associated with your activity. The following page shows the
selectResulttransaction and the URL for Google. The red dot button indicates that the recording was paused.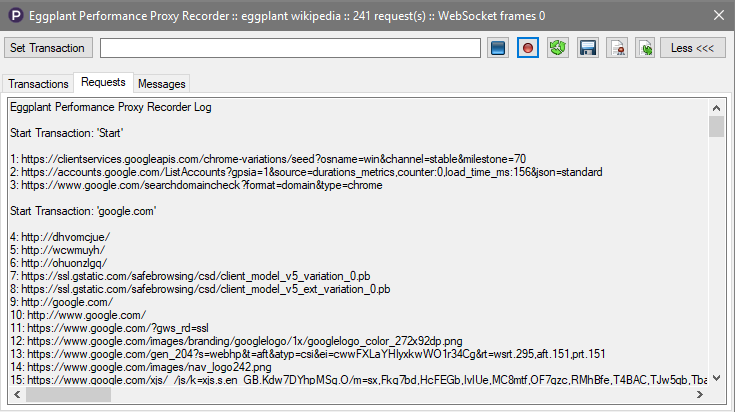
-
When you've completed your recording, either click
 on the recorder toolbar, or click close on the recorder to stop recording. You may see a prompt to confirm that you want to exit the recorder. When you exit the recorder, the Recording finished panel opens in the wizard.
 -
Click OK to confirm you would like to end the recording.
-
Click Next to continue. The Filter hosts panel opens showing you the hosts that were found in your recording.
-
Use the Filter hosts panel to specify which hosts you would like to have included in your final script. In the example below, the Allowlist filter mode is selected to specify that you only want to include the specified hosts.
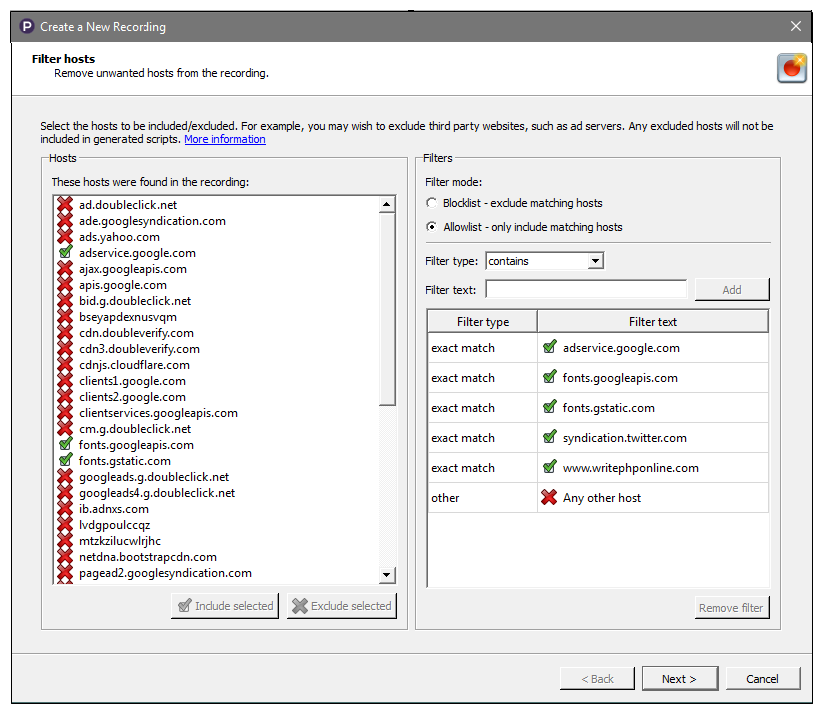
-
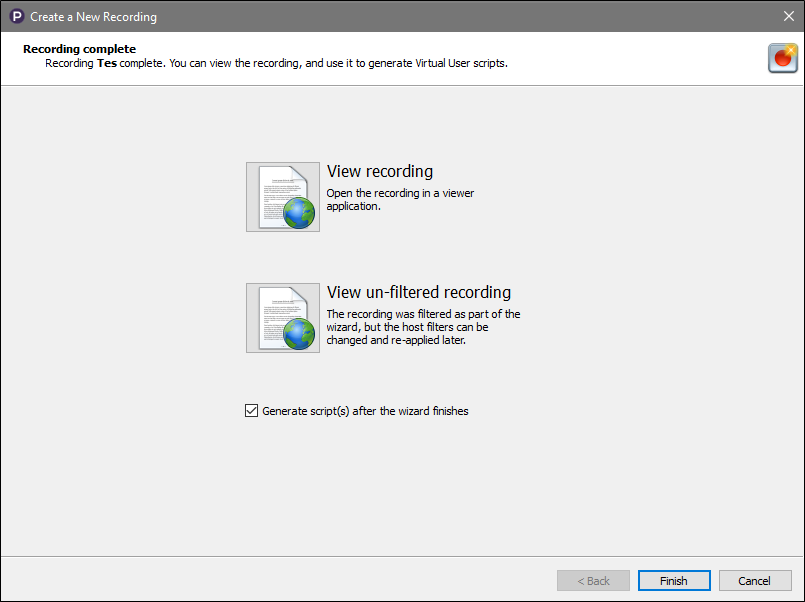
When you've specified host filters, click Next. The Recording complete panel opens, providing you the option to view the recording in its filtered or unfiltered form. By default, Generate script(s) after the wizard finishes is selected, which will automatically launch the Generate Script from Recording wizard when you complete the recording process.
-
Click Finish. The Generate Script from Recording wizard opens immediately if the Generate script(s) after the wizard finishes option was selected in the previous step.
-
Continue to the next section.
Generating a Script from your Recording
Recording a web session simply creates a raw recording. The Eggplant Performance Web script generator creates the final Web script with the help of the Generate Script from Recording wizard.
To generate a script from your recording:
-
Run the Generate Script from Recording wizard. It opens to the Choose a language panel.
As described in the previous section, the Generate Script form Recording wizard opens automatically when you choose Generate script(s) after the wizard finishes on the Recording complete panel in the Generate a New Script wizard.
-
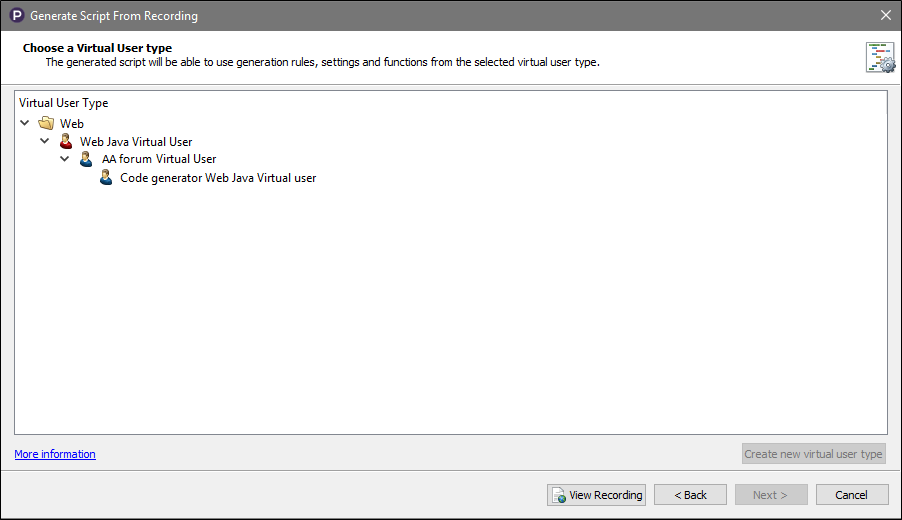
Select the programming language (Java or C#) in which you would like your script generated and click Next. The Choose a Custom Virtual User type panel opens. The examples below use a C# VU.
-
From the Virtual User Type list, select the Web VU that you created and click Next.
-
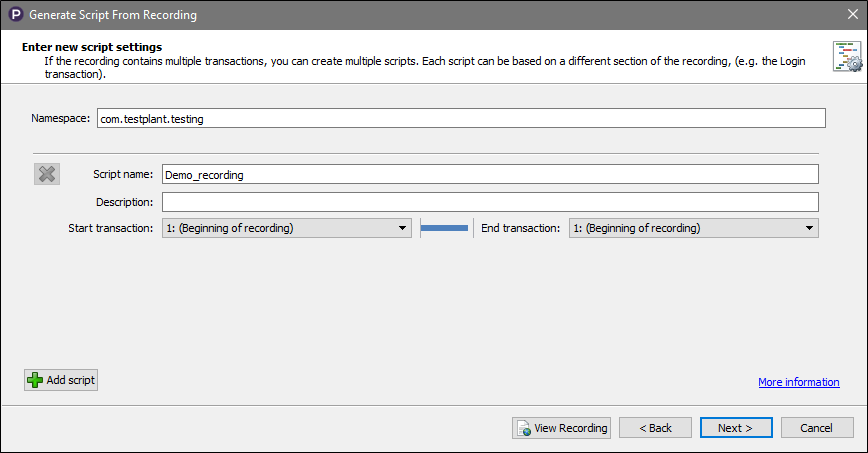
In the Enter new script settings panel, select the transactions from your recording that you would like to include in the generated script and click Next.
-
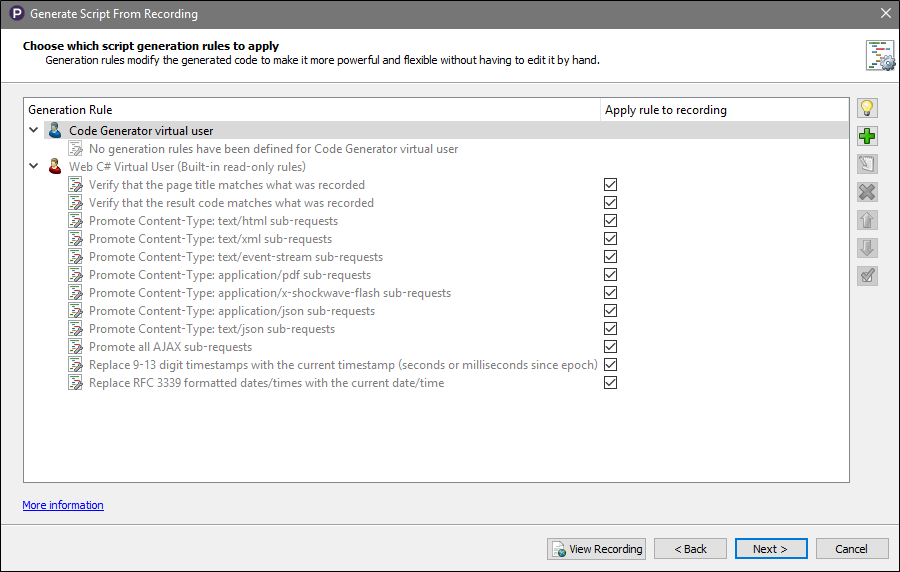
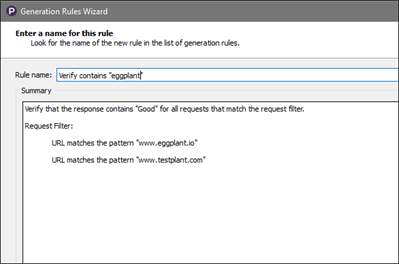
In the Choose which script generation rules to apply panel, click the Add (green plus) button to add a new generation rule for your VU.
 The Generation Rules Wizard opens and displays the Select Rule Type panel. Generation Rules allow you to automatically handle tasks such as parameterization, correlation, and validation each time a new script is generated.
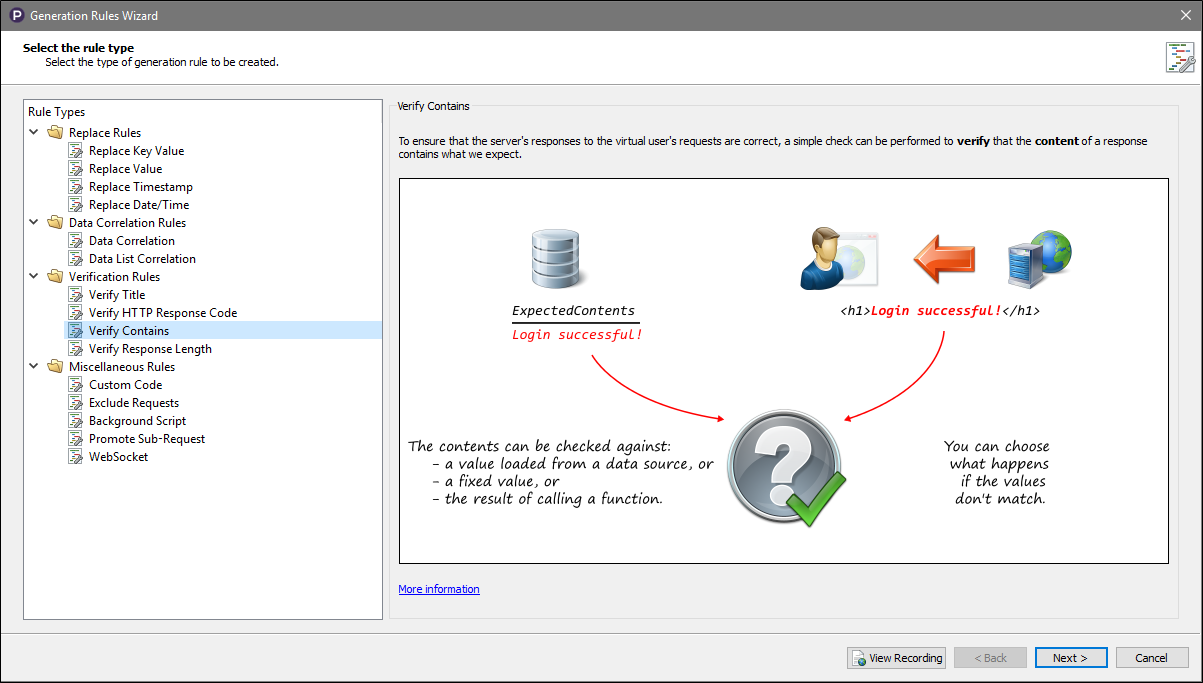
The example below uses the Verify Contains rule type, which lets you validate that the server's responses to the virtual user's (VU's) requests are accurate during the test. By verifying a short section of the page content, the virtual users can report errors if something goes wrong. For example, if the users are unable to view the page they're expecting to see.
-
From the Rule Types pane, select Verification Rules > Verify Contains rule and then click Next. The Verify Contains rule is used to ensure that the server’s responses to the Virtual User’s requests are accurate.
-
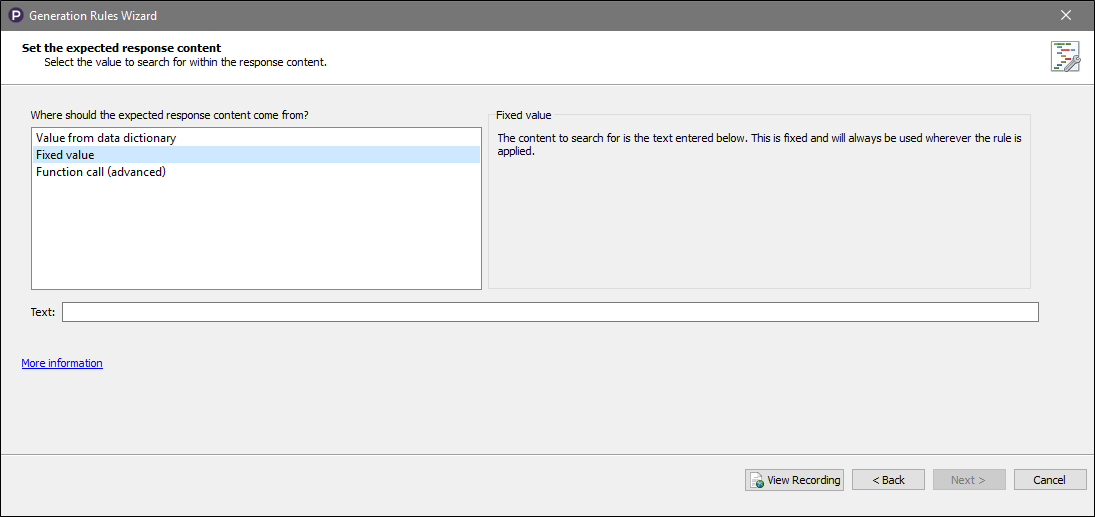
In the Set the expected response content panel, click View Recording to use the Web Log Viewer to see the requests and responses made during the recording so that you can find the appropriate text to enter in the Text box. Close or minimize the Web Log Viewer window when you finish viewing the recording.
-
On the Select the rule type panel, click Next.
-
In the Select the success/failure options panel, from the Action to take on failure list, select the action that you want to occur if the content cannot be verified.
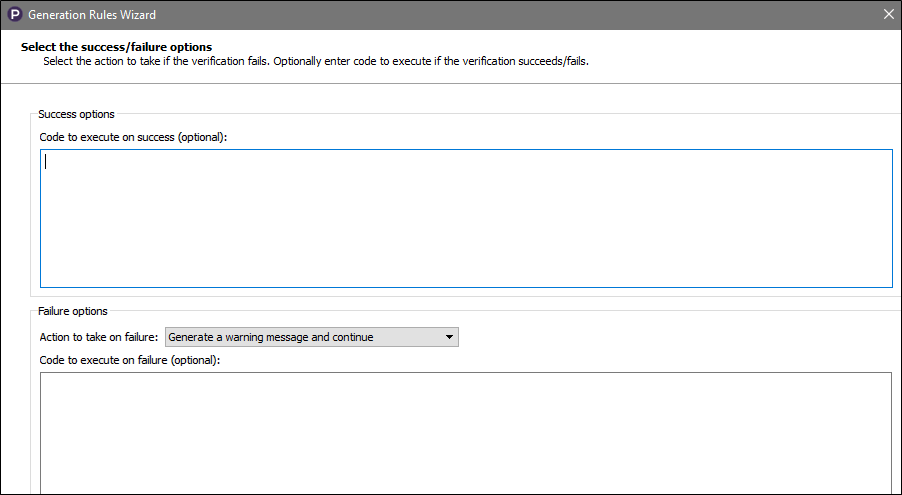 For example, Generate a warning message and continue causes a warning message to appear in the run-time results, but the execution otherwise continues. Click Next to continue.
 -
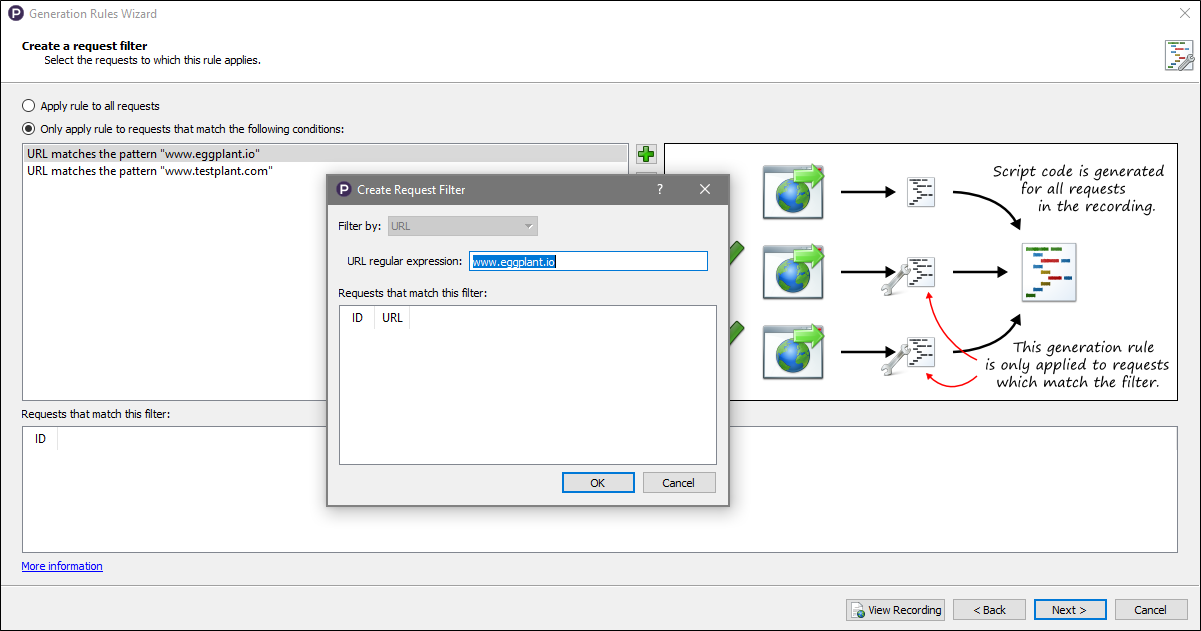
In the Create a request filter panel, select the appropriate filter option.
For example, select Only apply rule to requests that match the following conditions and click Add to create request filter that limits the requests to which your generation rule is applied.
-
Review the matching requests and adjust the request filters until the requests you want are displayed. When you are satisfied with the filters, click OK to create your filter. The filter and its matching requests are added.
-
Click Next.
-
In the Enter a name for this rule panel, review the summary of your new generation rule and click Finish to add your completed rule. The new rule is displayed on the Choose which script generation rules to apply panel of the Generate Script from Recording wizard.
-
Click Next. The Advanced web script generation options panel opens. For our example, we accept all the default values on this panel and its tabs.
-
Click Generate to generate your script. The Generation in progress panel opens showing the script generation progress. When it finishes, you see a message Script generation complete! If you see errors or a failure instead, troubleshoot accordingly.
-
When the script generation finishes, click Finish. Your new script opens in the main window and appears under Scripts in the Project tree view. You can see the rules your script was generated with in the main window.
-
Click Next on the Select Rule Type panel. The Set the expected response content panel opens.
-
Record and generate at least one more script so that you can create a workflow and then proceed to the next section.
Creating a Workflow
You can create a simple test consisting of one script without using a workflow. However, using a workflow gives you a greater degree of control over your scripts when you run a test. In a workflow, you can place scripts in three different categories:
- Initial: Scripts placed in the initial section run once at the start of a test.
- Repeated: Scripts in the repeated section are iterated the number of times specified in the Virtual User Group Runtime Settings.
- Final: Scripts in the final section run once at the end of the workflow.
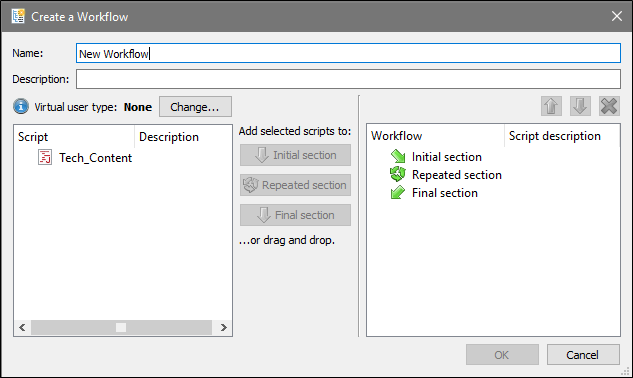
To create a workflow:
-
Right-click Workflows in the Project tree, then select New workflow
-
Provide a name for your workflow.
-
Build the desired workflow from your scripts using the Initial section, Repeated section, and Final section selectors, then click OK. Your new workflow opens in the main Studio window and is listed under Workflows in the Project tree.
For more detailed information on workflows, see Working with Workflows.
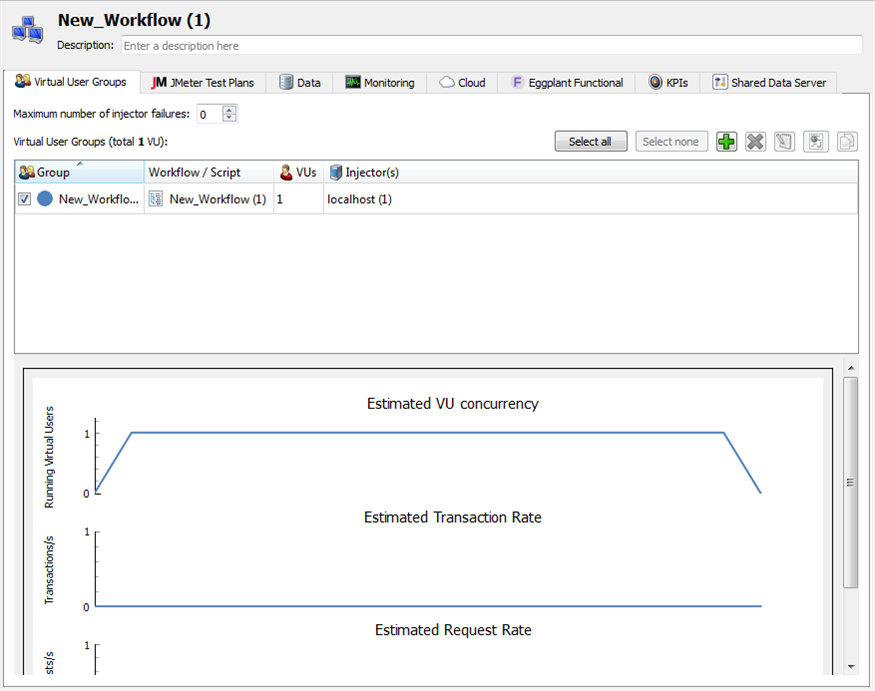
Creating and Configuring a Test
Designing a test allows you to configure how your VU scripts are used during test execution. You can reuse and configure a set of scripts in different ways to allow an infinite number of different tests.
To create and configure a test:
-
Right-click your new workflow and select Create Test. The Create test from script dialog box opens.
-
Enter a name for the test and click OK. In our example, we entered a name but accepted the default group. The test opens in the Test View pane.
-
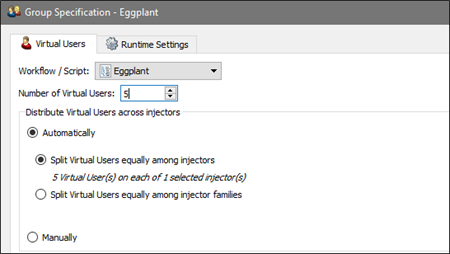
Double-click the VU Group for your new workflow.
-
In the Group Specification panel, on the Virtual Users tab, increase the number of VUs in the VU group. Use a conservative number, such as 5, so you don't tax the localhost injector. Also be mindful of the maximum VUs allowed by available licenses.
-
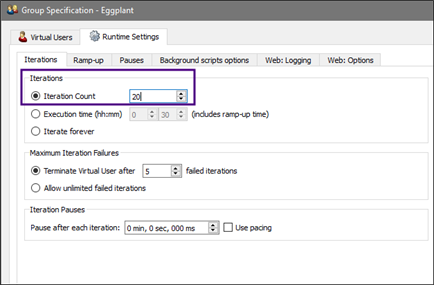
Select Runtime Settings > Interations, and raise the number of iterations to 20 to increase the amount of data gathered and available for later analysis. Click OK to commit the changes.
Building Your Project
You must build your project to ensure it compiles correctly.
To build your project:
-
In the toolbar, click Build.

-
Confirm that the build was successful.

Your test is ready to run. Continue to Running an Eggplant Performance Test.