Adding Static Injectors
There are several ways to create a new static injector in Eggplant Performance Studio:
- In the Create an Injector Family wizard, select the Add injector(s) after the wizard finishes checkbox.
- In the workspace tree, right-click the injector family you want to add injectors to and select Add Injector(s) to Family.
- With an injector family selected in the workspace tree, select Injector Family > Add Injector(s) to Family from the menu or click the Add Injector(s) to Family button on the Studio toolbar.
- With an injector family selected in the workspace tree, click the Add (+) button in the injector section of the Studio window.
All of the above methods open the Add Injector(s) to Family dialog box.
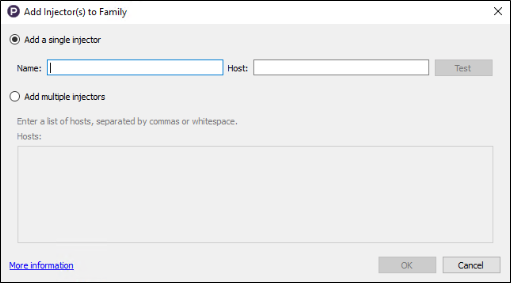
Add Injector(s) to Family Dialog Box
This dialog box provides you with two options for creating injectors:
-
Add a single injector: Requires you to enter a name and the IP address or hostname of the target injector machine. You can't change the injector name after it's been created, so plan ahead for a useful and descriptive naming convention, such as the hostname of the injector machine.
Click the Test button after you've entered your information to test the connection with the given settings.
-
Add multiple injectors: Quickly add multiple injectors to the family by entering the hostnames or IP addresses, separated by either commas or white space. When you create injectors with this method, what you enter here becomes the name for that injector.
When you've entered the appropriate information, click OK. The new injector or injectors appear in the list of injectors for the chosen injector family.
Names for injectors must be unique both within the injector family and across injector families in the same project. If you attempt to add an injector with a duplicate name, an error message prevents the action from being completed.