Building Test Cases
In the Test Case Builder, you can quickly create new or update existing test cases. With built-in validation, this no-code, guided process allows any team member to develop test cases from scratch. To save time, you can duplicate an existing test case, and use this as a template.
You can create Model based test cases and Script based test cases.
Build a New Test Case
Add a Test Case
Start by adding the details of your test case.
-
Either go to Designer > Test Cases or if you're editing a model, in the top menu, select Test cases.
-
Click Add New +.

Create new test case
-
Select the type of test case you would like to create - either Model based or Script based.
-
In the Test Case box, enter a name for your new test case. Do not include any of the following characters:
" \ ; : {}. -
(Optional) Enter the following details to more easily identify and audit your test case:
- Description: A brief description of the test case.
- Origin: The source of the test case. For example, another test application or auditing system.
- External ID: The unique identifier for the test case in the external system.
- Tags: Add a tag to easily identify a test case and associated test results as belonging to a particular category or feature. You can either select an existing tag from the list or type in a new tag name and press Enter.
- Ignore this test case in test config runs: Toggle to ignore this test case in a test run. This toggle is disabled by default, which means that the test case is not ignored in a test run by default.
- Test management tool: The integration tool used to send the execution results from DAI to the tool.
-
If you selected a Test management tool, you will need to input details for the tool:
- For a Jira Xray Cloud integration tool, enter Test plan key and Test key.
- For a Jira Zephyr integration tool, enter Test case key and Test cycle key.
-
If you have chosen Model based there will be an option to choose your model in the dropdown. If you have chosen Script based there will be an option to choose your suite in the dropdown.
-
Click Create to begin building your test case. For Model based, The Test Case Builder appears with the initial step of the test case, and any global actions, highlighted. For Script based, The Test Case Builder appears with a dropdown to choose a first script to add to a step.
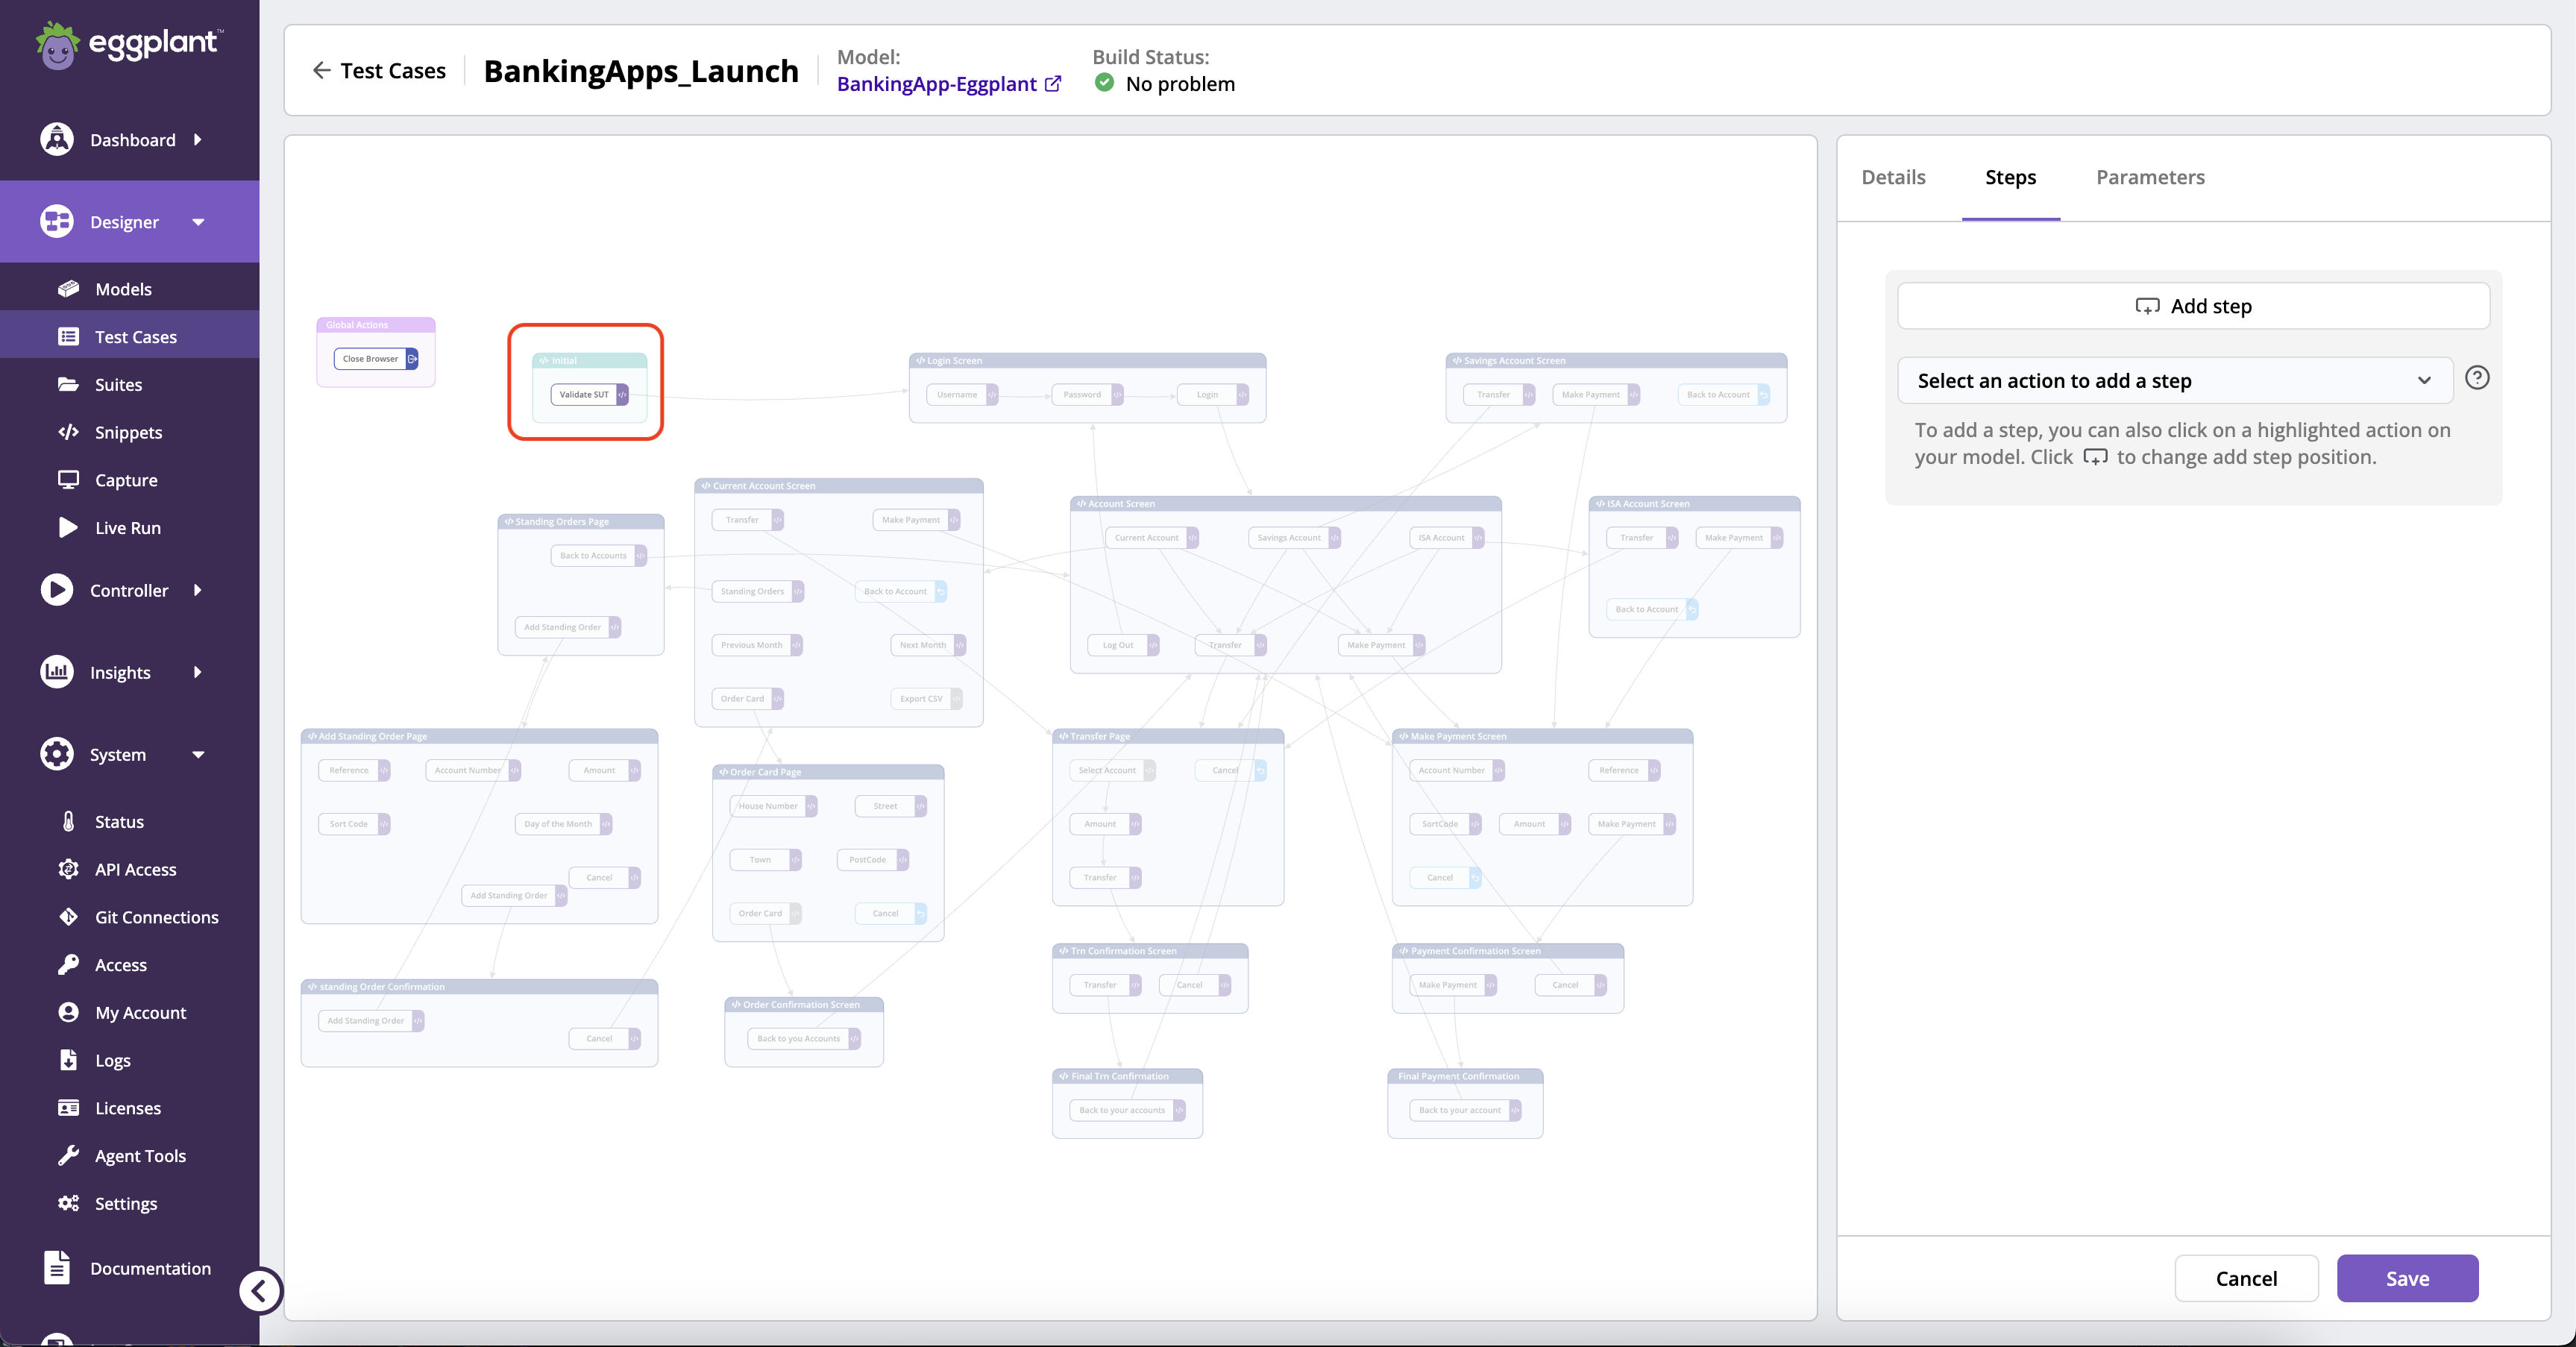
Test Case Builder
Define Your Model based Test Case
Capture the specific path through your model that you want to test. To make sure that you create a valid test case, the Test Case Builder only allows you to select a sequence of states and actions that adhere to the rules built into the model.
-
To add the Initial step, as the starting point for your test case, either:
-
Click on a highlighted action on the model canvas
-
Select an action from the Steps list.
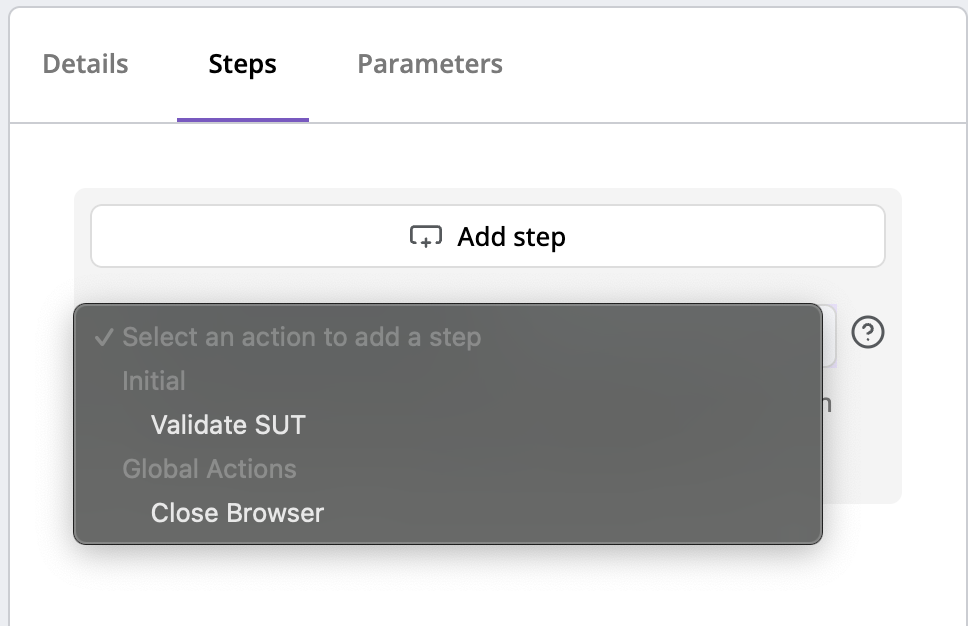
Steps list
A step is added to the list, and the next available actions are ready for selection.
note- If the selected action is connected to a sub-model, this appears as a step.
- When actions are connected in a sequence within a state, the sequence controls the order in which the actions are available for selection.
-
-
Keep adding actions until you either:
- Reach the end of the sequence of states and actions that you want to test.
- There are no actions left to select, and the following message appears: There is no valid action to add as step.
If you add a step (or steps) by mistake, click the trash button next to it to remove it.
-
To insert a step at a different position in the Test Case, as opposed to the end, click on the Add step below button. The Steps list will move below the appointed step. You may select an action to add a new step below the appointed step and add within the list.
-
As you add steps, build errors may be highlighted at the top of the page, which are commonly due to missing parameter values. Just click on the Parameters tab to see which parameters are highlighted. You may choose to leave certain parameter values blank, and you can also override values by entering a different value here.

The DAI test case Parameters tab showing the "Parameter values not entered" message
noteTo give you extra control as you build a test case, you can:
- Enter specific values for global, state, or action parameters that have DAI-generated values within the model. Or, if you leave them blank, generated values are used when you run the test case.
- Enter different values for the same state parameter when that state is triggered multiple times within the same test case.
-
When you're ready, click Save. Then click Run to execute your test case and view the results.
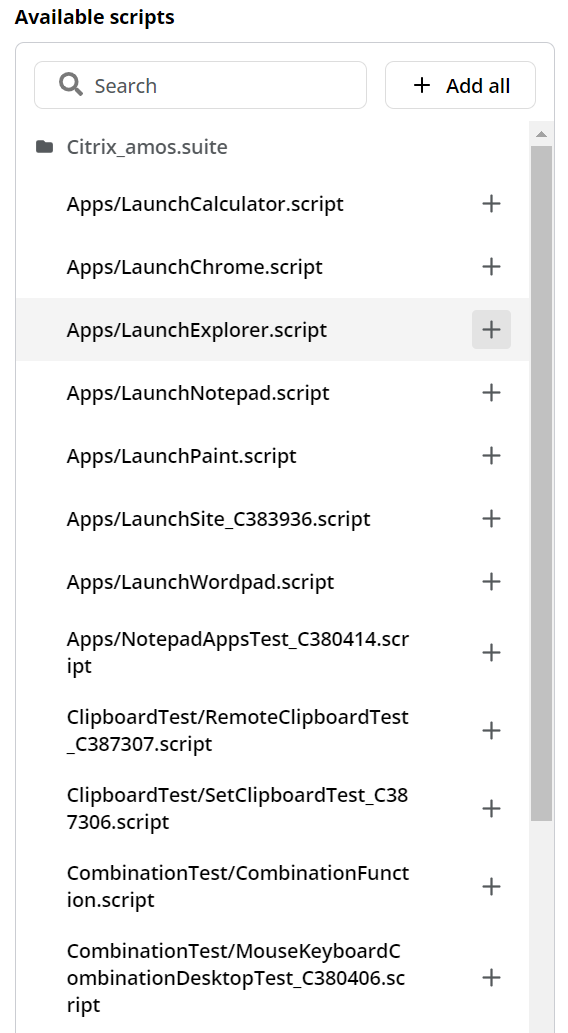
Define Your Script based Test Case
This allows you to create a Script based Test Case by choosing a suite and scripts within that suite.
-
To add a step to the test case, click a script from the list in the left panel.
-
Keep adding steps until you have completed your test case.
-
You can also add all scripts from the list into your test case by clicking Add all button.
-
If you are looking to add specific scripts, but the list in the left panel is too long, you can filter it by typing in the names of the scripts that you would like to add.
-
Likewise, you can click Add all button to add all scripts from the filtered list.
-
Once all scripts are added, you can remove any script individually from the script list in the right panel by clicking on the trash button.
-
You can also remove multiple scripts by checking their checkboxes and click Remove button.
-
The Remove button becomes Remove all if none of the checkboxes are checked and allows you to quickly remove all added scripts.
-
When you're ready, click Save. Then click Run to execute your test case and view the results.
We now support script selection from helper suites that are defined in Eggplant Functional. The maximum number of scripts/steps that DAI allows in a script-based test case is 1,000. You cannot add more than 1,000 scripts/steps to a script-based test case.
Helper suite support
Edit an Existing Test Case
It's important to maintain your test cases. A test case can become invalid if you change the name of a state or action in a model, or related parameters, and don't update the affected steps.
To update a test case:
- Go to Designer > Test Cases. Search or filter the list to find the test case you're interested in.
- From the actions menu, select Edit. The test case appears ready for editing. If the test case is already out-of-step with recent model changes, an error appears. In this case, click Edit and follow the on-screen text to resolve the error.
- You can now do the same editing tasks as when you create a new test case, including removing and adding steps, updating parameter values, and changing the Test Case name.
- When you have made all changes, click Save.
- To learn more about viewing, managing, and analyzing existing test cases, see Managing Test Cases.
- To understand more about test cases in Eggplant DAI, and how they influence your test results, see About Test Cases.
To create a test case with requirements: