Test Management Tool Integrations
DAI supports integrating with test management tools to streamline test case synchronization and reporting. Once you connect DAI to a test management tool, DAI will keep your test cases, requirements, and test results automatically synchronized between the two systems.
To manage test management tool integrations in DAI, navigate to System > Test Mgmt. Tools to display the Test management tools page.
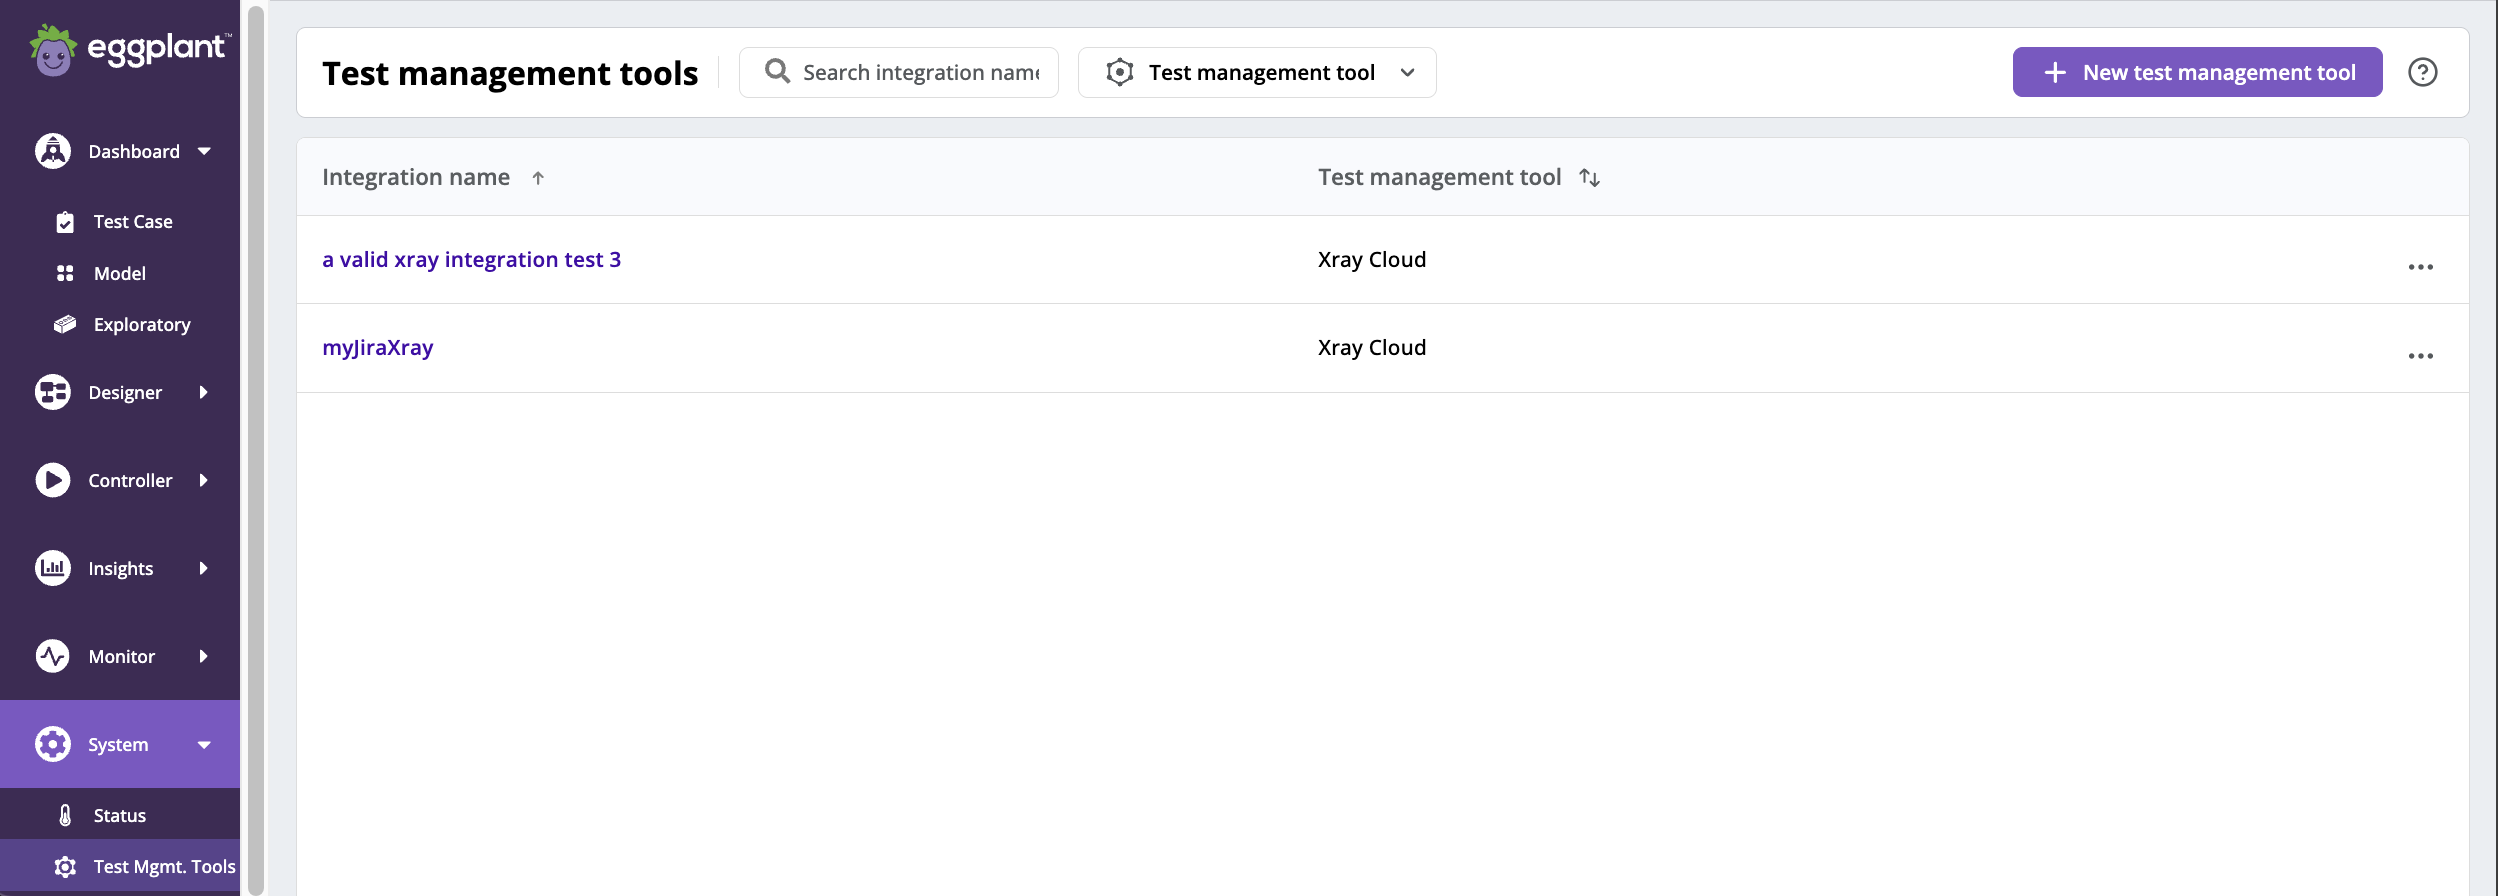
The DAI Test management tool page
Here, you can see the following details about your test management tools at a glance:
- Integration name: The display name of the test management tool.
- Test management tool: The type of test management tool specified for the integration, such as Xray.
You can also add, view, edit, and delete integrations from the Test management tools page.
-
Click the name of an integration to view its details.
-
Click
 (the Actions menu) to Edit or Delete an integration.
You can filter the integrations listed on the Test management tool page by name or tool type as follows:
- Search integration name: Type part of an integration name in this field. DAI filters the integration names you see as you type.
- Test management tool: Select the test management tool type from the drop-down list to filter by it.
Adding a Test Management Tool Integration
You can integrate a test management tool into DAI by connecting it within DAI. The streamlined tool synchronizations are established automatically when the integration is used in a test case (under Designer > Test Case) and run in a test configuration (under Controller > Runner).
Follow these steps to add a new test management tool integration:
-
Go to System > Test Mgmt. Tools. The Test management tools page opens.
-
From the top menu, click + New test management tool. The New test management tool page opens.
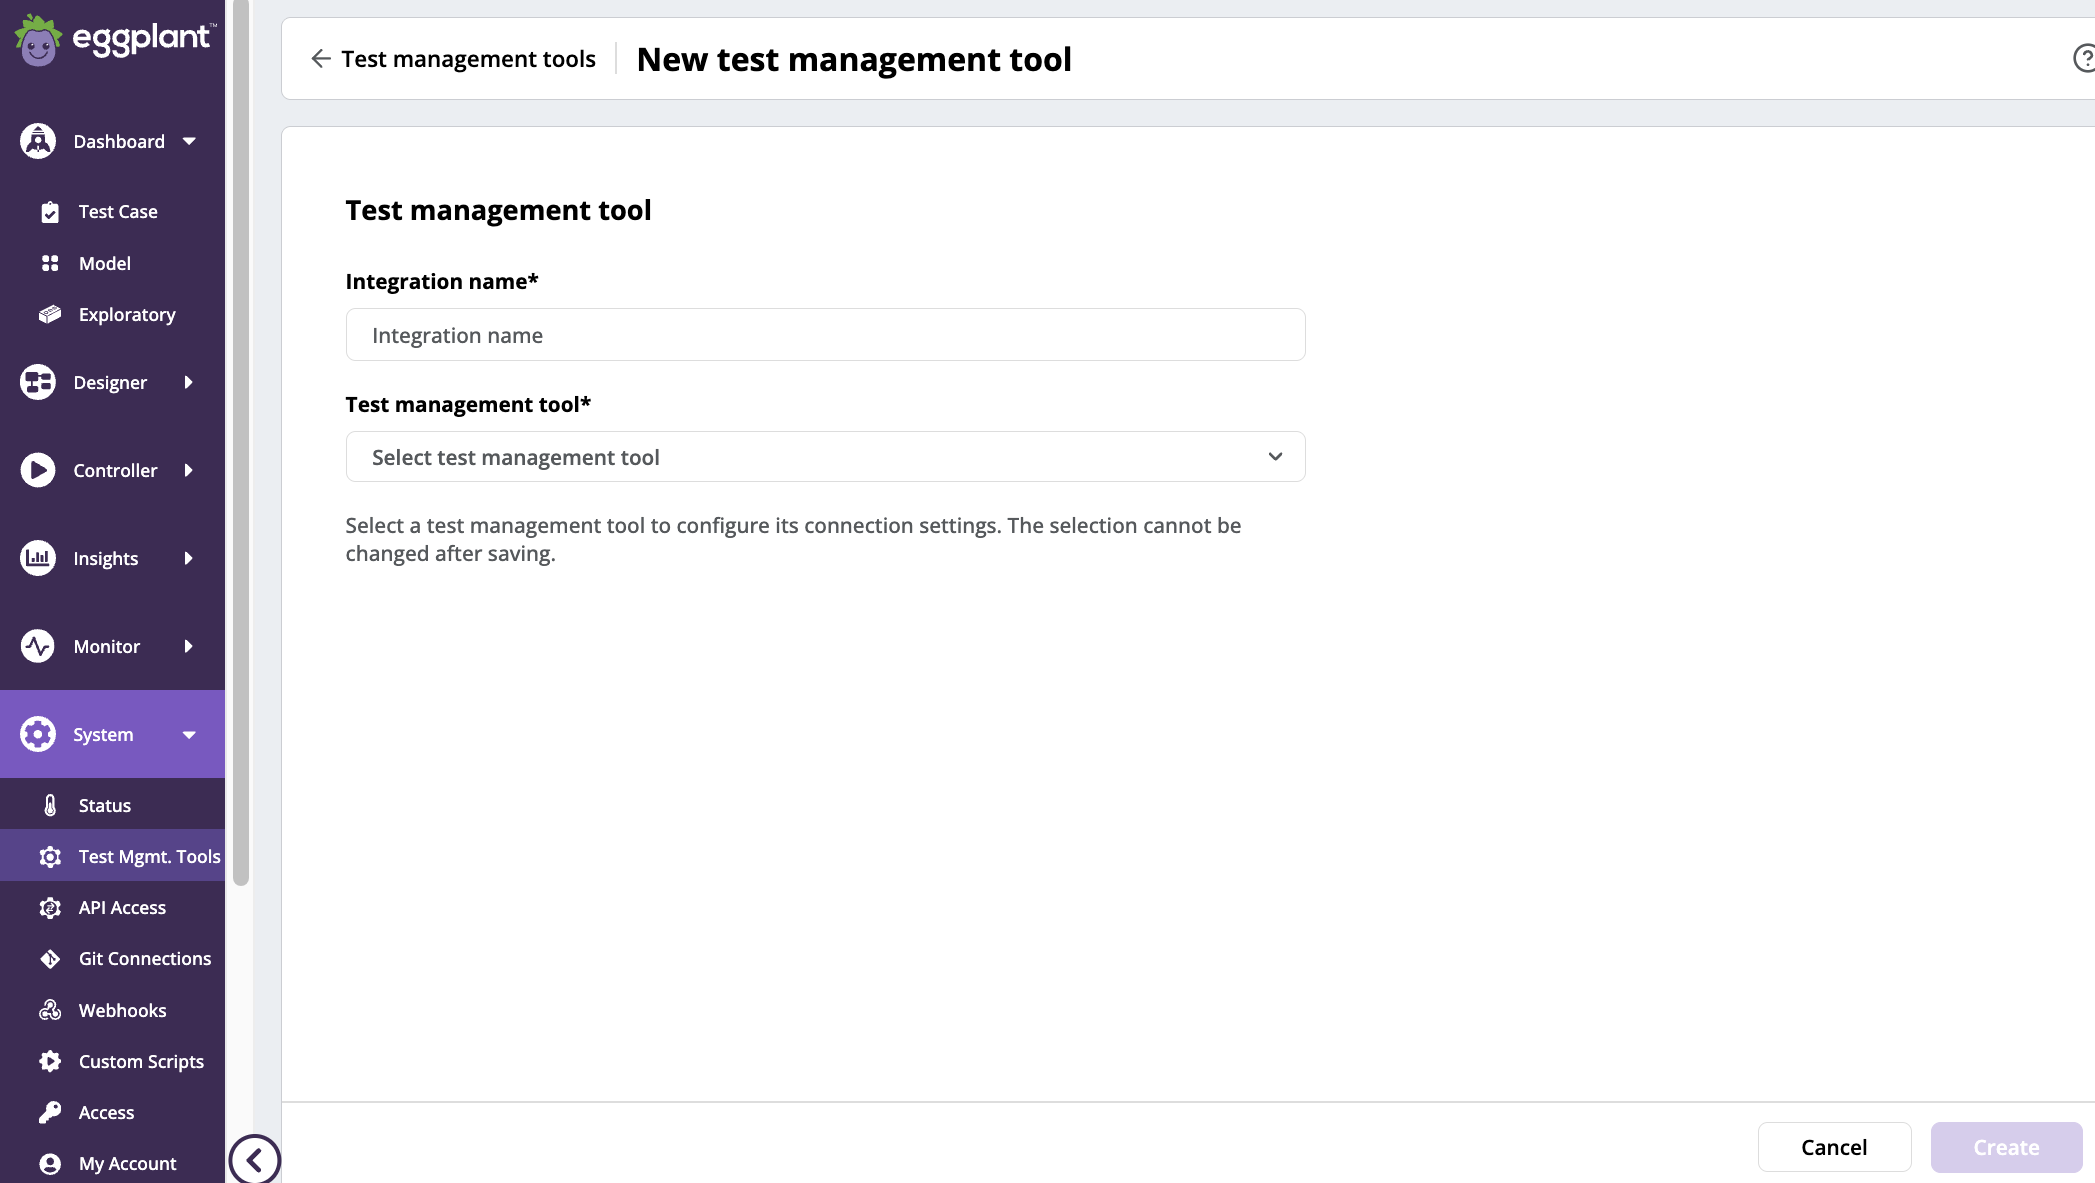
DAI New test management tools page
-
Enter a display name for the integration in Integration name* field (required) so that you can easily identify it in your list of test management tool integrations.
-
Select a Test management tool to connect a test management tool type* (also required) for your integration. The available options for this DAI release are as follows:
- Xray Cloud: Select for integration with Xray Cloud.
More fields appear on the Test management tool page when you select an integration type. The fields you see depend on the integration type you select. The fields are described in the specific integration section below.
noteThe selected test management tool cannot be changed after saving.
-
Provide the information for connecting to the selected integration tool as described in the step-by-step instructions below.
-
Click Create and close.
The newly added test management tool integration appears on the Test Management tools page.
Adding a Xray Cloud Integration
Xray Cloud is one of the test management tools that you can integrate with DAI. The information you need to supply when you add a Xray Cloud integration as described in Adding a Test Management Tool Integration is provided below. Included is a table describing the Xray Cloud integration settings, followed step-by-step instructions for adding a Xray Cloud integration.
Xray Cloud Settings
| Xray Cloud Setting | Description |
|---|---|
| Client ID | The Client ID to connect to the Xray Cloud. |
| Client secret | The client secret for client ID to connect to the Xray Cloud. |
| Region | The Xray Cloud region you want your integration to use, such as AU, EU or US. |
| Version | The fix version to assign to a test run. |
| User | The user to assign to a test run. |
| Test Environment | The associated test environment to assign to a test run. |
Step by step: Entering Xray Cloud Connection Information
-
From the Test management tool list, select Xray Cloud. Additional fields appear on the New Test management tools page for you to enter information about the Xray Cloud system that you want to integrate. Information about each of the settings is provided in the Xray Cloud Setttings table above.
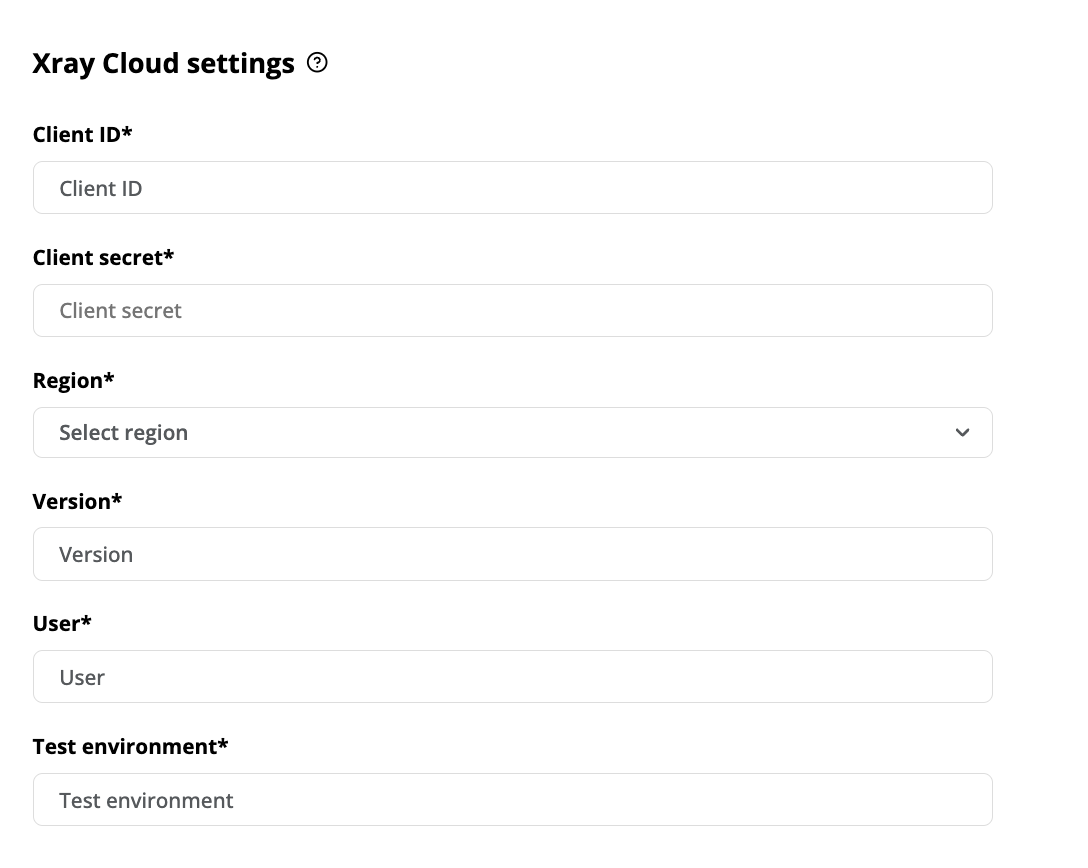
Xray Cloud integration fields on the DAI New test management tool page
-
Enter the Xray Cloud client ID and secret in the Client ID and Client secret fields, which are required for DAI to securely authenticate and to make REST API requests to Xray Cloud.
noteTo obtain Client ID and Client secret for Xray cloud, please refer to Xray > Global Settings - API Keys in the Xray Cloud documentation.
-
Select a Region.
-
Enter Version, User, and Test environment. Once all the Xray fields are filled with values, the Test connection section becomes visible.
-
(Optional) Click Test connection to validate the connection of the integration in Eggplant DAI to Xray Cloud.
noteYou do not need to successfully connect to the test management tool to create the connection. If the connection fails, you can still create it now and fix it later as described in Editing a Test Management Tool Integration.
Editing an Integration
To edit an existing test management tool integration:
- Go to System > Test Mgmt. Tools.
- Find the test management tool integration that you're interested in updating, then from the (Actions) menu, select Edit.
- From here you can update the test management tool integration details.
Viewing an Integration
To view the details for an existing test management tool integration:
- Go to System > Test Mgmt. Tools.
- Find the test management tool integration that you want to view, then click on the integration name.
Deleting an Integration
- Go to System > Test Mgmt. Tools.
- Find the test management tool integration that you want to delete, then, from the (Actions) menu, select Delete. A dialog box appears asking you to confirm the deletion.
- To confirm that you want to delete the integration, click Delete on the dialog box. Or, click Cancel to cancel the deletion.