Integrating Webhooks in Monitoring
Use Webhook Profiles to integrate real-time alerting with third-party apps such as Slack, Jira, ServiceNow, PagerDuty, and your DevOps pipeline. This is particularly useful for sending messages to your preferred apps notifying subscribed users when an error is opened or closed. Webhooks typically use HTTP requests with a JSON payload, which includes the message and other optional details as described below. To view sample webhook configuration examples, see Webhook Integrations with Third-Party Apps.
Webhooks are separate from the alerting profiles you have set up within the account. A webhook will always be sent when an error is opened or closed based on how you've configured the webhook profile and the alerting state of the monitor/step in your account.
Configuring Webhooks
The Alerts panel under the Settings menu in Monitoring Portal is where you configure and manage webhook profiles, and define relevant targets required to receive notifications in the event of an error being opened or closed. By default, webhook notifications are disabled for all monitors.
Step by Step: Create a Webhook
-
Go to Settings > Alerts > Webhook Profiles. The panel on the left may display current Webhook profiles, if any.
noteClicking on an existing webhook displays the Configuration tab for that webhook profile.
-
Click New Webhook Profile on the left. The Configuration page for creating new webhooks opens.
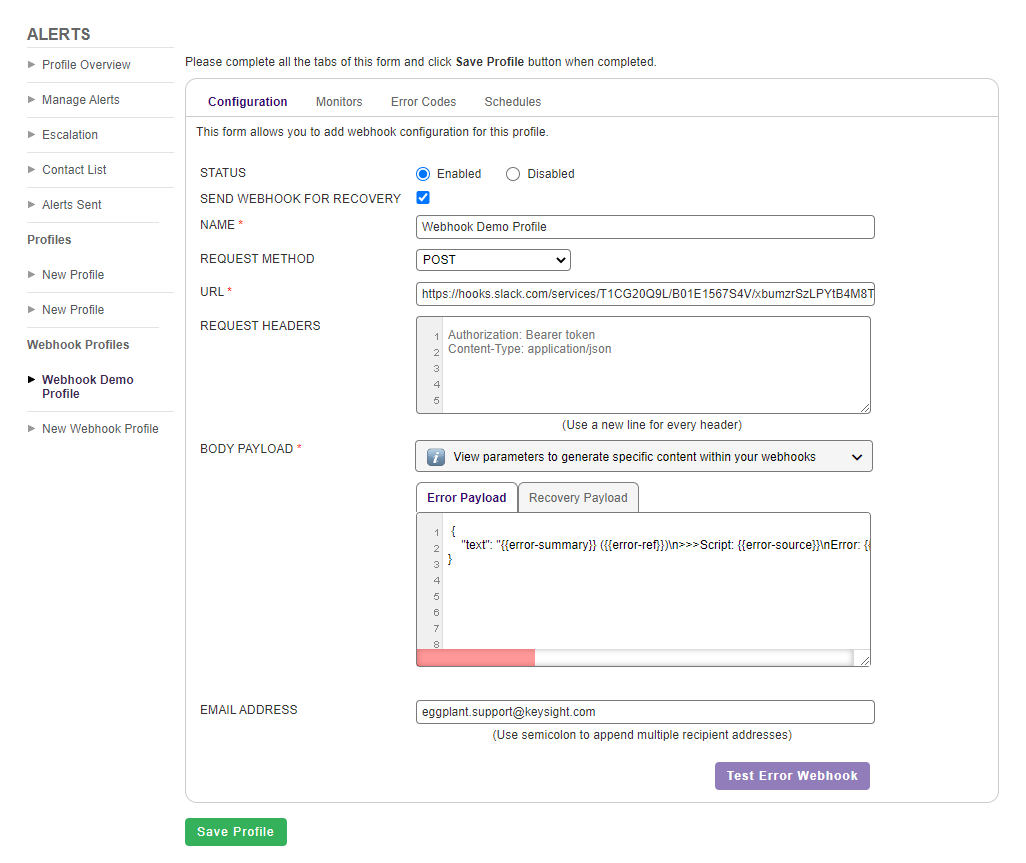
The Configuration screen for creating a new webhook profile
-
Enter the following information based on the application you want the webhook to integrate with:
-
Status: Set the status to Enabled or Disabled to indicate whether this webhook profile should send notifications to your app. For webhooks with disabled status, no events will be triggered for your app.
-
Send Webhook for Recovery: Select this option to indicate whether this webhook profile should also send alert notifications when the error is closed. You can configure relevant payloads under the Recovery Webhook tab.
-
Name: The name of the webhook profile.
-
Request Method: Select from the available request methods: POST, PUT, GET. By default, POST is selected for a new webhook request.
-
URL: Enter the URL for the application you want to send notifications to. For example, following is a sample outgoing webhook URL to Slack:
https://hooks.slack.com/services/T1GQ12KRT/BSYV6SK9B/WLgU12mWWeJYsHIbHSVrkKj -
Request Headers: (Optional) Enter any applicable request headers for the webhook, e.g., authorization type
Bearer Tokenwith Content-Typeapplication/json. If you have multiple request headers, specify them each on separate lines. -
Body Payload: Click to expand and select the
macrosas displayed in the help text to include as body parameters. These macros represent dynamic values that are sent in the payload, relevant to the specific monitor error. For example, to configure your webhook to send notifications to Slack as an incoming webhook, you could use the following sample body in Error Payload or Recovery Payload fields separately:{"text":"{{error-summary}} ({{error-ref}})\n>>>Script: {{error-source}}\nError: {{error-description}} ({{error-result-code}})\nSeverity: {{error-severity}}\nState: {{error-state}}\nEnvironment: eggymon\nFurther details can be found <{{error-url}}|here>"} -
Error Payload: Enter the body parameters as needed by your application by clicking the help text in the payload that's relevant to a specific monitor error.
-
Recovery Payload: This tab is only available if you select the Send Webhook for Recovery check box on the top. You can define a separate payload for recovery webhooks here, e.g., if you want a customized json payload to be sent with the macros defined in the help text.
noteThe Body Payload field is optional for GET requests.
-
Email Address: Specify a list of e-mail addresses that you want to send notifications to when a webhook delivery fails to send the message, i.e., if the endpoint of your application is unavailable, or if it returns an HTTP error. To add multiple email addresses, separate them with a semicolon.
-
Test: Click to confirm that the webhook that you've just created is valid. The Test Webhook page opens, displaying the response from the endpoint.
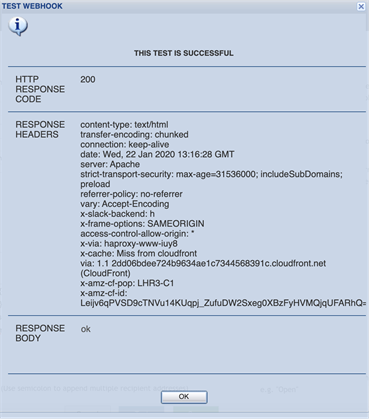
Testing a webhook
-
Save: Click to save the newly configured webhook for this profile. The new webhook appears in the list of current webhooks.
-
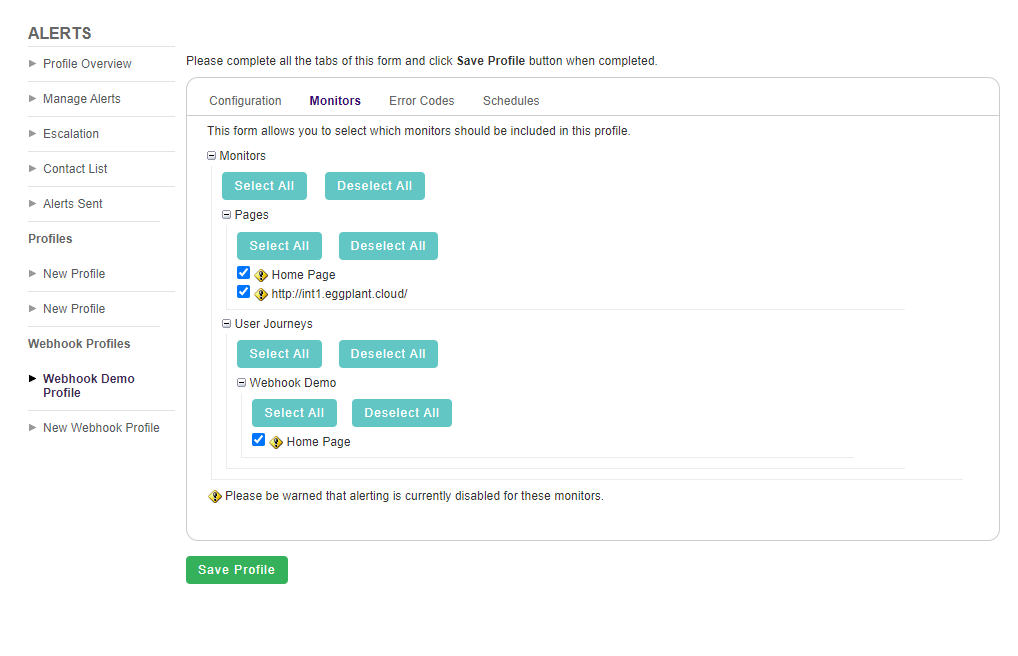
Monitors tab: Use this tab to select the monitor or step you want to enable this webhook profile for.
A webhook profile configured for a monitor
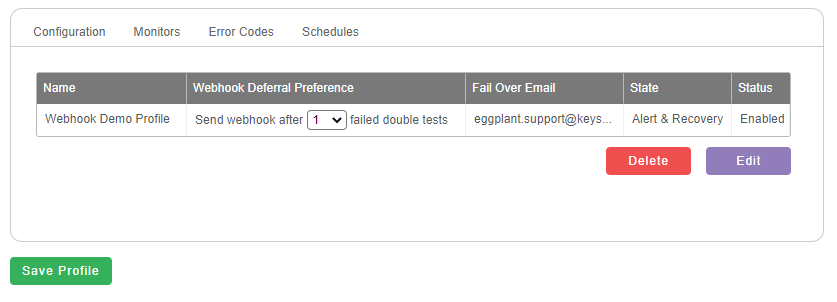
Managing Current Webhook Profiles
You can click on an existing webhook profile on the left panel to view, edit, or delete the Configuration page and Monitors for that Webhook Profile.
Managing a current webhook profile
-
To edit an existing Webhook Profile, click the Edit button and make changes in the Configuration page that opens as required, and then click Save Profile.
-
To change the Webhook Deferral Preference setting, select from the options available in drop-down list. Note that this is a global setting for the selected Webhook profile. For example, if the Webhook Deferral Preference setting is set to 2, Webhook alerts will only be sent when two successive double failures occur for the selected monitors or steps when using this profile.
-
To delete a webhook, click the Delete button. Then, click Yes to confirm.
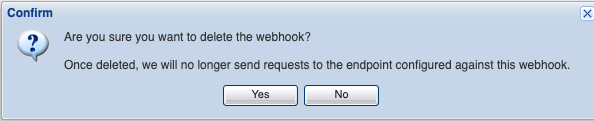
The Confirm webhook deletion dialog box
-
To enable webhook for a monitor or step, switch to the Monitors tab. Then, click the plus (+) sign to expand the Monitors section to reveal pages and steps from User Journeys and select the required monitors.
Error Codes
You can select from a list of error codes to trigger Webhook notifications for the selected Webhook Profile. For example, if one Webhook Profile has system related error codes (e.g., Login Failure) selected, the contacts to be notified might only belong to the IT team. You can then configure a separate Webhook Profile to send only the content related alerts (e.g., Page Size) to the team specifically concerned with maintaining the content.

The Error Codes panel for selecting error codes that trigger a webhook notification
Schedules
Use the Schedules tab to set time periods for when a Webhook Profile should be active. By default, a Webhook Profile is set to alert 24/7, but you can also change this to receive alerts only at specific times. The timings are based on the monitoring account’s time zone and daylight saving time (DST).

The Schedules tab for setting the time periods when a webhook profile is active
You can also create separate Webhook Profiles to receive notifications on different apps. To customize the active times when a Webhook Profile should receive notifications, use the check boxes to select the day of week and hour/minute drop-down lists to specify the time range.