Managing Public Cloud Injectors
To manage individual Public Cloud injectors in Eggplant Performance Studio, select the appropriate Public Cloud injector family in the workspace tree. The injectors in the family are shown in the bottom part of the main Studio window.
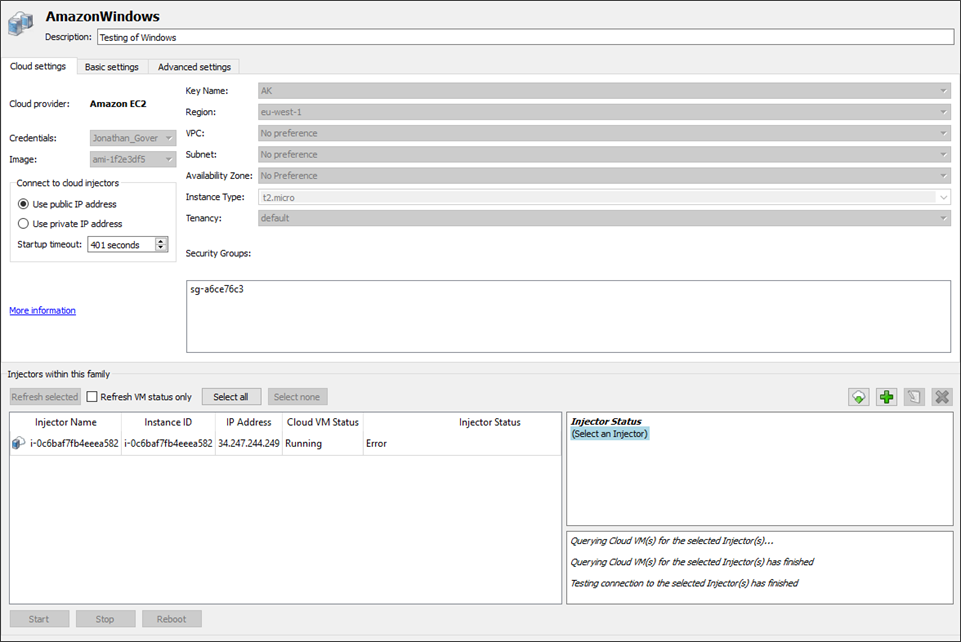
To edit an injector, select it in the injector table. You can select multiple injectors by using Shift+click, or Ctrl+click for non-adjacent items. The buttons in this section provide the following options:
-
Refresh selected: Lets you test the connection and view the current status of selected VMs. You can run this option with multiple injectors at once. The Cloud VM Status column is updated when the check is complete. When only a single running injector is selected, the right pane provides additional details about the instance.
warningIf any duplicate injector names are detected during the refresh, a warning dialog is displayed. Injector names must be unique both within the injector family and across injector families in the same project.
-
Refresh VM status only: If this option is checked, then clicking Refresh selected discovers the status of the VM, not whether the injector software is currently running. This is useful when the injector software isn't configured correctly but you still want to check the status of the VM.
-
Select all: Selects all the injectors in the list.
-
Select none: Clears all selected injectors from the list.
-
Find/Add Existing Cloud Virtual Machine(s): Opens the Find/Add Existing Cloud Virtual Machine(s) dialog box.
-
Add (+): Opens the Create cloud injector(s) dialog box. See Creating Injector Virtual Machines for further information.
-
Edit injector: Opens the Edit virtual machine name dialog box. This button is only active when a single injector is selected. You can't edit multiple injectors at once. Remember that injector names must be unique. If you attempt to change to a name that already exists in the current injector family or another family in the project, an error message prevents the action from being completed.
-
Assign elastic IP addresses: Allows you to associate or disassociate IP addresses that are already defined in the AWS console. You cannot create them here.
When you select an injector and click this button, the Assign Elastic IP addresses to VMs dialog box opens. It provides a list from which you can select available IP addresses to associate with an injector, or choose
<NOT SELECTED>to remove an association with an IP address. This option does not apply to Azure cloud injector families.
-
Delete (X): Deletes injectors from the family. This option can be used on multiple items and requires confirmation. The confirmation screen also gives you the option to delete the VM from your cloud environment. If you select this checkbox, the VM will be terminated, which means you won't be able to start it again later.
Beneath the injectors list, there are three additional buttons:
- Start: Starts an instance in your cloud environment.
- Stop: Stops a running instance.
- Reboot: Reboots a running instance. If you use this button on an instance that isn't running, it is started instead.
All three of these buttons can be used with multiple instances at once.